Creating a PowerShell Profile
As you create various aliases and functions, you may decide you like a particular key stroke combination and wish you could use your definition without always having to create it.
| Tip | I recommend reviewing the listing of all the aliases defined within Windows PowerShell before creating very many new aliases. The reason is that it will be easy, early on, to create duplicate settings (with slight variations). |
Of course, you could create your own script that would perform your configuration if you remembered to run it; however, what if you wish to have a more standardized method of working with your profile? To do this, you need to create a custom profile that will hold your settings. The really useful feature of creating a Windows PowerShell profile is that after the profile is created, it loads automatically when PowerShell is launched. The steps for creating a Windows PowerShell profile are listed here:
| Just the Steps | Creating a Windows PowerShell profile In a Windows PowerShell prompt, determine whether a profile exists by using the following command:
test-path $profile If tests-profile returns false, create a new profile file by using the following command:
new-item -path $profile -itemtype file -force Open the profile file in Notepad by using the following command:
notepad $profile Add the following toNotepad: A useful alias such as gh for Get-Help. This is shown here:
Set-alias gh get-help A useful function to the profile such as one to open the profile in Notepad to allow for ease of editing the profile. This is shown here:
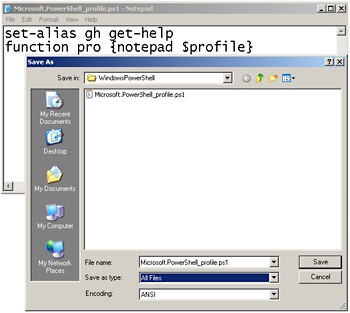
function pro {notepad $profile} When done editing, save the profile. Click Save As from the File menu, and ensure that you choose ALL Files in the dialog box to avoid saving the profile with a .txt extension. This is shown in Figure 2-3. |
| Just the Steps | Finding all aliases for a particular object If you know the name of an object and you would like to retrieve all aliases for that object, you can use the Get-Alias cmdlet to retrieve the list of all aliases. Then you need to pipe the results to the Where-Object cmdlet and specify the value for the definition property. An example of doing this for the Get-ChildItem cmdlet is as follows:
gal | where-object {$_.definition -match "get-childitem"} |
EAN: 2147483647
Pages: 128
