Creating and Modifying a Web Document
Microsoft Office Specialist You can save any Word document as a Web page—a special document designed to be viewed in a Web browser such as Microsoft Internet Explorer. When you convert a document, most of the formatting is preserved, though some formatting, such as text wrapping around pictures and objects, is not converted and some features, such as table formatting, character formatting, page layout features, and security and document protection, are not supported by all Web browsers.
| Tip | If you know which Web browser people will use to view your Web page, it’s a good idea to specify that browser and have Word disable any features that won’t work. |
To see how a document will be displayed in a Web browser, you can preview it as a Web page, or you can click the Web Layout View button to see how it will look. You can then edit the page as necessary to achieve the effect you want. When you’re satisfied with the results, you save the document as a Web page.
You can convert existing Word documents to Web pages using the Save as Web Page command on the File menu. You can also create new Web pages from within Word, by using a Web page template. You can access a template in the following ways:
-
Click New on the File menu, click “On my computer” in the Templates area of the New Document task pane, and click the Web Pages icon on the General tab of the Templates dialog box.
-
Click New on the File menu, click “Templates on Office Online” in the Templates area of the New Document task pane, and make a selection on the Templates page of the Microsoft Office Online Web site.
After you save a Word document as a Web page, you can open it in Word and modify it, just as you would a normal Word document. You can also use Word to open Web pages created in other programs and saved with a .htm or .html file name extension. Making changes can be as basic as replacing text and adjusting alignment or as advanced as moving and inserting graphics. You can also display a Web document in an area called a frame on a special type of page called a frames page, and then include other items of interest in the other frames so that they can be viewed at the same time as the document.
When you finish modifying the document, you can save it as a Web page or a regular Word document.
In this exercise, you will set options for displaying a document in Microsoft Internet Explorer 5.0 or later. You will then preview and save the document as a Web page. You will create a frames page, modify the page, and then save your changes.
| BE SURE TO | start Word before beginning this exercise. Also be sure you have a Web browser installed on your computer. (Internet Explorer 5.0 or later is recommended; the functionality and settings might be different for other browsers.) |
| USE | the CreateWeb document in the practice file folder for this topic. This practice file is located in the My Documents\Microsoft Press\Word 2003 SBS\CreatingWeb\CreatingWebDoc folder and can also be accessed by clicking Start/All Programs/Microsoft Press/Word 2003 Step by Step. |
| OPEN | the CreateWeb document. |
-
On the Tools menu, click Options.
The Options dialog box appears.
-
If necessary, click the General tab, and then click Web Options.
The Web Options dialog box appears.

-
On the Browsers tab, click the down arrow to the right of the People who view this Web page will be using box, and then click Microsoft Internet Explorer 5.0 or later.
-
In the Options list, verify that the Disable features not supported by these browsers check box is selected, and click OK.
-
Click OK to close the Options dialog box.

Maximize
-
On the File menu, click Web Page Preview to open the page in your Web browser, and then at the right end of your Web browser’s title bar, click the Maximize button.
The CreateWeb document is displayed in your Web browser as a Web page.

-
Close the Web browser window.
-
On the File menu, click Save as Web Page.
The Save As dialog box appears.
-
Navigate to the Microsoft Press\Word 2003 SBS\CreatingWeb\CreatingWebDoc folder, and in the File name box, type WebDoc.
Tip When you save a document as a Web page, you can specify a page title for the document. This title appears in the title bar of the Web browser, and it can be different from the file name. To specify a Web page title, click Change Title in the Save As dialog box, type the title in the “Page title” box, and click OK.
-
Click the down arrow to the right of the Save as type box, click Web Page in the drop-down list, and click Save.
A message tells you that some features in this document are not supported by Internet Explorer 5.0.
-
Click Continue.
Because the document is now a Web document, it appears in Word in Web Layout view.

Tip We’ve closed the Drawing toolbar and toggled off the Show/Hide button and the ruler to reduce visual clutter.
-
On the Format menu, point to Frames, and then click New Frames Page.
As indicated in the title bar, Word displays a new document. This document consists of one area, or frame, with WebDoc displayed in it. Word also displays the Frames toolbar.
-
On the Frames toolbar, click New Frame Left, and then close the Frames toolbar.
A frame roughly half the width of the screen appears to the left of the frame that displays the WebDoc document.
-
Point to the border between the two frames, and when the pointer changes to a double-headed arrow, drag the border until the frame on the left is half its original width.
-
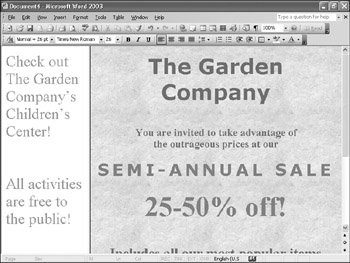
In the left frame, type Check out The Garden Company’s Children’s Center!, and press [ENTER] three times.
-
Type All activities are free to the public!, and press [ENTER].

Font Color
-
Select all the text in the left frame, click the down arrow to the right of the Font Size box, and click 26. Then click the down arrow to the right of the Font Color button, and in the second column of the second row of the color palette, click the Orange box, and press [END].
-
Scroll the frame that displays the WebDoc document.
The document scrolls, but the message in the adjacent frame doesn’t.
-
On the File menu, click Save, type FramesPage as the name of the file, verify that the file will be saved in the Microsoft Press\Word 2003 SBS\CreatingWeb\CreatingWebDoc folder, and click Save.
Word saves the frames document, which contains text in the left frame and an instruction to display the WebDoc document in the right frame.
-
Close the FramesPage document.

Open
-
On the Standard toolbar, click the Open button.
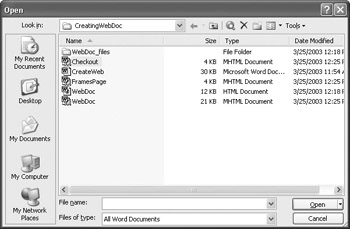
The Open dialog box appears.
Troubleshooting If your Open dialog box view is different, click the Views button on the toolbar until the Details view is displayed.
The CreatingWebDoc folder now contains CreateWeb (the original Word document); WebDoc (the Web document you saved in HTML); and three MHTML files that contain the information for the frames page, the text in the left frame, and the text in the right frame.
-
Double-click the WebDoc MHTML document (not the WebDoc HTML document).
-
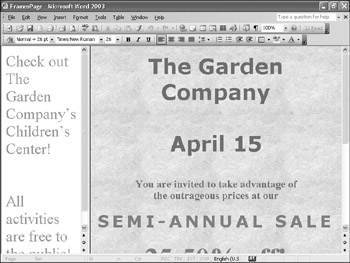
With the insertion point to the left of The Garden Company, press [END], and then press [ENTER] twice.
-
Type April 15.

Save
-
On the Standard toolbar, click the Save button to save the Web document, and then close it.
-
On the Standard toolbar, click the Open button, and then double-click the FramesPage MHTML document.
The edited document appears in the right frame of the frames page.
CLOSE the FramesPage document.
EAN: 2147483647
Pages: 156