Deciding Which View to Use When
Microsoft Office Speciailist In Word, you can view a document in a variety of ways:
-
Print Layout view displays a document on the screen the way it will look when printed. You can see elements such as margins, page breaks, headers and footers, and watermarks.
-
Normal view displays the content of a document with a simplified layout so that you can type and edit quickly. Page breaks are indicated only as dotted lines, and you cannot see layout elements such as headers and footers.
-
Web Layout view displays a document on the screen the way it will look when viewed in a Web browser. You can see backgrounds, AutoShapes, and other effects. You can also see how text wraps to fit the window and how graphics are positioned.
See Also For information about Web documents, see “Creating and Modifying a Web Document” in Chapter 9.
-
Outline view displays the structure of a document as nested levels of headings and body text, and provides tools for viewing and changing its hierarchy.
See Also For information about outlining, see “Using an Outline to Rearrange Paragraphs” in Chapter 2.
-
Microsoft Office Specialist Reading Layout view (which is new in Word 2003) as much of the content of the document as will fit in the screen at a size that is comfortable for viewing. In this view, you have access to the Reading Layout and Reviewing toolbars, which you can use to adjust the view, display page thumbnails, search the document, and suggest changes.
See Also For information about the Reviewing toolbar, see “Tracking and Managing Document Changes” in Chapter 8.
-
Document Map displays a list of your document’s headings in a separate pane so that you can see the structure of the document while viewing and editing its text.
In this exercise, you explore Word’s views so that you have an idea of which one is most appropriate for which task. After opening a document you switch between views, noticing the differences. You also zoom in and out, open up the Document Map, and work with thumbnails.
| USE | the ViewDoc document in the practice file folder for this topic. This practice file is located in theMy Documents\Microsoft Press\Word 2003 SBS\WorkingDoc\DecidingView folder and can also be accessed by clicking Start/All Programs/Microsoft Press/Word 2003 Step by Step. |
| OPEN | the ViewDoc document. |
-
If the Normal View button in the lower-left corner of the window is not already active, click the Normal View button, or on the View menu, click Normal.

Normal View
-
Scroll through the document.
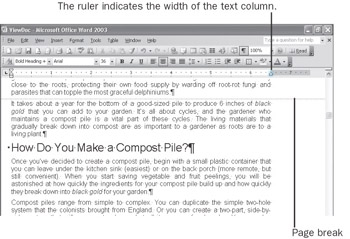
You can see the basic content of the document without any extraneous elements. The active area on the ruler indicates the width of the text column, dotted lines indicate page breaks, and scrolling is quick and easy.

Web Layout View
-
Press [CONTROL]+[HOME], and click the Web Layout View button in the lower-left corner of the window, or on the View menu, click Web Layout.
-
Scroll through the document.
In a Web browser, the text column fills the window and has no page breaks.

Print Layout View
-
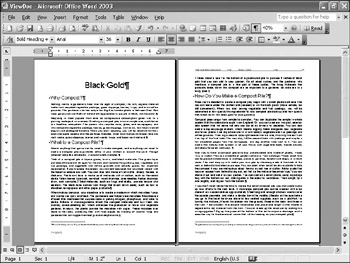
Press [CONTROL]+[HOME], and click the Print Layout View button in the lower-left corner of the window, or on the View menu, click Print Layout.
-
Scroll through the document.
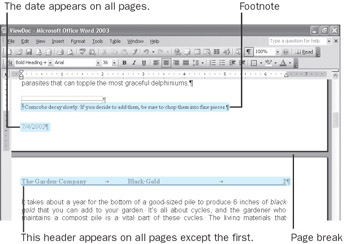
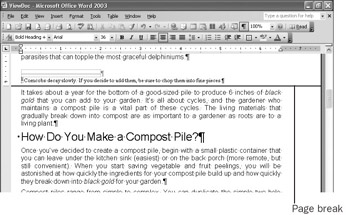
As you can see, when printed the document will have footnotes, the date will be printed at the bottom of each page, and a header will appear on all pages except the first.
-
On the Tools menu, click Options. Then on the View tab, clear the White space between pages check box, and click OK.
The white space at the top and bottom of each page and the gray space between pages is hidden.
-
Restore the white space by clicking Options on the Tools menu, selecting the White space between pages check box, and clicking OK.
Tip You can also show or hide the white space by pointing between the pages until the Show White Space pointer or Hide White Space pointer appears, and then clicking.

Outline View
-
Press [CONTROL]+[HOME], and click the Outline View button in the lower-left corner of the window, or on the View menu, click Outline.
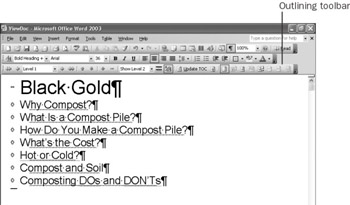
The screen changes to show the document’s hierarchical structure, and the Outlining toolbar appears.
-
On the Outlining toolbar, click the down arrow to the right of the Show All Levels box, and click Show Level 2.
The document collapses to display only the Level 1 and Level 2 headings.

Reading Layout
-
In the lower-left corner of the window, click the Reading Layout button, or on the View menu, click Reading Layout. (You can also click the Read button on the Standard toolbar.)
The screen changes to display the document in Reading Layout view, and the Reading Layout and Reviewing toolbars appear.
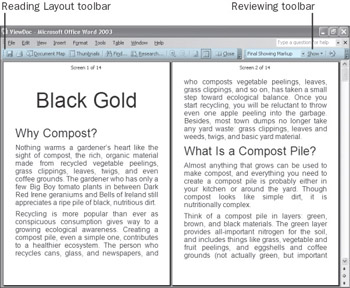
Troubleshooting If your screen doesn't look like ours, click all active buttons on the Reading Layout toolbar to toggle them off, and then click the Allow Multiple Pages button.

Allow Multiple Pages

-
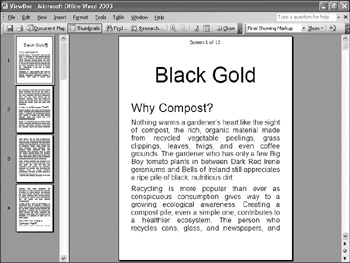
On the Reading Layout toolbar, click the Allow Multiple Pages button to toggle it off, and then click the Thumbnails button.
A pane opens on the left side of the screen showing each page of the document as a thumbnail image. You can use these thumbnails to quickly move around the document.
-
In the left pane, click the scroll bar below the scroll box, and then click thumbnail 8.
The eighth page appears on the screen.

Actual Page
-
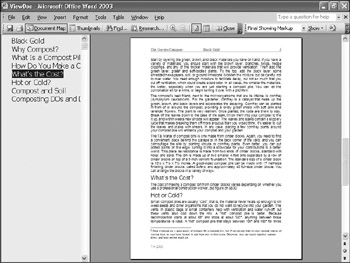
On the Reading Layout toolbar, click the Actual Page button.
The screen changes to show the same section of text as it will look when printed. The thumbnails still appear in the left pane, but they have changed to reflect the number of pages in the document in Print Layout view.

-
On the Reading Layout toolbar, click the Document Map button.
In the pane on the left side of the screen, an outline of the headings in the document replaces the thumbnails, and the first heading on the active page is highlighted.
-
In the Document Map, click the Black Gold heading.
The page containing that heading is now displayed.

-
On the Reading Mode toolbar, click the Document Map button again to toggle it off, and then click the Close button.
-
In the lower-left corner of the window, click the Print Layout View button.

Zoom
-
On the Standard toolbar, click the down arrow to the right of the Zoom box, and click 50%.
The screen changes to display the text of the document at half its size.
-
Click the Zoom box, type 40, and press [ENTER].
The first two pages of the document are now displayed.

Next Page
-
On the right side of the window, click the Next Page button until the third and fourth pages of the document are displayed.
-
In the lower-left corner of the window, click the Normal View button.
Note that Normal view is still displayed at 100%. You can change the magnification in each view independently.
-
On the View menu, click Print Layout, and then return the Zoom setting to 100%.
CLOSE the ViewDoc document, and if you are not continuing on to the next chapter, quit Word.
EAN: 2147483647
Pages: 156
- The Second Wave ERP Market: An Australian Viewpoint
- Distributed Data Warehouse for Geo-spatial Services
- Intrinsic and Contextual Data Quality: The Effect of Media and Personal Involvement
- A Hybrid Clustering Technique to Improve Patient Data Quality
- Relevance and Micro-Relevance for the Professional as Determinants of IT-Diffusion and IT-Use in Healthcare