Applying Updates in Project Web Access
The reporting loop completes through the Updates section in Project Web Access. In the last chapter, you learned how a project manager pushes the task assignments from the plan to the users through Project Web Access. In this chapter, you’ve so far learned how resources report on assignments through the timesheet. Now it’s time to accept or reject the resource reporting that flows back to you through Project Web Access. When you first log onto Project Server, the home page displays information about any new updates you may have pending in the update area. As shown in Figure 14-30, the logged-on manager has eight task changes and two calendar changes requiring responses.

Figure 14-30. The home page displaying update activity
Click the Updates link or the Updates button in the main navigation menu to display the Updates page shown in Figure 14-31. The Updates display echoes the “View my tasks” display in many ways. Like the aforementioned area, you can choose the Timesheet or Gantt Chart formats for the view. The View Options and Filter, Group, Search sections are nearly identical to those in the “View my tasks” area. In this case, however, an Apply Rules tab replaces the Delegation tab in the Tasks view.
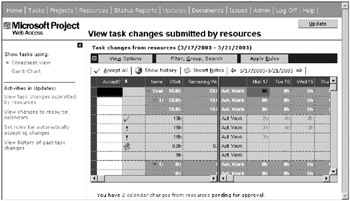
Figure 14-31. The “View task changes submitted by resources” page
Setting Filter, Group, Search Options
You build custom filters here in the same way I showed for timesheets, so I don’t cover it again for this view. Expanding the Filter, Group, Search tab reveals the options shown in Figure 14-32. Precooked filters include the following:
-
All task changes
-
All task updates
-
All new tasks
-
All task delegation requests
-
All resource declined tasks
-
All declined task delegation requests
-
All completed tasks
-
All incomplete tasks
-
All overdue tasks
-
All tasks pending for approval
-
All tasks updated into Microsoft Project
Group updates by the following criteria:
-
Accept?
-
From
-
Project
-
Task change type
-
Sent date
-
Work
-
Remaining work
-
Start
-
Finish
-
% Complete
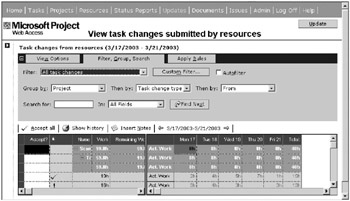
Figure 14-32. Options on the Filter, Group, Search tab
The Activities menu on the left allows you to select between viewing task changes and viewing calendar changes, and offers you the option to view historical changes. A selection for setting up rules for automatic update processing complements the Apply Rules selection on the Activities menu. Use the selection from the Activities menu to create rules, and then use the Apply Rules tab to apply the rules you create.
To accept task updates, in the leftmost column in the grid you must set each task to either Accept or Reject. Use the Accept all button in the toolbar to set all updates in the view to accept or set each one individually using the selector in the grid, as shown in Figure 14-33. Click the Update button to accept and reject according to your selections. You may see a logon screen flash briefly as the system goes to work.
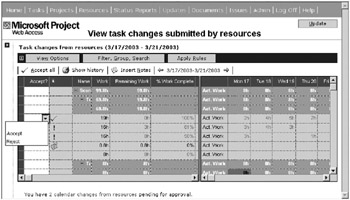
Figure 14-33. Accept or reject tasks
In processing the updates, if you don’t already have Project Professional open and connected to Project Server, the system will launch Project Professional and open any project plans affected by the updates. As shown in Figure 14-34, the system displays a confirming dialog box to proceed with your updates. If you want to save the changes to your projects, click OK to continue. When the system completes the updates, it displays another confirmation that the tasks have been published. You must now save and close any project plans opened by the system.
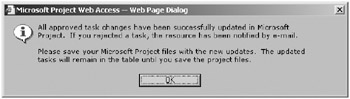
Figure 14-34. Task changes are updated.
Once all of your updates process and you’ve clicked OK in the final confirmation dialog box, the system redisplays the “View task changes submitted by resources” page, shown in Figure 14-35, which no longer has information to display. As soon as the next resource sends an update, the view is populated again. Notice that there are two calendar changes requiring updating as noted in the line under the blank grid display area.
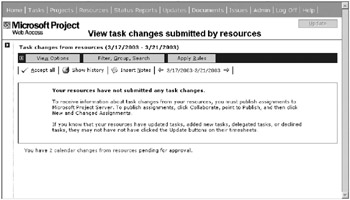
Figure 14-35. The “View task changes submitted by resources” page with no updates to tasks in the queue
Click the link at the bottom of the empty updates grid or click the link in the Activities menu to display the “View changes to resource calendars” page shown in Figure 14-36. This view has a different approach than the task updates view. Here you have the option to delete a calendar update or update all undeleted updates. Click the Update button to accept these changes into the plans affected. The system prompts you to select a project to open if one isn’t already open.
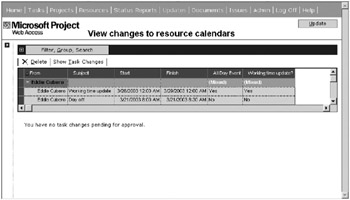
Figure 14-36. Update calendar changes.
Select “View history of past task changes” from the Activities menu or click the History button from the toolbar to open the “View history of past task changes” view shown in Figure 14-37. Use the View Options and Filter, Group, Search functions as you’ve learned elsewhere in this chapter to refine the data selection shown in the view as well as the presentation.
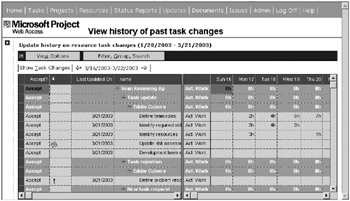
Figure 14-37. The “View history of past task changes” page
EAN: 2147483647
Pages: 185