Pre-Publishing Checks
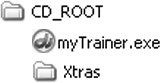
| There are many things to consider when creating an application that will be distributed, either on the Web or on CD. You want to do everything in your power to insure your code is bug free and that your end users will experience little problems. Before publishing your movie there are a couple of items you should consider, especially if you'll be creating a cross-platform projector. This includes deciding whether or not to embed fonts, how to handle Xtras, and even little things like what to do when the user presses Esc in the middle of program execution. Embedding FontsWhen you place text into your movie, Director lets you use any font available on your system. But if you play the movie on a system that lacks that font, some other font will be substituted. This could throw all your text formatting out of whack and make your application look unprofessional. Using common fonts like Arial, which are included with most operating systems, is one way to cure the problem, but it also severely limits your font choices. A better approach is to embed the fonts you are using into the movie. This way the embedded font will be used, whether the target machine has it installed or not. Typically, you would plan for embedding your fonts from the start of the project, and not wait until the project is complete. This is because when you embed a font you essentially get a new fontold text already in place won't automatically be updated to use the new font. For instance, in the training log the text members all use Arial as the font. If you embed Arial into the movie you get a new font named Arial *. All the text already in the movie set to Arial will still be using Arial, and not Arial *. You will need to go through and change the font each text member uses to the embedded version. (Note: a little Lingo can help fix that. See Appendix B, "Tips and Tricks," for a Lingo method that will change text members from one font to another.) To embed a font, choose Insert > Media Element > Font from the top menu. The Font Cast Member Properties dialog will appear:  You can choose to insert the entire font, or just a portion of it, if you're trying to save space, or just don't need anything more than the numbers from 0 to 9, say. You can also choose to embed bitmap versions of the fonts, which can make small point size text look better than using outline fonts. I had you use Arial for the application earlier, so you can bypass embedding the font now. But you should be aware of the need to do so in some situations. Before Director MX 2004, embedded fonts were quite problematic. On some Windows systems, typically in a business environment, embedded fonts wouldn't work because the user of the machine didn't have administrative rights to it. Because embedded fonts are actually unpackaged from the movie, and temporarily installed on the user's machine (while the movie plays), the user would need to have sufficient rights for the fonts to be placed in the necessary folder. Director MX 2004 fixes this problem, and fonts can now be embedded and used without worry. Packaging vs. Including XtrasAnother thing you'll want to decide before publishing your movie is how you'll be handling Xtras. Any Xtras you use must be included with the projector. They can either be packaged into the movie itself, or they can be placed in an XTRas folder, alongside the projector, as shown:
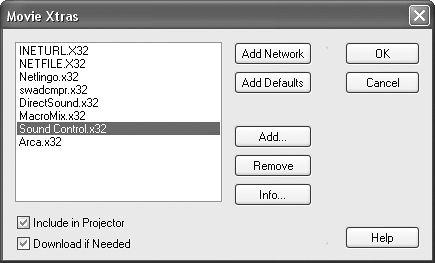
By default, sprite Xtras, such as the Mpeg Advance Xtra, and the Flash Xtra, are automatically added to the movie's list of available Xtras, using Modify > Movie > Xtras. But Lingo Xtras like Arca aren't automatically added. You must either add the Xtra to the list yourself, or place the Xtra in a folder. Either method will work fine. The only real difference is that packaging the Xtras into the projector will make your projector start up a little slower. This is because the Xtras must first be unpackaged from the projector and placed onto the user's hard drive. From there, they can be loaded and run by your movie. If the Xtras are in their own folder, the projector will simply load and run them without need for unpacking. If your projector will be installed and run from the hard drive, the speed hit will be negligible. But if your movie will run from CD, which is a much slower medium, placing the Xtras in their own folder is a good idea. The choice is yours. Some developers prefer the neatness of a single file projector, when the Xtras are packaged in. Others demand the speed increase, however marginal, of keeping the Xtras separate. Now, let's take a moment to talk about Xtras as they pertain to Shockwave. The Shockwave player, or plug-in if you prefer, allows your computer and Web browser to play Shockwave movies. The player contains both the player engine and also essential Xtras. Shockwave movies are movies you create in Director and publish to the Shockwave format. A Shockwave movie is different from a projector in that the player engine isn't included in the moviethe Shockwave player on the user's machine plays the file instead. So any additional Xtras beyond the ones included with the player need to be downloaded by your movie. This is accomplished by marking the Xtra as "Download if Needed" within the movie Xtra's list, as shown here:
When you tell Director to mark an Xtra for download as needed, the URL for the Xtra will be stored in your movie. The URL is taken from a text file named xtrainfo.txt, which is located in Director's configuration folder. The xTRainfo.txt file is a master list of Xtras and their file names for each platform. Because each Xtra has a different name depending on the OS, this file tells Director the filename of the Xtra regardless of the OS, which is important for cross-platform publishing. The URL to the Xtra package is also included for downloadable Xtras. You'll take a closer look at the xtrainfo.txt file later in this lesson when you modify it to include the Arca Xtra for cross-platform publishing. Handling the Close RequestWhat to do when your application is running happily along and someone presses Esc or Alt-F4? In its default mode the projector will simply quit, and run the stopMovie handler before it does. But what if your application has its own close button that takes the user to a credits screen before closing? Or what about a movie created for a kiosk where you don't want the user to be able to close the movie at all? For scenarios like these you use the movie's exit lock property, along with the new closeRequest handler available in Director MX 2004. To use the movie's exit lock property you can simply turn it on within the Projector tab of the Publish Settings as shown here:  When a projector is created with exit lock enabled you won't be able to close the projector using the Esc key, the Alt-F4 combo or even the close button in the window's title bar. Instead, you will need to create a close button and use the Lingo _movie.halt() to close the projector when you want to. You can even take this a step further using the new closeRequest handler, which is called whenever you try to close the movie if exit lock is enabled. That is when exit lock is enabled, and you press Esc or click the title bar's close button, Director will generate a closeRequest event. If you have an on closeRequest handler in a movie script, you can intercept the close request from the user and deal with it appropriately. To better illustrate how this works, let's create a closeRequest handler in the training log, to finally implement the exit screen.
|
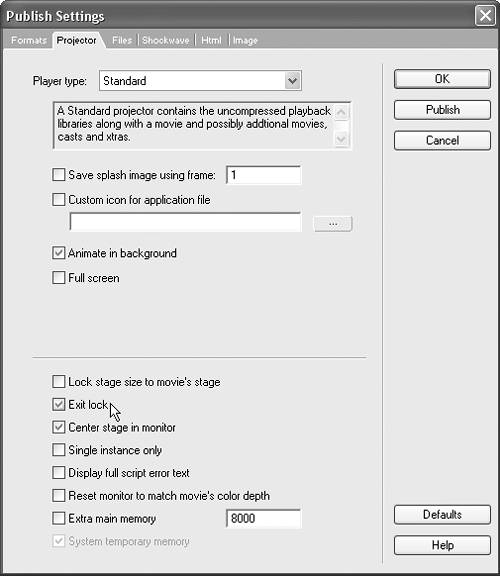 With exit lock enabled your projector won't be able to be closed without force quitting it through the operating system. However, once exit lock is turned on, Director will generate closeRequest messages, which is exactly what you want.
EAN: 2147483647
Pages: 166