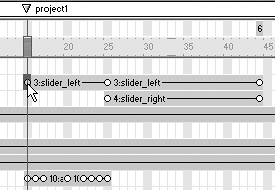
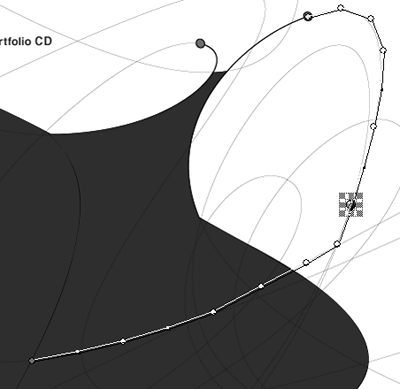
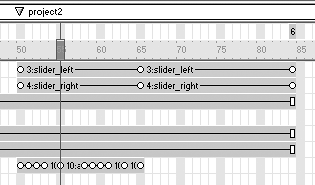
| Earlier in the lesson, you created keyframes when you animated the curtains sliding open. In this section you'll create a variety of keyframes along a path to animate the ball you created in the previous section. Because you want the ball to animate first, before the curtains open, you need to make some room for the ball animation. Currently, for project 1, the curtains slide open from frame 15 to frame 34. Ten frames is a good length of time for the ball, so it will need to occupy frames 15 to 24. The curtains will then need to begin opening at frame 25, instead of 15. You now can see why it was smart to leave some blank frames between your sections. 1. | Click in the Score to choose frame 13 of channel 4.
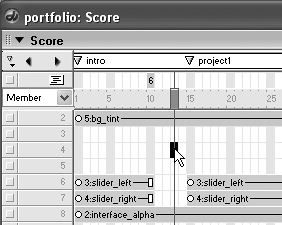
It actually doesn't matter which frame you selected, just so long as you choose one between the end of the intro section and the project1 marker.
| 2. | Press Ctrl/Cmd+] ten times to slide everything to the right ten frames.
Your Score should now appear like this, with the project1 marker at frame 25:
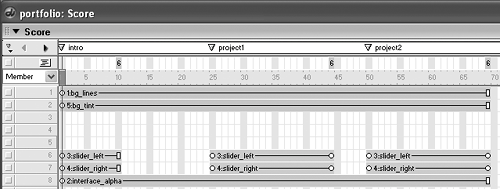 Each time you press the key combination, all sprites and markers in the Score after the playhead move forward one frame. In most cases you'll want the markers to move as you insert or delete frames in the Score, but because the ball animation will start on frame 15 that's where the project1 marker will need to be. Each time you press the key combination, all sprites and markers in the Score after the playhead move forward one frame. In most cases you'll want the markers to move as you insert or delete frames in the Score, but because the ball animation will start on frame 15 that's where the project1 marker will need to be.
Tip Pressing Ctrl/Cmd+Shift+] will open an Insert Frames dialog box where you can enter any number of frames to insert, instead of having to repeat the key combination multiple times. I intentionally had you do it manually, so you could see the process in action. | 3. | Click and drag the project1 marker from frame 25 to frame 15, and then click in the Score to choose frame 15 of channel 12.
You're going to place the ball bitmap you created into channel 12, right above the topmost interface sprite.
| 4. | Drag the ball from the cast and drop it onto the red circle that is already part of the interface.

Notice in the Score that the new sprite in channel 12 spans frames 15 to 44, although it needs to end at frame 25, where the curtains begin.
| 5. | Click to choose the final frame of the ball sprite's span, and drag it from frame 44 to frame 25.
With just the last frame of the span selected, the sprite on Stage will have a single-pixel dotted border. You next want to position the ball at this frame so that its start point and endpoint are defined.
| 6. | Use the cursor keysin conjunction with the Shift key for larger stepsto position the sprite in its destination location.
You could have the ball end up any place you like, but the spot at the lower portion of the cutout formed by the curtain edges and the intersection of the background line seems perfect.

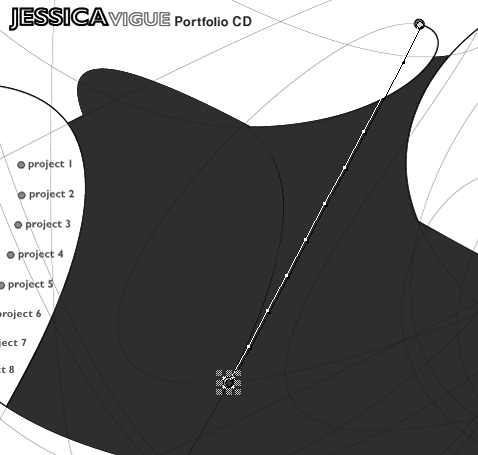
As you move the ball into position, you'll see the path it will travel, with the in-between frames marked along the way. But instead of the ball just moving in a straight line, suppose you want it to follow the nice curved arc between the two spots? What you need is more keyframes.
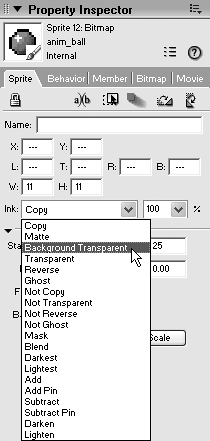
But first, you probably noticed that the ball displays some distracting white corners when it's over a dark area, like the curtains. This is because even though you didn't create any white corners, Director uses the smallest rectangle containing your bitmap from the Paint window. So how do you make the white corners transparent without using an alpha channel?
| 7. | Click anywhere in the middle of the ball's sprite span to choose the entire span, and then, using the Property inspector, change the Ink from Copy to Background Transparent.

When the ink is Background Transparent the white corners of the ball disappear, making the ball look a lot more round. But wait, there's a new problem: the nice white highlight you created on the ball has also turned transparent. That's because the Background Transparent ink type turns all the white in your image transparent.
| 8. | With the sprite selected, change the ink from Background Transparent to Matte.
This time, it's perfect: the corners have disappeared and the highlight is back. Matte ink removes the white from the bitmap like Background Transparent, but stops at the edges of filled areas, so it won't remove the white from inside the ball.

Tip When using Background Transparent or Matte inks, be aware that they only remove pure white (RGB 255,255,255) from the image. If you set a sprite's Ink to one of these inks and see a white halo appear it's because there are non-pure-white pixels. Director's Paint window is good for cleaning up these kinds of problems. As you can see, you have a wide choice of inks available. While some of the Ink types remain extremely useful, using them with bitmaps greater than 8 bits in color depth can have unexpected results. Now, let's get back to animating our ball.
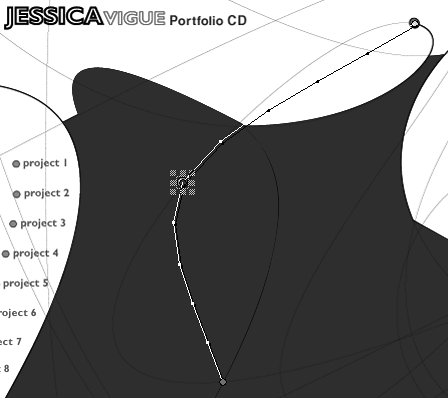
| 9. | Click the ball's sprite span at frame 20. The entire sprite will become selected. From the top menu choose Insert > Keyframe.
A keyframe appears in the middle of the span, at frame 20:

The keyframe should be selected as well. If it's not, single-click it to choose just the keyframe at frame 20.
| 10. | Use the arrow keys and the Shift key to move the ball sprite to the left so that it's centered over the line being used for the path.
With the ball in place at frame 20, your path now looks something like the following:

You will now add keyframes to the sprite's span, to keep the ball as close to the line path as possible.
Tip You can right-click a frame in the sprite span and choose Insert Keyframe from the contextual menu. | 11. | Continue adding keyframes and moving the sprite at each keyframe so that the ball travels along the line from start to finish.
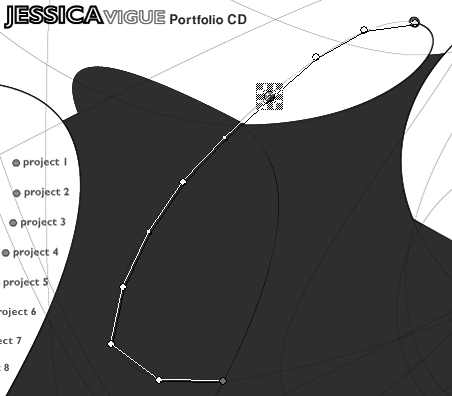
To get the ball close to the path, you may need to place keyframes in adjacent frames. In the example shown here, I used six keyframes between the start and end points:

Tip If you don't want a particular keyframe in your span, simply choose it and choose Insert > Remove Keyframe from the top menu. You can also right-click the keyframe and choose Remove Keyframe from the contextual menu. When you've got the ball traveling along the path properly, play the movie to see how the animation looks. When you click the project 1 button you will notice a problem: now that the curtains have been slid forward to start at frame 25, the cutout section revealed by the curtains is open as the ball moves, then quickly snaps shut, before opening. You need to have the curtains remain closed from frames 15 to 25 as the ball travels.
You could just copy the two static curtain sprites from the intro section and paste them into frames 15 to 25, but there's a better way. You can clone a keyframe by dragging it with the Alt/Option key held down.
| 12. | While holding down the Alt/Option key, click and drag the initial keyframe of the left curtain sprite in the project 1 section from frame 25 to frame 15.
When you click and drag a keyframe with the Alt/Option key, the keyframe is cloned. Because the curtain is initially closed, it now stays closed between frames 15 and 25, then opens from 25 to 44.

| 13. | Repeat Step 11 with the right curtain so that both curtains are closed as the ball travels along its path.
At this point you can rewind and play the movie and see how it's progressing. When you click the project 1 button, the ball will appear, travel along its path, and disappear just as the curtains begin to open. If you click the project 2 button the curtains just open, with no initial animation.
Do you want to leave the project 2 section as is, or add a ball animation? It's up to you. Of course, I would suggest that you add the animation, because it will reinforce what you've just learned. You might even want to make the animation a little slower or have it travel a different path.
In the next lesson you will add more interactivity to the project, including real buttons, background sound, keyboard control, and more.
As this is the end of this lesson, I will leave you with the following images that you can use as reference for creating the second ball animation:


|
|

 Each time you press the key combination, all sprites and markers in the Score after the playhead move forward one frame. In most cases you'll want the markers to move as you insert or delete frames in the Score, but because the ball animation will start on frame 15 that's where the project1 marker will need to be.
