Section 15.2. Transferring Files
Once you've told Dreamweaver how you plan to ship off your Web page files to the Net, you can set about doing it. Thanks to Dreamweaver's Files panel, the whole process takes only a few steps.
Note: Dreamweaver 8 adds "Background FTP" to the file-transfer process, so you can keep working on a Web page while Dreamweaver transfers files in the background. See the box on Section 15.2.1.1 for more information.
15.2.1. Moving Files to the Web Server
To transfer files to your Web server:
-
Open the Files panel (Figure 15-7) .
Choose Window
 Files (keyboard shortcut: F8).
 Figure 15-7. The Files panel offers toolbar buttons for uploading and downloading your Web files to and from the actual Web server that dishes them out to your site's adoring public. (See Chapter 13 for much more on this important window.)

-
From the Site menu, choose the name of the site whose files you wish to move (if it isn't already selected) .
The Files panel displays files for the selected site. You can use the File View pop-up menu to access either a list of the local files or the remote files on the Web server (see Figure 15-7). You can also see both local and remote files side by side if you first choose "Remote view" from the File View pop-up menu and then click the Expand button on the Files panel, as described on Section 13.1.5.1.
Tip: The color of the folders in the Site panel lets you know which view you're currently in: green folders mean Local view (your computer), beige (blue on the Mac) folders mean Remote view, and red folders indicating the Testing view described on Section 20.2.2.
-
From the file list in the Files panel, select the files you wish to upload to the Web server .
To move a folder and every file inside it, just select the folder. (In other words, you can transfer your entire Web site to the server by simply selecting the local root folderthe folder listed at the very top of the Local Folder file list.) When only a few files have changed, you can also select only certain files or folders for uploading, using any of the techniques described on Section 14.4.2.
Tip: If you don't see the files you wish to upload in the Site Files list, you may have Remote view selected. Select Local view to see only those site files on your computer.
When you use do-it-yourself FTP programs like WS_FTP or Fetch, you have to specify a folder location for every file you transfer to the Web server. But here's one of the great advantages of letting Dreamweaver do your file shuffling; it already knows where the files should go on the remote site. The local and remote sites are, after all, mirror images, so Dreamweaver simply puts files in the corresponding folders on the remote site.
For example, suppose you select the file mayo.html , which is in a folder called Condiments, which is itself stored in the local root folder. When you transfer the file, Dreamweaver knows to put this file in the Condiments folder in the root folder on the remote site. In fact, if the folder Condiments doesn't exist on the remote site, Dreamweaver creates it and then puts the file into it. Now that's service.
A hush falls over the audience; you're ready to go live with your Web page.
-
Click the "Put files" buttonthe up-arrow icon identified in Figure 15-7on the Files panel .
Alternatively, you can use the keyboard shortcut Ctrl+Shift+U (
 -Shift-U).
 Several things happen when you do this: First, if you're using an FTP connection, Dreamweaver attempts to connect to your Web server, dialing your modem if necessary. As you can see in the status window that opens, it may take a minute or so to establish a connection; the Connect button (see Figure 15-7) displays a bright green light when Dreamweaver is connected.
Next , if any of the files you're transferring are currently open and have unsaved changes, Dreamweaver asks if you want to save the files before transferring them to the server. Click Yes to save the file, or, if there are multiple unsaved files, click the Yes To All button to save all of them before posting them online.
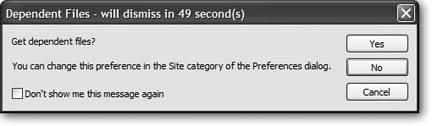
In addition, Dreamweaver asks if you wish to transfer any dependent files (see Figure 15-8). Dependent files are graphics, frame pages in a frameset, or external Cascading Style Sheets files that you've placed onto a page.
This feature can save you considerable time and hassle; no need to hunt for and upload each graphic file or external style sheet yourself. On the other hand, if all the dependent files are already on the server, having Dreamweaver transfer the same files again is a waste of time. Fortunately, Dreamweaver 8 helps stop this wasted effort as described in the next step.
Tip: If you turn on the "Don't show me this message again" box and then click Yes, Dreamweaver copies dependent files without asking. On the other hand, if you turn on the "Don't show me this message again" box and click No, Dreamweaver never copies dependent files.If you want the Dependent Files dialog box to appear again after you've turned it off, hold down the Alt (Option) key when you transfer a file (using any method except a keyboard shortcut). Or choose Edit Preferences Site Category (Dreamweaver Preferences Site Category) to turn this feature on or off.
-
Click Yes to transfer dependent files, or No to transfer only the files you selected .
Dreamweaver copies the files to the Web server. If you're copying a file that's inside a folder that isn't already on the remote site, Dreamweaver creates the folder as well. In fact, Dreamweaver creates as many subfolders as necessary to make sure every file is transferred to the same folder location on the remote site as it is in the local site. (Try doing that with a regular FTP program.)
If you've chosen to transfer dependent files as well, Dreamweaver may or may not put the dependent file on the Web server. If you've turned on the "Maintain Synchronization Information" checkbox when defining your remote site (see step 11 on Section 15.1.1), Dreamweaver 8 determines if the dependent file is already on the Web server and, if it is, whether your local copy of the file is a newer version. If the dependent file doesn't exist on the server or your local copy is newer (meaning you've made some changes to it locally but haven't yet moved it onto the Web), Dreamweaver puts it on the remote site when you tell it to transfer dependent files.
However, if Dreamweaver thinks that it's the same file, or that the copy of the file on the Web server is newer, it won't transfer the dependent file. This behavior is a huge time-saver, since you won't have to repeatedly upload the same 50 navigation buttons each time you say "Yes" to transferring dependent files; but, best of all, Dreamweaver still transfers those dependent files that really are new.
Note: Dreamweaver's ability to correctly determine whether a dependent file on your computer is the same as the file on the remote site depends on its Site Synchronization feature, described on Section 15.4. While Dreamweaver 8 greatly improves on the accuracy of this tool, it has been known to get it wrong. If Dreamweaver isn't moving a dependent file that you want moved to the remote server, you can just select that file and upload it manually (for example, select it in the Files panel and click the Put button). Dreamweaver always obeys a direct order to move a selected file to the remote site.
-
Continue using the Put button to transfer all files in your Web site to the remote site .
Depending on the number of files transferred, this operation can take some time. Transferring files over the Internet using FTP isn't nearly as fast as copying files from one hard drive to another (see the box below).
| POWER USERS' CLINIC A Little More Background on File Transfers |
| Dreamweaver 8 introduces a productivity- boosting enhancement to its FTP feature. In earlier versions, Dreamweaver would essentially "lock up" as it moved files to or from the remote site; you couldn't do anything elseedit a Web page, create a new style sheet, or complete any other Dreamweaver taskwhile the program concentrated on transferring files. If you had to move hundreds of files over a slow Internet connection, this lock-up became a real productivity sink. Fortunately, now you can continue to work in Dreamweaver as it dutifully moves files in the background. However, there are some things you can't do while Dreamweaver is transferring files. These are mostly logical restrictions: you can't edit the site definition (since this could affect how you connect to the remote server); you can't put or get other files (since Dreamweaver's already busy doing that); you can't delete a file on the local or remote server (since you may be transferring that file). Dreamweaver lets you know if you try to do one of these forbidden actions while it's working with the server. If you find the background activity window (pictured here) a nuisance, click the Hide button and it temporarily disappears. In addition, if you accidentally start uploading a 10,000 page Web site, you probably won't want to wait until Dreamweaver is finished. Click the Cancel button to stop the process. Once Dreamweaver's finished moving files around, you can see a record of Dreamweaver's actions by clicking the Log button that appears at the bottom-right corner of the Files panel. This log is a different record than the raw FTP log discussed in the box on Section 15.2.3. This plain-language window lets you know what Dreamweaver did"Put successful," "Get successful," and so on. If you see a "not transferred" message, this means that you tried to Get or Put a file, but both the local and remote copies were identical, so Dreamweaver didn't do anything. See the above Note for more information. 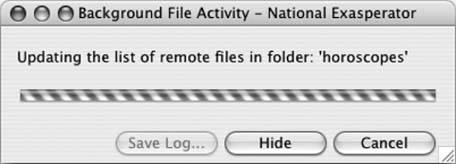 |
15.2.1.1. Other ways to move files to the Web server
In the Files panel, you can also drag a file from the Local Folder list into the Remote Site list. (You first must expand the Files panel, as described on Section 13.1.5.1.) But don't do it: it's too easy to drag a file into the wrong place. If you drag a file to the wrong folder on the remote site, for example, you'll probably break all the links on the page. It's much better to let Dreamweaver keep track of where files should go in the organization of your site. (However, if you're already in this mess, see "Find and Fix Broken Links" on Section 14.4.)
You can also copy your current document to the Web server without using the Files panel at all. You can go directly to the Put command when, say, you finish building or modifying a Web page and want to immediately move it to the Web server. Just choose Site Put or press Ctrl+Shift+U ( -Shift-U); Dreamweaver automatically copies the fresh page to the proper folder online.
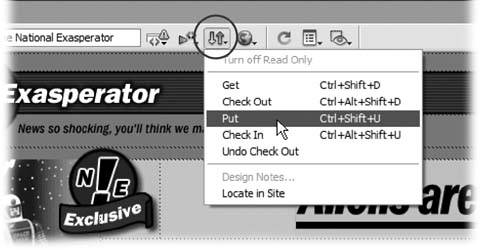
The toolbar also provides a quick menu shortcut for this operation, as shown in Figure 15-9.
Figure 15-9. Click the File Status button (circled) and choose Put to quickly move a file to your Web server. You can also use this menu to retrieve a copy of this file from the server (Get), use Check In and Out features (Section 15.3), or review Design Notes (Section 15.5) for the page. To select this file in the Files panel, choose Locate in Site.
15.2.2. Getting Files from the Web Server
So far, this chapter has described getting your hard drivebased Web pages to the Internet. Sometimes, however, you'll want to download one or more files from the Web server. Perhaps you've made a horrible (and irreversible) mistake on the local copy of a file, and you want to retrieve the last version from the Web server, using the remote site as a last-ditch backup system. Or perhaps someone else uploaded some files to the site, and you want to download a copy to your own computer (although the Synchronize feature described on Section 15.4 would also work).
To get files from the remote site, open the Files panel (press F8) and proceed as follows :
-
From the Site pop-up menu, choose the site whose files you wish to retrieve .
From the Files panel's View menu (see Section 13.1.5), choose Remote View.
-
Click the Connect button .
Dreamweaver tells you that it's attempting to connect to the Web server. Once the connection has been made, a list of files and folders appears in the Remote Site list, and the Connect button displays a bright green dot. (Dreamweaver automatically disconnects you after 30 minutes of inactivity, and the green dot turns black. It's usually a good idea not to stay connected to a server indefinitely, since doing so takes processing power away from the server and poses a security risk.)
Tip: Dreamweaver disconnects from the Remote site after 30 minutes of inactivity. If you'd like to change this setting, press Ctrl+U ( -U) to open the Preferences window. Click the Site category and change the number listed in the Minutes Idle box. Be aware, however, that some Web servers have their own settings and may disconnect you sooner than you've specified.
If you're connected to the Web server over a local network as described on Section 15.1.2, the Connect button is dimmed, and you can skip this step. You use the Connect button only when connecting to the Web server via FTP, RDS, or Visual SourceSafe.
TROUBLESHOOTING MOMENT
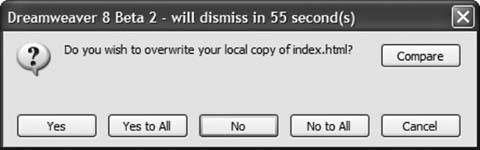
Don't Replace the Wrong FileOne strange feature of the Files panel's Get and Put commands may get you in trouble. Suppose, having just added new information to the home page ( index.html ), you want to transfer it to the Web server. You select it in the Local Folder listbut then you accidentally click Get instead of Put.
Not knowing your true intention , Dreamweaver dutifully retrieves the file from the Web server and prepares to replace (wipe out) the newly updated home page on your computer.
Fortunately, Dreamweaver also opens a warning message asking if you really want to overwrite the local file. Click No or Cancel to save your hard work.
There may be times when you do want to wipe out your local copyfor example, if your cat walks across your keyboard, types illegible code, presses Ctrl+S to save the ruined page, and Ctrl+Q to quit Dreamweaver (keeping you from using Undo to fix the mistakes). In this common situation, you'll want to replace your local copy with the remote copy. To do so, press the Yes key to wipe out your cat's errors. Oh yeah, this is also a useful trick if you ever make a mistake on a page you can't fix and want to return to the working copy on your Web server.
Dreamweaver 8 adds a useful "Compare" button. Clicking it lets you compare the local and remote copies of the page, so you can identify which changes you made. In this way, you can salvage changes you made to the local copy and discard errors you (or your cat) may have introduced to the page. This feature is described on Section 9.5.
-
From the Remote Site file list, select the files you wish to download from the Web server .
For techniques on selecting files in the Files panel, see Section 14.4.2. To download a folder and every file inside it, just click the folder. This technique also lets you get your entire Web site from the server; just click the remote root folder, which appears at the very top of the Remote Site file list.
-
Click the Get files buttonthe down arrow .
Alternatively, you can use the keyboard shortcut Ctrl+Shift+D (
-Shift-D). If the local version of any file you are getting from the remote site is currently opened and has unsaved changes, Dreamweaver warns you that you'll lose those changes. (No surprise there; copying a file from the remote site automatically replaces the same file in the local site, whether it's open or not.) Dreamweaver also warns you if you're about to replace a local file that's newer than the remote one.
In addition, Dreamweaver offers to transfer any dependent files, as described in Figure 15-8.
-
Click Yes to transfer dependent files, or No to transfer only the files you selected .
Dreamweaver copies the files to the local site folder, creating any folders necessary to replicate the structure of the remote site.
| POWER USERS' CLINIC Troubleshoot with the FTP Log |
| If you're having problems moving files using Dreamweaver's FTP command, you may be able to find some clues in the records Dreamweaver keeps when transferring files. If you've used other FTP programs, you may have seen little messages that are sent back and forth between the Web server and the FTP program like this: 200 PORT command successful. LIST 150 Opening ASCII mode data connection for /bin/ls. Dreamweaver also sends and receives this information, but it keeps it hidden. In order to see the FTP log, choose Window For example, if you encounter a "cannot put file" error, it may mean that you're out of space on your Web server. Contact your ISP or the administrator of your Web server for help. WebDAV connections also produce a log of file-transfer activity, but it's not very easy to decipher. And Secure FTP (SFTP) produces no log in Dreamweaverhush, hush, it's a secret. |
15.2.3. Cloaking Files
You may not want all files transferred to and from the Remote site. For example, as part of its Library and Template tools, Dreamweaver creates folders inside your local root folder. The Library and Templates folders don't do you any good on the Web server; their sole purpose is to help you build the site on your computer. Likewise, you may have Photoshop (.psd), Flash (.fla), or Fireworks (.png) files in your local root folder. They're inaccessible from a Web browser and take up a lot of disk space, so they shouldn't be transferred to the Web server when you move your site online.
Note: If you work on a Web site with other people, you probably will want to have the Library and templates folders on the server. This way, others who work on the site can access them as well.
To meet such challenges, Dreamweaver includes a feature called cloaking . It lets you hide folders and specific file types from many file-transfer operations, including Get/Put files, the Check In/Check Out feature (Section 15.4), and site synchronization (Section 15.4). In fact, you can even hide files from many site-wide Dreamweaver actions, including reports (see Section 14.6), search and replace (Section 18.3), check and change links sitewide (Section 14.4), and the Assets panel (Section 13.3). There's one exception: files that are linked to Library items (see Chapter 16) or templates (Chapter 17) can still "see" items in cloaked Library and template folders.
Dreamweaver lets you cloak specific folders in your site or particular file types (those that end with a specific extension such as .fla or .png). Each type of cloak requires a different technique.
To hide specific types of files:
-
Choose Site
Manage Sites . The Manage Sites window opens, listing all sites you've defined in Dreamweaver.
-
Select the site you wish to use cloaking on and click Edit .
That site's Site Definition window opens.
-
Click the Cloaking category .
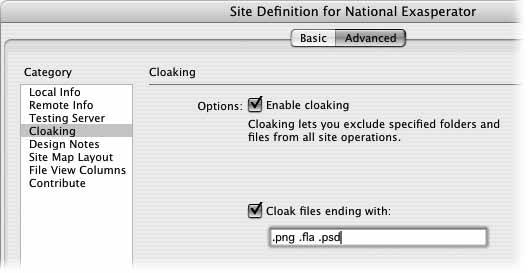
The cloaking settings appear (see Figure 15-10). The factory setting is On for every site you define. (If you want to turn it off, just turn off the "Enable cloaking" box.)
Tip: You can quickly turn cloaking on and off by right-clicking (Control-clicking) any file or folder in the Files panel and selecting Cloaking Enable Cloaking from the context menu. A checkmark next to Enable Cloaking means cloaking is turned on.
Turn on the "Cloak files ending with" checkbox .
Dreamweaver identifies file types by their extensions.png for Fireworks files, for example.
Note: Mac programs don't always add these file name suffixes, but without them, Dreamweaver can't cloak.
-
In the text box, type the extensions you wish to cloak .
Each extension should start with a period followed by three or four letters . To type multiple extensions in the box, separate them with a space.
-
Click OK twice to close this window and the Manage Sites window .
All cloaked files have a red slash through them in the Files panel.
You can also cloak a folder using the Files panel like this:
-
Open the Files panel by pressing F8 .
Alternatively, choose Window
Files. -
Select Cloaking
Cloak . Dreamweaver adds a red slash through the folder's icon in the Files panel. All files and folders inside the cloaked folder are hidden as well, as indicated by the red slashes through their icons.
Note: You can't hide individual files in the Files panelonly folders and file types .
Figure 15-10. The Cloaking category of the Site Definition window lets you turn cloaking on and offa feature that lets you hide specific file types and folders from site-wide operations like transferring files to a Web server or searching and replacing text. In this window, you can specify which types of files to hide by listing their extensions (.psd for Photoshop files, for example).
Once you've cloaked a folder, it and any folders inside it disappear from Dreamweaver's file-transfer functions. Files with specific extensions that you specified in the Preferences window are also hidden.
However, there are exceptions. You can override the cloaking, for example, by selecting a cloaked folder or file and then using the Get or Put file buttons as described on Section 15.2. Dreamweaver assumes that since you specifically selected that file or folder, you intend to override the cloaking feature.
Dreamweaver also ignores cloaking if you answer Yes in the Include Dependent Files message box (Figure 15-8) when you put or get files. In that case, Dreamweaver transfers all dependent files, even if they're cloaked (this applies to Library and template files as well).