Painting Away the Past
The History brush and the Art History brush allow you to use the History palette's features in much more selective and creative ways. The History brush paints you back to previous states, and the Art History brush does pretty much the same thing but also enables you to paint using special artistic effects. Although the functions of these two tools overlap slightly, they both have very specific purposes, which become clear in the following sections.
| Tip | As you work with these tools, remember that you can use the Edit Fade command to blend the altered pixels with the originals , just as you can when applying any other painting or editing tool. You can adjust both the opacity and blend mode of the newly applied pixels. |
The History brush
To use the History Brush tool, press Y to select it and then drag in your image to selectively revert to the source state targeted in the History palette. You also can vary the translucency of your strokes using the Opacity setting in the Options bar and take advantage of brush modes. By choosing a different brush mode from the Mode pop-up menu in the Options bar, you can mix pixels from the changed and saved images to achieve interesting, and sometimes surprising, effects. You see this in action in the upcoming section "Retouching with the History Brush," but first let's take a look at the History brush's right-brained cousin.
The Art History brush
The Art History brush lets you create impressionistic effects with the aid of the History palette. To get a sense for how it works, follow these steps:
-
Open some file you don't mind defiling, such as the simple still of a flower, shown in Figure 3-3.
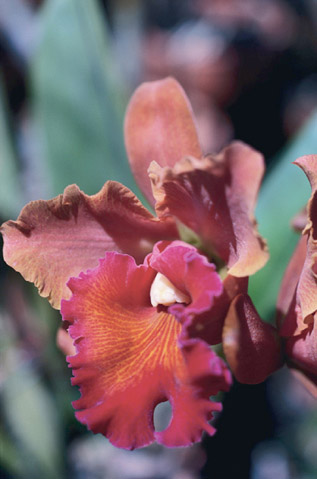
Figure 3-3: A simple flower, waiting to be defiled. -
Press D to bring up the default foreground and background colors, select the standard Brush tool.
-
Paint willy-nilly all over your image. Make a total mess of it, as shown in the first example in Figure 3-4. Think it's ruined? Nah ” it's ready to be turned into an impressionistic masterpiece!
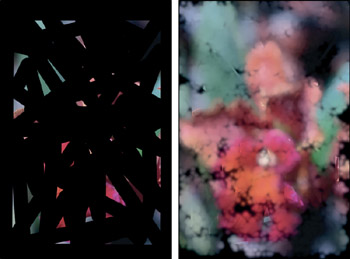
Figure 3-4: After painting a random series of black brushstrokes over an image (left), select the Art History brush and paint in a rough translation of the original (right). -
Select the Art History brush, which shares a flyout menu and keyboard shortcut (Y) with the History brush.
-
Bring up the History palette and make sure the first snapshot is identified as the source state.
-
Paint inside your black image. Each stroke reveals a bit of your original photograph in painterly detail, as illustrated in the second image in Figure 3-4.
The Art History brush paints from the source state specified in the History palette by painting tens or even hundreds of tiny brushstrokes at a time, swirling and gyrating according to settings you select in the Options bar. You've seen many of these settings several times before. As shown in Figure 3-5, you have the standard Brush controls, a reduced Mode option, and the Opacity option. Unique to the Art History brush's options are
-
Style: The Art History brush paints with those previously mentioned, randomly generated swirls and gyrations of color . You can decide these basic shapes by selecting an option from the Style pop-up menu, displayed in Figure 3-5. Combine these options with different brush sizes to vary the detail conveyed by the impressionistic image. Tight styles and small brushes give you better detail; Loose styles and big brushes produce less detail.
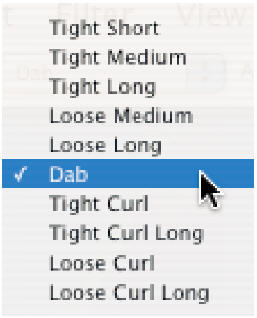
Figure 3-5: Choose an option from the Style menu to change the type of strokes the Art History brush applies. -
Area: This value defines the area covered by a single spot of swirlies. Larger values generally mean more swirlies are laid down at a time; reduce the value for a sparser look. You can get some very interesting effects by raising the Area value to its maximum, 500 pixels, and mousing down inside the image without moving the cursor.
-
Tolerance: This value limits where the Art History brush can paint. A value of 0 lets the brush paint anywhere ; higher values let the brush paint only in areas where the current state and source state differ dramatically in color.
Painting through time Hoping to punch home the Art History effect a little more? You're in luck!
-
Choose Filter Distort Displace.
-
Enter 10 percent for both of the Scale values.
-
Select the Tile radio button.
-
Click OK.
-
Load the Random Strokes pattern (discussed in Chapter 2). Photoshop adds a little bit of extra brushwork, as shown in the example on the left.
-
Choose Filter Texture Texturizer.
-
Select the Canvas texture, and fiddle with the Scaling and Relief options to get the desired effect.
Regardless of your settings, you'll get a painted canvas look, as shown on the right side of the example.
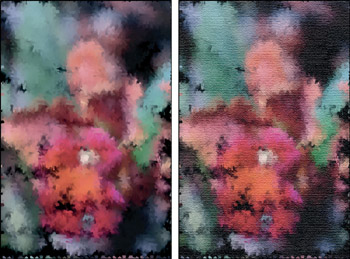
Apply the Displace filter (left) and add canvas texture with the Texturizer filter (right). After two minutes, you have something suitable for any dentist's office waiting room. -
If impressionism interests you, we encourage you to experiment. It's a nifty (and surprisingly well implemented) feature, but it does kind of fall under the heading Whimsical Creative Tools to Play with When You're Not under Deadline.
Source state limitations
Photoshop displays the cancel cursor if you try to paint with the History brush or Art History brush using a source state that's a different width or height than the current image. One pixel difference, and the source state is a moot point. This same restriction applies to filling your image with a history state by choosing Edit Fill and picking History from the Use menu, or just pressing Ctrl+Alt+Backspace ( z -Option-Delete on the Mac).You may also see the cancel cursor if the layer is locked, or if the source state lacks an equivalent layer. To find out exactly what the problem is, click the image with the cancel cursor to display an explanatory alert message. If the problem relates to the source state, move the source state icon in the History palette to a point after you modified the width or the height of the image. The Crop tool and the Image Size, Canvas Size , Rotate Canvas, and Crop commands can mix up the History brush. If you applied one of these operations in the very last state, you either have to back step before that operation or find some alternative to the History brush.
It's not a big deal, though. After some practice, you'll learn to anticipate this problem. Or better yet, make sure that you resize or crop your image first, before you start making other changes. Get the dimensions ironed out and then start laying down your time trails.
EAN: 2147483647
Pages: 95
- Challenging the Unpredictable: Changeable Order Management Systems
- ERP System Acquisition: A Process Model and Results From an Austrian Survey
- Context Management of ERP Processes in Virtual Communities
- Healthcare Information: From Administrative to Practice Databases
- Development of Interactive Web Sites to Enhance Police/Community Relations