Configuring Name Servers with BIND
| Before we dig (pun intended) deeper into how to configure DNS as a server-based service on your SUSE Linux system, a word on the service itself BIND. BIND stands for Berkeley Internet Name Domain or Daemon. BIND is software developed by the University of California at Berkeley, as the name implies. BIND is a full service DNS solution that allows clients to get name resolution information as requested. Although an entire book can be dedicated to Unix- and Linux-based DNS, for purposes of this chapter, we will not get too involved with BIND's history and current status. In this section we will cover the basics. If you want more information, the following URLs explain DNS, BIND, and how to configure BIND to the smallest detail:
BIND is one of the most used and commonly seen forms of DNS on the Internet today. In fact, most service providers use only BIND because of their lack of trust and the proprietary nature of the Windows-based DNS server products. Now that you are familiar with BIND, let's look at how to configure your system with it. Up until now you have worked with SUSE Linux as a client of DNS. Next, you will make SUSE Linux function as the server that the clients query to get their DNS resolution information. Let's look at how this is done. First, you need to verify that DNS is installed on your SUSE Linux system. To verify, open up YaST. On the left pane of the YaST Control Center, select Software. Then select Install and Remove Software. In Figure 27.10, you can see under the Network Services section that BIND is either installed, or it is not. Here, for this example, it has already been installed. Figure 27.10. Using YaST to install DNS.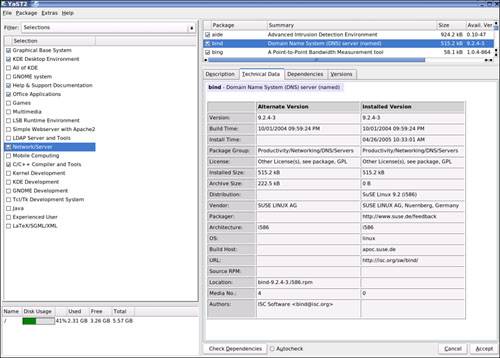 After DNS is installed, open YaST if it is not already opened; select the DNS Server icon that will allow you to configure DNS settings on your SUSE Linux system. Next, you need to configure DNS. To configure DNS manually you can use YaST to install the base system and then configure it as well. To get to the DNS configuration pages, open YaST and navigate to the Network Services menu in the YaST Control Center. You can use the DNS Server section of YaST to configure a DNS server for your local network. When you start the module for the first time, a wizard will prompt you about making changes on your forwarder. A forwarder is used to send your request to the next server that will be able to answer the request and then cache it on the forwarding server, which will most likely be "Internet facing" and have a publicly assigned IP address. Next, consider the following. Because you've set up the client, you are now setting up the server. If you remember from previous examples, the DNS server, if not a root server, will still need to get its information from a public Internet-based DNS server. The server you are creating now with your SUSE Linux system is a local DNS server that will be used in your local environment (or network), and it will have to query another DNS server for its name resolution information because it is not a public Internet-based DNS server. You can, in fact, set it up as an Internet-based DNS server, but because doing so is outside the scope of this book, this chapter will not be able to cover all those details in depth. There are many more steps to configuring a DNS solution, and there are many ways you can set it up, allowing you to meet just about any name resolution scenario placed before you. To set your SUSE Linux system as a Local DNS server, you can bypass the forwarder configuration by clicking Next. You do not have to set a forwarder. Remember, a forwarder is nothing more than setting your local DNS server as a nonroot DNS server that will query a root server if it does not know the answer to a query. When you starting the module for the first time, see the dialog box shown in Figure 27.11, DNS Server Installation Forwarder Settings. Figure 27.11. Changing the forwarder setting.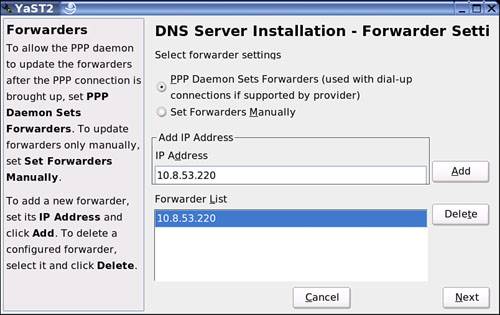 Click Next to enter the other DNS server configuration settings areas, such as where you will build new A records. After you have clicked Next, you will be shown the DNS Zone section where you can add a new zone. A default of example.com is shown in Figure 27.12. Figure 27.12. Viewing DNS Zone information.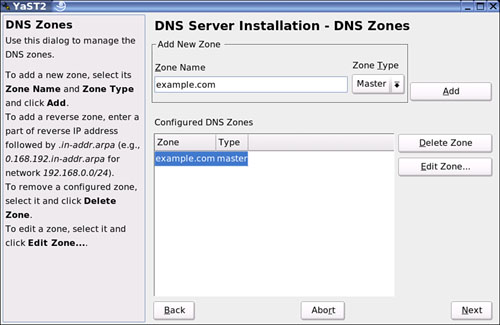 This particular dialog box consists of several parts and is responsible for managing of zone files, adding new zones, or removing a zone. To add a zone, add or change the current zone name of example.com. The type of zone will be the master because it's the first zone you are making. After you make more zones, you will be given an option to make a slave domain. A slave is a DNS server that will get its main information from the master server. Read and writes can be done on the master; the slave is read-only and gets its configuration information from the master. To add a reverse zone you have to know to add the extension to your zone, such as 10.1.1.in-addr.arpa. The name must end in .in-addr.arpa and you will need to add this manually. Select Edit Zone to configure other settings of an existing zone. To remove a zone, you can select Delete Zone. If you decide to edit a zone, you can select Edit Zone. Inside the zone, you can change many settings, such as adding records. To add a simple A record so you can have basic name resolution, click the Records tab and add a new resource record. (Resource records were covered earlier in the chapter; now you can add one manually.) To add a record, add the hostname (without the domain name) to the Record Key. The Type is an A record (the Domain Name Translation). The Value is the IP address you want to use. By clicking Add, you will have successfully added your first resource record beyond what may have been made during the installation, such as the SOA record, or Start of Authority, which is a record that will indicate the start point or point of originating authority for information stored in the zone just created. The SOA resource record is the first record created when adding a new zone. This is a great example of a record that is made for you (see Figure 27.13). Figure 27.13. Using the Zone Editor.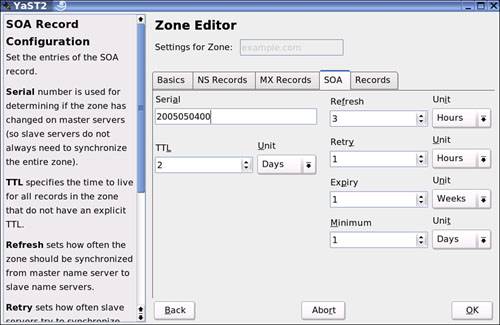 Now that you understand how to add records and adjust the zone file database, click Back to go back to the original DNS Zones configuration page. You can also click OK to finish, but you are not quite finished with your configurations. Clicking Next from the DNS Zones dialog box will bring you to the Finish Wizard. The reason why you didn't want to bypass this screen by clicking OK is that you want to modify the DNS server startup options and behavior. For instance, do you want the server started now, or when you boot up? Or do you want to set it for manual start? Either way, you can adjust these settings in the DNS Server Installation Finish Wizard. When you're done, click Finish to run your new DNS server. You can also click Expert Options to get more options to choose from, including a section where you can adjust your logging settings, which is covered next. |
EAN: 2147483647
Pages: 332