Project32.Edit with vim
Project 32. Edit with vim"What do I do once I've outgrown the nano text editor?" This project introduces the powerful, highly configurable vim text editor. Ideal for writing code and maintaining configuration files, vim is highly efficient, enabling you to edit with the minimum number of keystrokes. The vim text editor is an improved version of the standard vi (pronounced vee eye) text editor traditionally distributed with Unix systems. The three projects following this one33, 34, and 35cover some of the more advanced features of vim. Project 31 introduces the emacs text editor, and Project 30 introduces the simpler nano text editor. Tip
BasicsFire up vim, and we'll take a look at what it can do. Use any text file; we'll once again work on a copy of ~/Sites/index.html. $ cd ~/Sites $ cp index.html index-new.html $ vim index-new.html You'll see a terminal window similar to that shown in Figure 4.3. The bottom line (the vim command line) shows important and informational messages such as the current mode, and is also where you type vim commands. In this project and the others covering vim (Projects 3335), the term command line refers to vim's command line, not that of the shell unless specifically stated. Figure 4.3. The vim text editor takes a little getting used to, but it's incredibly flexible, powerful, and even fun after you become familiar with it.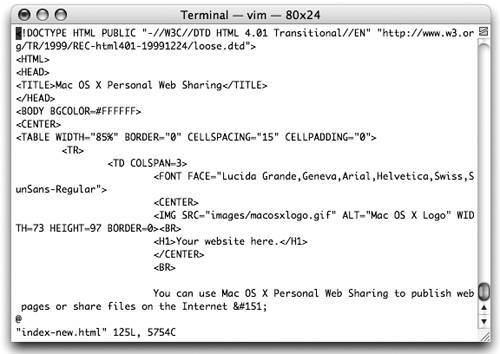 Before we continue, there's something you should understand. To reap the benefits of vim, you must invest a little time in learning the basics. If you are prepared to do so, you'll be rewarded with a powerful and very productive editing tool. If not, take a look at nano. Override vi CompatibilityBecause it's based on the old vi editor, vim runs by default in vi-compatibility mode, which doesn't expose all its features. We'll want to run in full vim mode, and the easiest way to activate it is to create an empty vim configuration file in your home directory. $ touch ~/.vimrcYou can edit this file later to change vim's default settings.
Learn More
Understand vim ModesYou can't just plunge straight into vim and start typing; weird things will happen. vim operates in one of two modes:
Tip
Move AroundThe arrow (cursor) keys work as expected and, most important, do so in both normal and insert modes, so there's no need to switch modes just to cursor around the file. In X11's xterm, but not Apple's Terminal, you can enable positioning of the cursor via mouse clicks by entering normal mode, typing :set mouse=aand pressing Return. You'll see this echoed on the vim command line, as in the help example earlier. To enable mouse-click positioning of the vim cursor within Terminal, turn on Terminal's Option-Click to Position Cursor feature. Launch the Terminal Inspector by choosing Terminal > Window Settings; select Emulation from the pop-up menu, and check Option-Click to Position Cursor. (If you did this already to enable mouse clicks in nano or emacs, you don't need to do it again for vim.) Option-clicking tells Terminal to send a series of cursor-movement keystrokes to vim, thereby moving the cursor to the point where you clicked. In normal mode, vim supplements the arrow keys with several cursor-movement shortcut keystrokes. Following are some of the most useful, listed in an order that will become apparent as you read them:
The difference between minus (-) and k is that minus moves to the first nonblank character on the line, whereas k will happily move the cursor to leading white space. Plus (+) and j are similarly different. Tip
Tip
Jump to a LineYou may jump straight to line number n within a file by using either of the following command syntaxes within vim normal mode. Type
To jump halfway into a file, type 50%. I'll leave you to figure out how to jump one-third of the way into a file (but integer numbers only, please!). Tip
Get HelpTo enter the vim help system, press Escape if you are not in normal mode, and type :helpand then press Return. (Remember that typing a colon positions the cursor on the vim command line, where you then type help.) The vim help pages will appear in the top half of a split screen. Use the arrow keys to move around the help pages. In fact, the help pages are simply a non-modifiable document. Note
Cursor down a few lines until you reach the section labeled "BASIC:". Below it, you'll find sections labeled with vertical bars on either side, such as "|quickref|" and "|tutor|". Position the cursor on one of these tags, and press Control-] (hold down the Control key while pressing the ] key). A tag is like a hyperlink and takes you to the appropriate point in the help system. Press Control-t to move back from the linked page to the original page. Tip
To get help on a specific command, type :helpin normal mode, followed by the keystroke(s) for the command you want to learn about. For example: :help j :help ctrl-] :help :s To get help on a particular topic, type :help the-topic-hereTo exit the help system and return to the main document, type :qAdd and Remove TextWhen you wish to insert text, type i for insert. From then on, editing is pretty much as you would expect. To add text, place the cursor at the location where you want your addition to begin. The Delete key (also referred to as the Backspace key) deletes the character behind the cursor. Forward-Delete (the key above the left arrow on full-size Mac keyboards, emulated by pressing Fn-Delete on laptops) removes the character under the cursor. Different keystrokes for switching from normal to insert mode determine where text insertion begins after the mode switch. From normal mode, enter insert mode by typing one of the following:
If you want to replace (overwrite) existing text instead of inserting new text, type the following in normal mode:
Undo ChangesTo undo changes, enter normal mode and type one of the following:
Note
Learn More
Simple Cut, Copy, and PasteHere are the most basic cut, copy, and paste commands for vim. Remember to enter normal mode when you issue these commands.
To cut or copy a specific number of lines, precede the command with a count. To copy 20 lines and then paste them back elsewhere, for example, type 20yy, move the cursor, and then type p. If you use Apple's Terminal application, you may also use the standard Mac methods of pressing Command-c to copy selected text and Command-v to paste it (in vim insert mode). It's not possible to cut text by using Command-x. Save Your EditsHere are some of the most useful commands. Type
Tip
Edit as RootSystem configuration files are writable only by root. To modify them, you must run vim as user root, using the sudo command, and type your administrator password when prompted. $ sudo vim filename Password:Learn More
Search and ReplaceThe vim text editor has search, and search-and-replace, capabilities. In addition, the search can be case sensitive, employ regular-expression matching, and be performed in the reverse direction. To search for a term like web in vim, type / (forward slash) in normal mode. The cursor will be placed on the vim command line. Now type the search term web and press Return. The cursor will be placed on the first match. To move to the next match, type n; and to move backward to the previous match, type N. If a search reaches the end of the file, it will wrap back to the beginning, displaying the message Search hit BOTTOM, continuing at TOP on vim's command line. To repeat the last search, type / and press Return. To search backward, use ? instead of / and then proceed as before. Tip
Search OptionsIf you wish to change the way searches behave, vim has several options that you can enable (or set), either interactively on vim's command line or in the configuration file (see Project 35). When these options have been set, they affect all searches, not just the next search made. Here are some of the most useful. Type
Tip
Switch off any of the above options by preceding the option name with no. For example: :set noignorecaseNote
ReplaceTo perform a search and replace (substitute), type :%s/search-text/replace-text/gLet's analyze this command. The initial percent (%) symbol means "all lines in the file." Without it, the search operates on the current line only. The next part says to search for and then substitute (s) search-text with replace-text. The forward-slash characters delimit the text. The final g says do this globally across each line, as without it, only the first match on each line is substituted. Learn More
Use Regular Expressionsvim is capable of searching for, and replacing, regular expressions. No special commands are necessary; simply use a regular expression as the search term. |
EAN: 2147483647
Pages: 153