Voice Calls
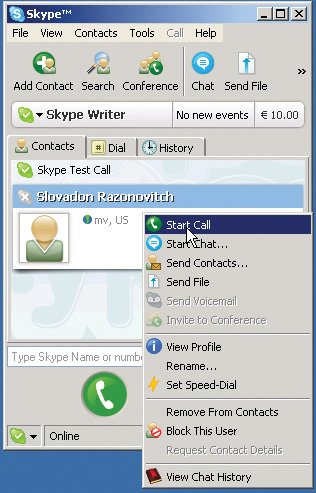
| The Skype application is easy to use and works in the same way across a variety of activities. With Skype, you typically select a contact (or contacts) and then do something (make a call, start a conference call, start a video call, send an IM, or transfer a file). You have the choice of clicking an icon or selecting an option from a menu to start an activity. This section covers how to use Skype for voice calling. It includes how to make and receive calls, start a conference call, make and receive calls from landline and cell phones (SkypeOut and SkypeIn), view your call history, and forward your Skype calls to a landline or cell phone. Make a CallThere are four ways to make a call using Skype:
Make a Conference CallYou can use Skype to host a conference call with up to four other people (for a total of five, including yourself). The person who initiates a conference call is considered to be the host, and the host is the only person who can add new participants to a call. Note Because Skype calls use the Skype P2P network, it is best that the conference host have a modern computer and a fast connection to the Internet. There are three ways to begin a conference call:
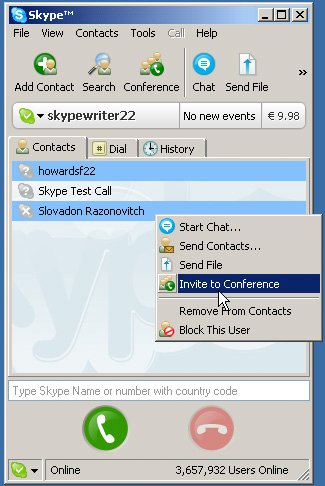
Your conference will start when the participants accept the call. You can also add people who are not on the Skype network to a conference call. Type the phone number you want to add in the text box in the appropriate Skype format (or select the SkypeOut contact in your Contacts List), and click the Conference icon. When adding a SkypeOut contact to a conference call, you must have sufficient SkypeOut credit for the duration of the call for each person you are calling. For more information about SkypeOut, see the "Call a Landline or Cell Phone (Use SkypeOut)" section later in this chapter. When you add SkypeOut contacts to a conference call, each call will be charged separately and will appear on your account overview as a separate call. There is no extra charge for SkypeOut conference calling. You simply pay for the time used for each connection. If you have less than 1 minute of SkypeOut credit remaining for any of the calls, Skype will drop the call from the conference. The conference will continue with the remaining users. Skype users running Linux and Pocket PC can participate in conference calls but currently cannot host them. Add Participants to a Live Conference CallAs the host, if you are already on a conference call and you want to add another participant to the discussion, follow these steps:
Figure 5-14. Invite to conference
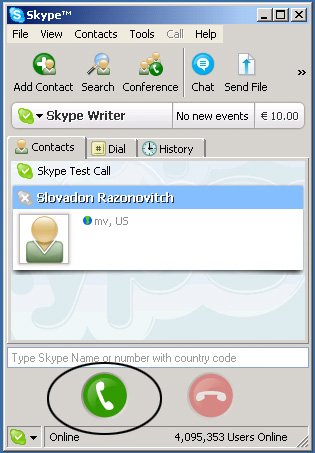
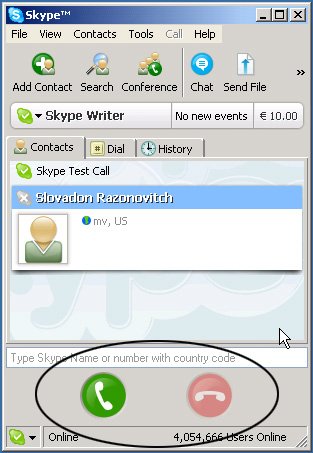
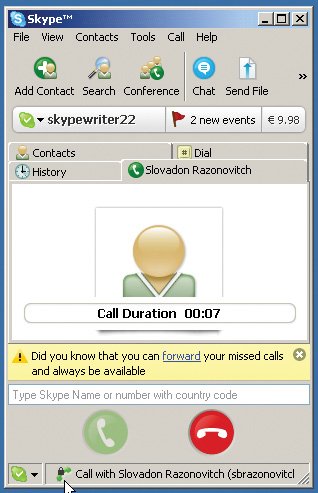
You can add participants to a conference call up to the five-person maximum limit. Receive a CallWhen someone calls you, you will hear a ring, and a message will pop up notifying you of the call. (Mac users: The Skype icon will bounce in the Dock if your Skype preferences are set to do this.) You can choose to accept the call by clicking the big green Call button or to reject the call by clicking the big red Hang Up button (see Figure 5-15). When you accept the call, and the call connects, you will see a timestamp with the duration of the call. This timestamp signals that a call has started (see Figure 5-16). Figure 5-15. Call and Hang Up buttons
Figure 5-16. Call accepted
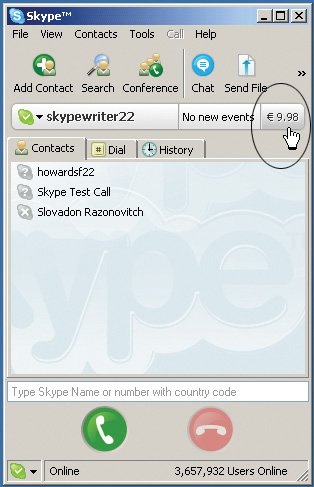
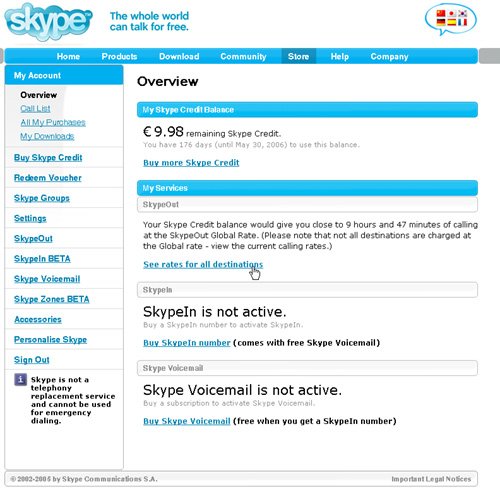
To change the way you are notified of a call, choose Tools > Options > Notifications to change the settings. (Mac users: Choose Skype > Preferences > Events.) To change the sounds you hear, choose Tools > Options > Sounds. You can download special tones or reset the sounds to the Skype defaults. (Mac users: Choose Skype > Preferences > Events.) If you are using a headset, and you want your computer speakers to ring when you receive a call, choose Tools > Options > Sound Devices, and check the Ring PC Speaker checkbox. Adjust the Volume of a CallTo adjust the volume of your microphone, speakers, or headset, use the sound Control Panel for your operating system. To open this Control Panel, choose Start > Settings > Control Panel > Sounds and Audio Devices. (Mac OS X users: Choose Apple > System Preferences > Sound.) End a CallYou can end a call at any time by clicking the big red Hang Up button in the bottom-right portion of the Skype main window. You can also end the call from the Call menu. Call a Landline or Cell Phone (Use SkypeOut)To call someone outside the Skype network (someone using a landline or cell phone), you need to buy SkypeOut credit to allow Skype to connect your call using the traditional telephone network. SkypeOut credit rates vary depending on the country you are calling, but the rates start at approximately 2 cents per minute. For current SkypeOut pricing, go to the My Account section of the Skype main window, and click the SkypeOut link. You will be taken to the Skype Web site and will be asked to log in to your account page with your Skype Name and password. Alternatively, you can go to the Skype Web site by typing www.skype.com in the address bar of your Web browser. Your SkypeOut credit remains active for 180 days after your last successfully connected SkypeOut phone call. To use SkypeOut, you need to have a positive credit balance (at least enough credit to make a 1-minute call to the country you want to call). Buy SkypeOut CreditTo buy SkypeOut credit, follow these steps:
Buy SkypeOut Credit for a GroupYou can also buy SkypeOut credit to be used by a group of people (such as family members or work teams). This feature allows a group administrator to buy SkypeOut credit (as well as SkypeIn numbers and voicemail subscriptions) to manage the billing centrally. To administer a Skype group, go to www.skype.com/products/skypegroups/. Make a SkypeOut CallWhen you have SkypeOut credit in your account, you can use the dial pad to make a call outside the Skype network. You can also type the number in the text box in the bottom portion of the Skype main window. To make a SkypeOut call, enter a plus sign (+) and the number in a specific format; then click the big green Call button. The specific format for SkypeOut is + country code area code number. Here is an example: +16505551212 The country code is 1; the area code is 650; and the number is 5551212. Note The country code is always included, even if you are calling the same country in which you reside. If you do not know the country code you need to dial, you can use the Skype Dialing Wizard at www.skype.com/products/skypeout/rates/dialing.html. You can also get to the Dialing Wizard by using the Help menu. Choose Help > Help; click Knowledgebase; type Dialing Wizard in the search box; and click Search Knowledgebase. Then click the Where Can I Get the Country Codes for Dialing? link in the search results. Warning Skype cannot be used for dialing emergency services anywhere in the world, such as 911 in the United States. If you try to call 911 using Skype, you will not be connected. Receive a Call from a Landline or Cell Phone (Use SkypeIn)A SkypeIn number is a telephone number that you purchase so that people outside the Skype network can call a regular telephone number and reach you on Skype. When you purchase a SkypeIn number, you also receive a voicemail subscription at no extra cost, so callers can leave you a message if you are not available. SkypeIn numbers currently are available in Denmark, Estonia, Finland, France, Germany, Hong Kong SAR, Poland, Sweden, Switzerland, the United Kingdom, and the United States. Be sure to check the Skype Web site, as new areas are being added continually. Skype allows you to buy up to ten SkypeIn numbers (in a variety of states and countries) per Skype Name. This means that if you have friends in different countries or states, you can purchase a number in a country or area code that is convenient and cost effective for them. That way, they can call you using a number that is local to them (avoiding long-distance charges), and you will receive the call on Skype. When someone calls you using a SkypeIn number, she will hear a normal telephone ring and will not know that she is calling you on Skype. If you are logged into Skype, you will hear the ring, and a pop-up message will notify you of the call. If you aren't available to take the call (or if you reject the call), the caller will go to voicemail automatically. If you are not logged into Skype, the caller will hear the phone ringing and then go directly to voicemail (unless you have call forwarding activated). Buy a SkypeIn Number (with Voicemail)To purchase a SkypeIn number (and free voicemail subscription), go to the My Account section of the Skype main window, and click the SkypeIn link. You will be taken to the Skype Web site and will be asked to log in to your account page with your Skype Name and password. When you are logged in, follow these steps:
Note If you live in the United States, the online form separates the house number from the street address, so you may need to re-enter your house number. To see your SkypeIn number, follow these steps:
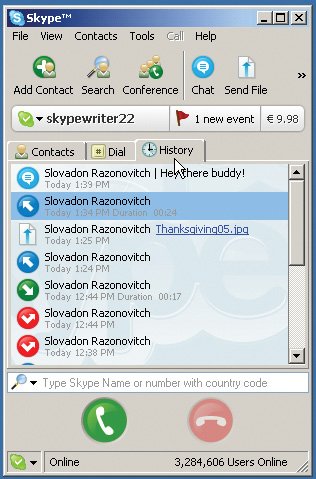
Note For security purposes, Skype Technologies allows only one credit card per Skype Name. If you have multiple Skype Names and want to purchase services for these accounts, you will need to use multiple credit cards. This is a fraud-protection measure. Buy SkypeIn Numbers for a GroupYou can also buy SkypeIn numbers to be used by a group of people (such as family members or work teams). This feature allows a group administrator to buy SkypeIn numbers (and SkypeOut credit, as well as voicemail subscriptions) to manage the billing centrally. To administer a Skype group, go to www.skype.com/products/skypegroups/. View and Clear Call HistoryYour call history is easily accessible via the History tab (or the Call List tab in all of the operating systems other than Windows). You can view all calls, missed calls, received calls, and sent calls, and you can sort calls by contact. You can also listen to your voicemails from the History tab (see Figure 5-19). Figure 5-19. History tab
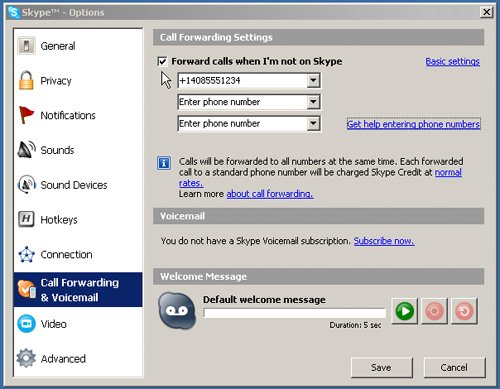
To initiate a call, chat, or file transfer directly from the History tab, right-click a Skype Name in the list, and select an option from the context menu. (Mac users: In the Call List tab, Control-click a Skype Name, and select an option from the context menu.) To listen to a voicemail message, click the Voicemail icon. To clear your call history, choose Tools > Clear History. (Mac users: Choose Call > Clear Call List.)You can delete your call history from the Skype application on your computer, but you cannot delete your SkypeOut call history in the My Account section of the Skype Web site. Forward Calls from SkypeYou can elect to have your Skype calls redirected to a cell or landline phone so that you can receive calls even if you are not on Skype. This is helpful when you need to be away from your computer or PDA but still have important calls you want to answer. When you use call forwarding, your incoming Skype calls are relayed to up to three different numbers that you designate, even if your computer is off. Because these calls travel outside Skype's network, a forwarded call is charged just like a SkypeOut call. When call forwarding is activated, and your Skype is open, your Skype will ring, and the call will roll to your forwarded number(s). If your computer is off or Skype is closed, the call will forward without ringing. You can also forward your calls from one Skype Name to another. Because this forwarding is within the Skype network, there is no charge for this forwarding. Please note, however, that callers will get a message saying that the "caller is offline" if you are not logged in to the destination Skype Name. Activate Call ForwardingTo forward your calls to one or more phone numbers, follow these steps:
Deactivate Call ForwardingTo stop forwarding your calls to other phone numbers, follow these steps:
Note You need to be using at least Skype version 1.4 to activate call forwarding. Also, if you are forwarding to another Skype Name, the Skype Name to which you are forwarding calls must be online. Some Skype users also may experience problems with their call forwarding if their privacy settings are set to allow only people on their Contacts List to contact them. |
EAN: 2147483647
Pages: 130