Project 4. Create a Panoramic Image Let Photoshop Elements automatically create your panoramic image, or do it yourself. Tools: Photoshop Elements Materials: Your photos 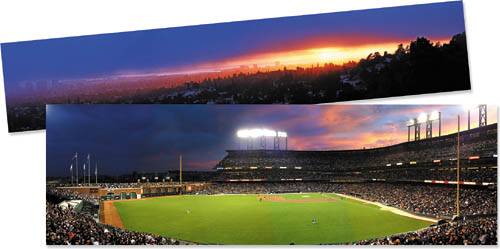
This technique is for all those fabulous scenes where your camera lens isn't quite wide enough or you are looking for a spanning vista that just isn't possible in one photo. This method is also useful for piecing together building facades. In any event, it's easy to use and fun.  Organize your images. Once you have all the images you want to combine, place them in one folder for easy access. Organize your images. Once you have all the images you want to combine, place them in one folder for easy access.
 Choose your files. In the Organizer window, hold down the Ctrl key; this allows you to select noncontiguous images. Then, select File > New > Photomerge Panorama. In the resulting dialog box, your files will appear in the Photomerge Source Files window. Click OK to bring them into the Photomerge window. Choose your files. In the Organizer window, hold down the Ctrl key; this allows you to select noncontiguous images. Then, select File > New > Photomerge Panorama. In the resulting dialog box, your files will appear in the Photomerge Source Files window. Click OK to bring them into the Photomerge window.
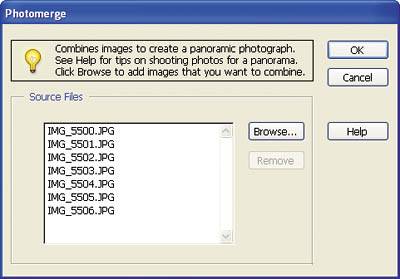
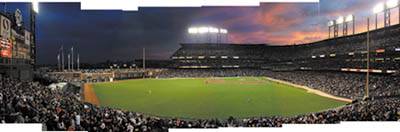
 Merge your images automatically. After you have selected all your files, click OK. Photoshop Elements will then begin to auto-match your images together. When it has finished, you should see the merged images in the Photomerge dialog box, as in the example above. Merge your images automatically. After you have selected all your files, click OK. Photoshop Elements will then begin to auto-match your images together. When it has finished, you should see the merged images in the Photomerge dialog box, as in the example above.
 Merge your images manually. Photoshop Elements may not always be able to place all your images automatically. When this happens, it will place your images in the thumbnail box above the arranging area. To manually arrange your images, choose the Select Image tool ( Merge your images manually. Photoshop Elements may not always be able to place all your images automatically. When this happens, it will place your images in the thumbnail box above the arranging area. To manually arrange your images, choose the Select Image tool ( ) from the toolbox and then drag the thumbnail into the arranging area. ) from the toolbox and then drag the thumbnail into the arranging area.
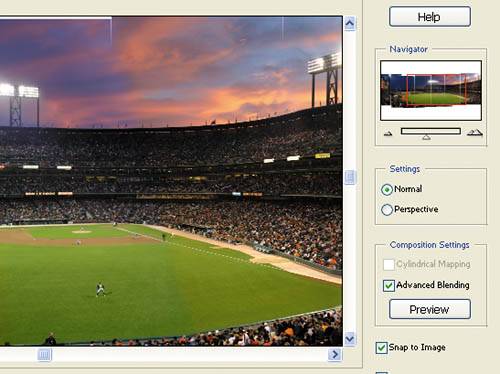
  Set up your options. When your image is selected in the arranging area, you will see a red highlight around it. The dialog box at the right contains all the options for merging your images. Set up your options. When your image is selected in the arranging area, you will see a red highlight around it. The dialog box at the right contains all the options for merging your images.
To get things started, you may want to turn on Snap to Image. Next, click Perspective to set the vanishing point. Select the Vanishing Point tool from the toolbox, and click the image where the vanishing point should be. You will see the images adjust to that perspective. Note: Depending on how your images were shot, you may want to use the Rotate Image tool as well.
Finally, to eliminate any differences in exposure, choose Advanced Blending and click Preview. You may still need to do some touch-up in the final file. If you are happy with the result, click OK. Elements will then create a new untitled file with your combined image.
  Edit your new file. Okay, you have your new panoramic image, but it still looks a little less than perfect. Use the Crop tool ( Edit your new file. Okay, you have your new panoramic image, but it still looks a little less than perfect. Use the Crop tool ( ) to edit out the ragged edges, and make any other edits the image may need, such as adjustments to the color, lighting, and other properties. Choose File > Save As and save your panoramic image with a new name. ) to edit out the ragged edges, and make any other edits the image may need, such as adjustments to the color, lighting, and other properties. Choose File > Save As and save your panoramic image with a new name.

|