Performing an Application Installation
Prior to installing an application on the server, you have to ensure that no sessions are currently running on the server and that no new connection can be established to the server while the application is being installed. Completing this step is imperative to ensure the proper running of the application for all users after the install is complete.
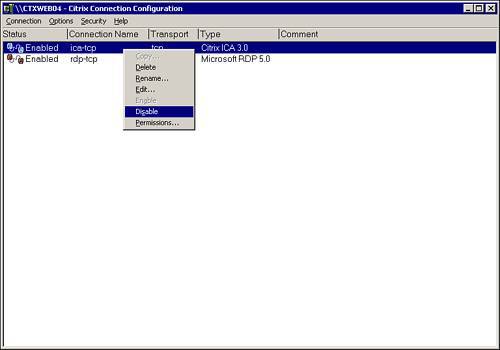
You can prevent new sessions from being established with the server in several ways. Select the easiest and most convenient for you. You can use the command line to disable access to the server by typing change logon /disable , which will disable new logons but will not log off existing sessions that are connected. You can then type change logon /enable later to reenable logons. You can disable logons to a server from the Management Console by expanding the Servers node, right-clicking the server, and choosing Properties. Select MetaFrame Settings from the left pane, and uncheck Enable Logons to this Server in the right pane, as shown in Figure 10.1. You can also launch the Citrix Connection Configuration tool from the server where you want to disable logons, right-click the protocol, and choose Disable, as shown in Figure 10.2.
Figure 10.1. Disable logons to the MPS server.
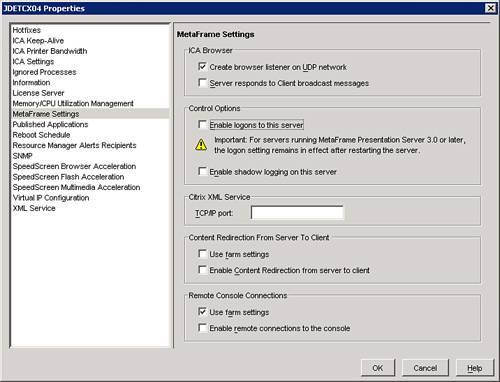
Figure 10.2. Disable the ICA-TCP protocol.
The preceding steps take care of new connections but do not address currently connected sessions. You should always schedule your application install and announce to your users that this particular server will be unavailable on a particular date and time. The easiest way to view and log off users from a server is to use the Management Console. Expand the Server node and select the server in question. Click the Users tab in the right control pane. The tab displays a list of the users who are currently connected to the server. You can then select them all and right-click to log them off or reset their sessions.
Installing an Application
After completing the preliminary steps and prerequisites to installing the application, you are ready to install it. If you decide to install using the command line, follow these steps:
| 1. | Choose Start, Run, CMD and press Enter. |
| 2. | Type change user /install . |
| 3. | Run the setup program for the application from a CD, floppy disk, or network share. |
| 4. | After the install completes successfully, type change user /execute to switch back to Execute mode. Note You can use chgusr /install and chgusr /execute as shortcuts to the full commands change user /install and change user /execute . |
If you prefer to use the GUI to install an application, follow these steps:
| 1. | Choose Start, Settings, Control Panel. |
| 2. | Double-click Add or Remove Programs and then click Add New Programs. |
| 3. | Click the CD or Floppy button, which launches a window that is the equivalent of the way Windows would have reacted had you typed change user /install manually from a command prompt. |
| 4. | Click Next. Then browse the CD, floppy, or network share and launch the setup program to run the installation of the application normally (see Figure 10.3). Figure 10.3. Add New Programs Window. |
| 5. | After the application finishes the installation successfully, you are then prompted to click Next and Finish to place the server back into Execute mode and save all the changes that were recorded by the server. |
| 6. | After the application is installed, you may need to run the appropriate Application Compatibility Scripts associated with that application for it run properly. |
Note
Many applications require you to reboot the server after their installation. It is important that you click Finish to ensure that all the changes the application made were properly recorded and saved.
EAN: N/A
Pages: 199