| Occasionally, after setting up a spreadsheet, you might decide that the spreadsheet would work much better if you had the rows where the columns were and the columns where the rows were. Using Quattro Pro's Transpose command, you can swap rows and columns quickly. There are two possible drawbacks to using the Transpose command: Any formulas in cells that you swap will not work. You'll have to redo formulas in the transposed range. You cannot transpose data into the same range that contained the data originally. If you want the data to ultimately appear in the location where the original data appeared, transpose it outside the original range and then delete the extra rows and columns containing the original data. For help deleting rows and columns, see "Inserting and Deleting Rows and Columns" in Chapter 4, "Editing in a Spreadsheet."
Tip  | You can select a single cell; you don't need to select a range. Quattro Pro will place the first cell of the transposed data in the cell you select and then fill the range below and to the right of the cell you select with the rest of the transposed data. |
To transpose a range of rows and columns, follow these steps: 1. | Select the rows and columns containing the data you want to swap; in Figure 8.14, I selected A4.E9.
Figure 8.14. Select the data you want to swap. 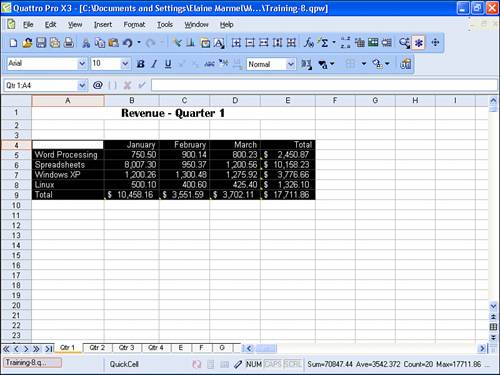
| 2. | Open the Tools menu, point to Numeric Tools, and click Transpose. Quattro Pro displays the Transpose Cells dialog box (see Figure 8.15).
Figure 8.15. Use this dialog box to identify the range to transpose and the new location for the transposed range. 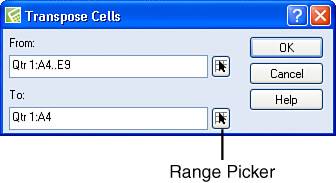
| 3. | Click the Ranger Picker button in the To box. Quattro Pro collapses the Transpose Cells dialog box and allows you to select a new location for the transposed data.
| 4. | Click any blank cell (in this example, I selected cell A13) and then click the Maximize button of the Transpose Cells dialog box.
| 5. | Click OK. Quattro Pro displays the transposed data (see Figure 8.16).
Figure 8.16. The transposed data begins in the cell you selected in the Transpose Cells dialog box. 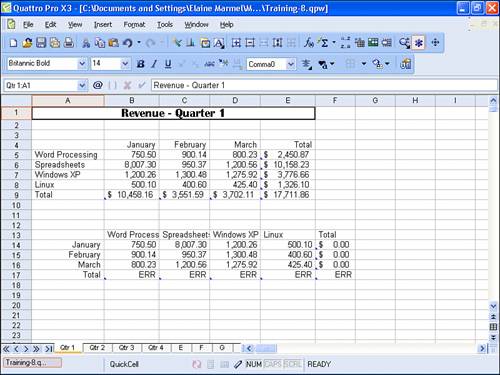
|
Notice that the formulas do not display correctly. Delete the contents of the cells containing the formulas and re-create the formulas. See Chapter 10, "Working with Calculations," for help with spreadsheet calculations. Also notice that Quattro Pro maintained the formatting of the transposed cells; you'll probably want to reformat the transposed cells using the techniques described in this chapter and the next chapter. The Absolute Minimum This chapter introduced the basics of formatting. Using SpeedFormatting, you applied predefined formatting to spreadsheets. Then, I introduced you to some of the most commonly used formatting techniques. You learned how to: Use the SpeedFormat dialog box to quickly apply predefined formats to a selection of cells. Align information within cells and join cells using the Alignment tab of the Active Cells dialog box. Assign numeric formats to cells using the Numeric Format tab of the Active Cells dialog box. Set row heights and columns widths by dragging row or column boundaries or by using the Row/Column tab of the Active Cells dialog box.
Chapter 9, "More Notebook Formatting," continues to explore spreadsheet formatting, covering topics like changing fonts and using color on spreadsheets. |
|