Chapter 4. Deforming the Skin
|
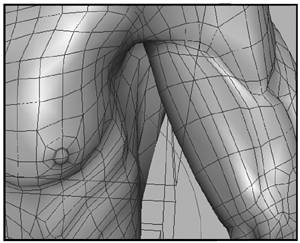
This chapter shows you how to assign the skeletons in your rig to your character models as skin influences (see Figure 4.1). This process is called binding the skin, and enables you to deform the shapes of your models over time. The two binding methods available in Maya are called rigid skin binding and smooth skin binding. Although the basics of rigid binding are explained, this chapter focuses on creating a good smooth skin bind for your character. 4.1. Binding enables the skeleton rig you created in Chapter 3 to deform your character's skin.
In addition to smooth binding your skin to the skeletons you created in Chapter 3, "Character Skeleton Setup," you also draw new skeletons that facilitate better skin deformations. The new skeletons are used to stabilize the skin around your character's joints, and create muscle flexing on the skin. In addition, this chapter shows you how to use geometry-based deformers, called influence objects, to make your character flex its muscles. Finally, this chapter shows you how to create more subtle skin effects that enhance the skeletal and muscle deformations on your character. These include making it appear like bones are sliding under your character's skin, producing wrinkles on the skin where joints bend, and creating muscle or fat jiggling on the skin. |
EAN: 2147483647
Pages: 75