Installing and Configuring PHP
|
Installing PHP might sound like a challenging task, especially if you have already looked inside the archive you downloaded from the PHP web site. Whilst the methods for installing PHP on both Windows and Linux machines are entirely different, they are both relatively easy.
Installation ShortcutsWhilst knowing how to install PHP individually can be widely considered a good thing, it should not be forgotten that there are always alternative ways to achieve the same goal. Installing PHP is no different, and it is especially useful to know of the quicker alternatives, if you are pressed for time. PHP itself is available as two different downloads from the PHP web site, www.php.net. There is a Zip file distribution, which requires a little bit of manual tweaking, and there is also a self-installing version of PHP available that uses the Windows Installer. Neither method is entirely foolproof, but in general the Windows Installer version is quicker with certain configurations. There are also a number of alternative, combination distributions available that not only install PHP, but also install MySQL and the Apache Web Server too. This is the perfect option, should you have no local web server to use for development purposes, or if you wish to use a web server other than Internet Information Server. There are two main distributions that fall into this category: PHPTriad and phpdev. Unfortunately PHPTriad has recently been discontinued, though its files are still available from http://www.sourceforge.net/projects/phptriad. phpdev is still under active development and can be obtained from http://www.firepages.com.au.
Installing PHP On WindowsThe process for installing PHP on Windows is relatively simple, as you don't need to worry about compiling sourcecode. You can either use the Windows Installer, or follow these instructions. The process involves extracting the files from the archive you downloaded from the PHP web site, and moving the files and folders it contains to specific locations.
Now that the process of installing and configuring PHP to work on your Windows machine is complete, we need to tell the Web Server that you have PHP installed. This process is slightly different for Apache and IIS.
Configuring Apache 1.3.xHistorically there have been two ways to configure PHP to work with Apache. You could configure PHP to work as an Apache module, or you could configure PHP to work as a CGI process. Thanks to a security advisory report at http://www.cert.org/advisories/CA-1996-11.html, the CGI method is now not recommended under ANY circumstances. This is due to the fact that when PHP is installed as a CGI process, a hacker of proficient skill level can, under certain circumstances, access the PHP CGI Program and use it to run system-level commands on your web server. These commands can be anything from transferring the content of your database to a location of their choice, or even accessing your files with the intention of erasing or replacing them. This warning has been officially made as the risks of running any interpreter as a CGI program are too high, and cannot be ignored. For this reason, we will configure PHP to run as an Apache module.
All that now remains is to shut down and restart the Apache service (Windows NT, 2000, and XP users), to do this open a command prompt window and type "net stop apache" to stop the Apache Service, and "net start apache" to restart the service.
Configuring Internet Information Server (v4 or greater)Like Apache, there are two ways to configure PHP to work with IIS. You can configure PHP to work as an ISAPI module, or you can configure PHP to work as a CGI process. As the ISAPI module is experimental, and for the moment considered unstable, it is not recommended that you use it in a production environment. For this reason, we will only look at installing PHP as a CGI process with IIS.
All that now remains is to shut down and restart the IIS service for the changes to take effect. To do this open a command prompt window and type net stop iisadmin to stop IIS completely. Typing net start w3svc restarts IIS with your new configuration options. It is worth mentioning here that there is one final task for Windows NT, 2000, and XP users who use NTFS as their file system. In order for the above configuration to work you should additionally follow this procedure:
Completing this procedure allows the web server to access this directory when it needs to use the PHP program to process your pages.
Installing PHP On Your Linux Web ServerIf you're using Linux on your development server, then you need to follow these instructions. They are borrowed, in part, from the PHP & Linux Quick Install documentation, contained within the PHP sourcecode distribution. More detailed and up-to-date information on installing PHP on Linux can be found at the PHP Online Manual at http://www.php.net/manual/en/install.apache.php. As with Windows, there are two ways in which PHP can be installed on your Apache web server under Linux. The first method is using a Dynamic Shared Object (DSO) much like the Windows Apache module, or a Static Module. DSO modules are far better in this respect, as they do not rely on you also having the sourcecode for Apache because they compile independently. This also means that should you wish to upgrade your version of PHP at any time, you don't have to also recompile Apache. For this reason, we will concentrate solely on compiling PHP as a DSO module.
The final stage in installing PHP on your Linux machine is to configure your web server appropriately. As most Linux distributions come with Apache pre-installed, all you need to do to is edit your httpd.conf, and add a line that looks like this:-
AddType application/x-httpd-php php Once this has been done, restart the Apache service, by typing: apachectl restart in a console, log in as the root user, and your server is ready to process PHP files. We previously mentioned that OSX 10.1 comes with PHP installed by default. However, it should be noted that whilst PHP is installed, it isn't turned on by default.
Activating the PHP Module in OSXThankfully the OSX installer has handled the hard part of installing PHP to work with Apache under OSX. All that remains is to turn on the PHP module, and this is how we do it:
Now that this is done, if you are using a Linux or Mac OSX Server you should open a shell, or terminal window, and enter sudo apachectl graceful to restart Apache.
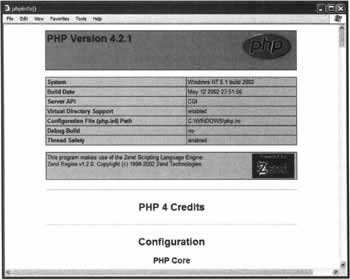
Testing Your PHP InstallationWe have now covered the installation and configuration of PHP on your machine, and all that remains is to check that the installation works. Thankfully there is a very easy way to do this. Create a new file in Notepad (or any other text editor), and enter:
<?php phpinfo(); ?> Save the file as test.php and upload it to your web server. Once there browse the file on your web server and you should see something like this:
Troubleshooting PHP Configuration IssuesNothing in life always goes quite to plan, as we all know. This is often the case with software installation. Here we will look at a list of possible issues that you might come across and their relevant solutions. Because PHP is ever evolving, there are from time-to-time, version-specific issues that arise. It would be impossible to cover those here, due to the amount of time that PHP has been available. However, there are a number of issues that do occur, that are common over the various versions of PHP. These are detailed within the PHP install guide, that formed part of your download, and some of those are also included here for reference.
When Testing a PHP Page in Your Browser You Get a Blank PageTo determine whether or not any data has been sent to the browser view the source code of this blank page. If this reveals a sourcecode listing that begins with <?php or <?, then it means that your web server isn't properly processing the web page by sending it to PHP for interpretation. In this situation, you should check your PHP installation against the installation instructions given previously.
When Testing a PHP Page in Your Browser You Encounter a 500 ErrorA 500 error occurs when something goes wrong with the server during processing. There is a simple diagnostic check, which might give further information. Open a command prompt, and navigate to your php directory. Under Windows type php.exe -i or under Linux type php -i. If the resulting output is a series of HTML tags then it is likely that this is a PHP configuration issue. As such, go over the configuration steps again for your web server to determine where the problem is. If no HTML tags are returned, then you will receive some error messages. It might be clear from these messages what the problem is, enabling you to find a simple solution. If, however, this is not the case, you will find more information at the PHP Frequently Asked Questions (FAQ) page and discussion boards at http://www.php.net/faq. Another common cause of this problem can be with Windows NT, 2000, and XP users who have not correctly assigned permissions to IUSR_ to access the PHP executable. This process has previously been detailed in the Configuring Internet Information Server section.
The Specified CGI Application Misbehaved by Not Returning a Complete Set of HTTP Headers Visible in the Browser.Follow the procedure given in the 500 error section, above.
Other ErrorsThankfully, while PHP is free to use, it is also very well supported. If you encounter other errors or problems, then there are two really useful resources to visit. First of all, there is the extensive PHP FAQ, as previously mentioned. Another great resource for installation issues is the dedicated installation mailing list. To subscribe to this mailing list, send an empty e-mail to <php-install-subscribe@lists.php.net>. | ||||||||||||||||||||||||||||||

EAN: 2147483647
Pages: 88