Section 2.1. Ajax Technologies in a Blink
2.1. Ajax Technologies in a BlinkThis section includes a few exercises to get up to speed with the basic Ajax technologies. Each section is independent from the others, and each corresponds to a group in the Foundational Technologies Patterns (Part II), which are patterns about the raw technologies on which all Ajax applications are based. 2.1.1. Preparing the DemosEach demo should live in its own directory, so create a tutorial directory under your server's document root, and then create three fresh directories underneath that: cd /apache/docroot (substitute your own document root) mkdir tutorial cd tutorial mkdir display remoting dynamic For Unix systems, ensure permissions are appropriate for your web server (e.g., make the directories globally readable and executable). Each directory will begin with the same "blank slate" HTML file, index.html. Open up your favorite editor and save the following file to display/index.html, remoting/index.html, and dynamic/index.html: <html> <head> <title>AjaxPatterns.org - Tutorial</title> <script type="text/javascript" src="/books/2/755/1/html/2/tutorial.js"></script> </head> <body> <h1>AjaxPatterns Tutorial</h1> <div > </div> </body> Remember to set file permissions according to the web server's requirements. Now point your browser to one of the new files and check that you can see the above content. The URL should be http://localhost/tutorial/display/ or, failing that, try http://localhost/tutorial/display/index.html. The HTML file loads the JavaScript file tutorial.js, which isn't there yet. The next three demos will leave the HTML file alone and illustrate Ajax concepts with code in their respective tutorial.js files. 2.1.2. Display Manipulation and the DOM in a Blink2.1.2.1. Hello World!To begin, go to the working directory (tutorial/display/). Note that there's an online demo of the application we're going to build at http://ajaxify.com/tutorial/display. The first thing we want to do with Ajax is update the displaychange controls, run animations, and so on. We do that by manipulating the DOM so this tutorial will change the DOM as soon as the page loads. We'll do all our work in the working directory, tutorial/display, so once you're in there, save the following as tutorial.js: window.onload = function( ) { var greeting = document.createElement("span"); greeting.style.backgroundColor = "yellow"; greeting.innerHTML = "Hello World!"; document.getElementById("sandbox").appendChild(greeting); } Now point your browser to the display demo (http://localhost/tutorial/display/index.html) and you should see a "Hello World!" message with yellow background. As explained in Display Morphing (Chapter 5), the DOM is a tree structure representing the current page, and the browser will keep the display synchronized with programmatic changes to the DOM. You can, if you like, confirm this by visualizing the DOM after running the script above. There are numerous visualization tools, described in DOM Inspection (Chapter 18). In the above code, greeting is a new DOM node that's appended to the existing sandbox DOM node. After creating greeting, we set its background color as a CSS style property, and we use innerHTML as a simple means of setting its content. The resulting DOM is the same as if the page had been loaded with the following HTML: <div > <span style="background-color:yellow;">Hello World!</span> </div> 2.1.2.2. $( ) Convenience functionNow, a quick refactoring. Since we often need the function, document.getElementById( ), all the demos here will use a convenient alias, so append the following function: function $(id) { return document.getElementById(id); } Now we can make the final line of the earlier code more concise: $("sandbox").appendChild(greeting); Verify the page works as before. The $( ) notation[*] is used throughout this book. In fact, it's sometimes used repeatedly to refer to the same DOM element, which is a slight performance overhead, since each reference will cause a DOM lookup. In production systems, consider using $( ) just once to assign a DOM element to a temporary variable, and then reference the temporary variable after that. You'll gain some performance at the expense of a little code clarity.
2.1.2.3. Adding a linkWe'll complete this section by dynamically creating a link. Append some code to onload( ): window.onload = function( ) { var greeting = document.createElement("span"); greeting.style.backgroundColor = "yellow"; greeting.innerHTML = "Hello World!"; $("sandbox").appendChild(greeting); $("sandbox").appendChild(document.createElement("hr")); var link = document.createElement("a"); link.href = "http://ajaxpatterns.org"; link.appendChild(document.createTextNode("More Ajax Stuff ...")); $("sandbox").appendChild(link); } function $(id) { return document.getElementById(id); } Reload the page and confirm it looks like Figure 2-1. Figure 2-1. Tutorial display We've just added two further child nodes to the sandbox. The first child is an hr element for aesthetic purposes. Then comes the link, an anchor tag with appropriate href property (just like an HTML <a href="..."> declaration). To set the link text, we append a new child text node. Contrast this with the earlier example, where we used innerHTML to set an element's contents. With innerHTML, the browser will parse the HTML content and attempt update the DOM on that basis. It's convenient, but somewhat more error-prone than the kind of direct DOM manipulation performed with the link text. 2.1.3. Web Remoting in a BlinkTo begin, go to the working directory (tutorial/remoting/). Note that there's an online demo of the application we're going to build at http://ajaxify.com/tutorial/remoting/. We're going to use web remoting to do something very basic: dynamically inject a server-side HTML segment onto the page. First, create the HTML page to be injected: message.html: <h2>This is message.html</h2> and there's <strong>some markup</strong> here<br/> as well as an <a href="http://ajaxpatterns.org">AjaxPatterns link</a>. Now we have to code tutorial.js to retrieve the message and put it in the "sandbox" container. We'll perform remoting with XMLHttpRequest, detailed in the XMLHttpRequest Call (Chapter 6) pattern. Since its creation is browser-specific, begin tutorial.js with a createXMLHttpRequest( ) factory function: function createXMLHttpRequest( ) { try { return new ActiveXObject("Msxml2.XMLHTTP"); } catch (e) {} try { return new ActiveXObject("Microsoft.XMLHTTP"); } catch (e) {} try { return new XMLHttpRequest( ); } catch(e) {} alert("XMLHttpRequest not supported"); return null; } As in the previous demo, create the $( ) convenience function as well: function $(id) { return document.getElementById(id); } With these library functions in place, the only remaining task is to have XMLHttpRequest pull down the content and display it once loaded: window.onload = function( ) { var xhr = createXMLHttpRequest( ); xhr.onreadystatechange = function( ) { if (xhr.readyState==4) { // Request is finished if (xhr.status==200) { $("sandbox").innerHTML = "Retrieved from server ...<hr/>"; $("sandbox").innerHTML += xhr.responseText; } else { alert("Message returned, but with error status."); } } } xhr.open("GET", "message.html", true); xhr.send(null); } And what you'll see is the contents of message.html inside the sandbox, as shown in Figure 2-2. Figure 2-2. A message inside the sandbox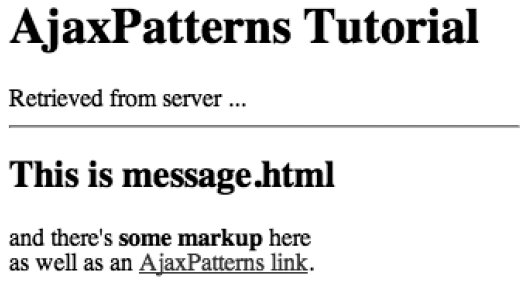 The code demonstrates XMLHttpRequest usage in a nutshell. Three things happen:
How is the XMLHttpRequest callback mechanism used here? During a call, XMLHttpRequest progresses through several stages, from 0, before the connection's open, to 4, when the response has arrived. Here, we only care about that final state, so onreadystatechange ignores any prior states. At that stage, we have a complete response, but is it valid? We have to check that the header has a successful response code, which is 200. If all has gone well, XMLHttpRequest.responseText will then hold the content that was retrieved from the server. So, after the screening the response, responseText is a string reflecting precisely the contents of message.html: "<h2>This is message.html</h2>...AjaxPatterns link</a>." It can then be displayed by appending it to the sandbox's innerHTML. A response doesn't have to be HTML. It could also be a piece of data, like "5," "OK," or "1,1,2,3,5." Also, the response handler can use it however it wants to. It doesn't have to place the response directly onto the page, and in fact, it doesn't have to change the display at allit might just store the value for later on. Furthermore, the target URL could be any location on our server. More often that not, it's a dynamic script rather than a static HTML file like the message file used here. The URL will often contain CGI-style variables as input for the server-side script. 2.1.4. Dynamic Behavior in a BlinkTo begin, go to the working directory (/tutorial/dynamic/). Note that there's an online demo of the application we're going to build at http://ajaxify.com/tutorial/dynamic/. This demo shows how to handle events in JavaScript. Begin creating tutorial.js with the usual $( ) definition: function $(id) { return document.getElementById(id); } Once the page has loaded, we'll invite the user to click on the sandbox: window.onload = function( ) { $("sandbox").innerHTML = "Click Here!<br/>"; }; } So what we want to do is catch the event of a user clicking on the sandbox. When that happens, we'll append a message to the sandbox: window.onload = function( ) { $("sandbox").innerHTML = "Click Here!<br/>"; $("sandbox").onclick = function(ev) { ev = ev || window.event; $("sandbox").innerHTML = Clicked at " + new Date() + ". Event: " + ev + "; for (property in ev) { var message = "Property " + property + ": " + ev[property] + "; $("sandbox").innerHTML += message; } }; Clicking on the sandbox triggers the event handler, which outputs the event contents, shown in Figure 2-3. Figure 2-3. Event contents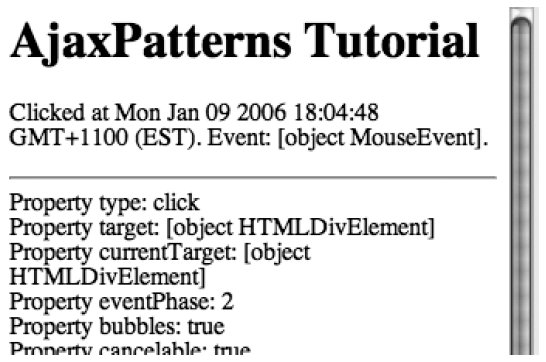 We assigned $("sandbox").onclick to an anonymous function that will handle the event. That's one common way of registering an event handler. We could just as easily register $("sandbox").onmouseover if we want to capture mouse movement instead of clicking activity. Browsers usually generate an event object with information about what just happened, such as the time and mouse location. It's either passed into the callback or set as the global window.event, depending on the browser. The first line of the callback ensures ev is set to whichever of these is valid, so we can assume for the rest of the callback that ev is a proper representation of the event that took place. The handler then shows a detailed report of the event by looping across each property. |