8.3. Creating Templates Ready-to-use templates are a fantastic innovation because they provide fine-tuned worksheets without forcing you to write a single formula. Of course, these templates also have a major drawback: no matter how crafty Microsoft programmers are, or how much money Bill Gates spends, they can't predict your every need. For example, the Travel Services Invoice provides a generic worksheet that a travel agency might use to bill its customers. But what if you need to group different types of expenses separately, apply different discount rates to various groups, include a late fee, and tack on a few miscellaneous charges to pad your company's bottom line? If that's the case, you need to add your own formulas, restrictions, and formatting to the template. In this situation, starting over from scratch and creating a template with the exact features you need is probably easier. Fortunately, creating custom templates isn't difficult at all. 8.3.1. Understanding Custom Templates Earlier in this chapter, you learned how to create a new workbook by choosing a template from the Templates dialog box. In order to understand how to create your own templates, you need to know how the Templates dialog box works namely, how does Excel find the templates that are installed on your computer? The answer is a little tricky because Excel actually offers three types of templates, all of which can appear in the Templates dialog box. (To open the Templates dialog box, select File  New and, in the New Workbook pane, click the "On my computer link.) New and, in the New Workbook pane, click the "On my computer link.) The different types of templates include: Built-in templates. These templates are a part of the Office package and are included automatically when you install Excel. You can find them (depending on where you installed Office) in a folder like C:\Program Files\Microsoft Office\Templates\1033. (1033 is the language ID for U.S. English.) You'll find the Spreadsheet Solutions templates in this folder, along with a slew of templates for other Office programs.
Note: This list includes only the templates on your computer. It doesn't include the templates from Office Online because these are actually on Microsoft's Web servers.
UNDER THE HOOD
Tracking Down Templates | It's a good idea to take note of where your Templates folder is. This information helps when you want to share your templates with other people (or take their templates and copy them to your computer). Even if you aren't planning on sharing templates, it still makes sense to pay attention to their location, so you can back them up for safekeeping. The Templates folder location varies depending on the version of Windows you're using. Some common locations include:  C:\Windows\Application Data\Microsoft\Templates C:\Windows\Application Data\Microsoft\Templates- C:\Windows\Profiles\[UserName]\Applic ation Data\Microsoft\Templates
- C:\Documents and Settings\[UserName]\Application Data\Microsoft\Templates
For example, if you're using Windows XP and you've logged yourself in under the user account billjones, you'll probably find the templates in C:\Documents and Settings\billjones\Application Data\Microsoft\Templates. (Incidentally, this folder includes user-defined templates for all installed Office programs, including Word. So don't panic if you see extra files here that don't appear in the Excel Templates dialog-box.) You may already be familiar with this location, because it's closely related to the special My Documents folder where Windows programs encourage you to store files (like Excel worksheets and Word documents). The easiest way to find out where your templates folder is located is to use Excel to save a new template. Just choose File Save As, and select the "Template (*.xlt)" file type to move to the Templates folder. To find out exactly where this folder is, click the arrow in the "Save in drop-down listbox at the top of the Save As dialog box: the folder tree you're looking at shows you exactly where your Templates folder is located. |
Workgroup templates. These are also custom templates. The only difference is that workgroup templates are stored in a shared location where more than one person can access them. This way, other people using the same computer (or connected via a network) can make use of your hard work. When you first install Excel, the workgroup template folder doesn't exist yet. If you want to use this feature, you need to set it up yourself.
The list of built-in templates is completely unchangeable. Even if you save your own custom templates to the same folder, Excel steadfastly ignores them. For that reason, you should never try to add or remove a built-in template. On the other hand, you can freely add custom templates to the local and workgroup folders. Best of all, Excel always checks these folders before it displays the Templates dialog box. If Excel finds two custom templates in the local template folder, and three more in the workgroup template folder, it shows all five in the Templates dialog box. These templates appear in the General tab (not the Spreadsheet Solutions tab), and you can use them to create new spreadsheets the exact same way you use a built-in template. So, all you need to know to integrate your custom templates with Excel's is where to save your files. As it turns out, Excel can take you there automatically, as you'll see in the next section. 8.3.2. Building a Custom Template To create a custom template, you simply need to build a new workbook, add any headings, formatting, and formulas you desire, and then save it as a template. You can start this process from scratch by opening a new, blank workbook, or you can refine an existing built-in template. Either way, you should follow the same process of perfecting your workbook until it's ready for template status. Here are some tips: Clear out the junk. Your template should be a blank form politely waiting for input. Clear away all the data on your template, unless it's generic content. For example, you can leave your company name or the worksheet title, but it probably doesn't make sense to have sample numbers. Assume formulas won't change. The ideal template is one anyone can use, even Excel novices who are too timid to edit a formula. If you have a formula that contains some data that may need to change (for example, the sales commission, interest rate, late fee, and so on), don't type it directly into your formulas. Instead, put it in a separate cell and use a cell reference within the formula. That way, the person using the template can easily modify the calculation just by editing the separate data cell. Turn off worksheet gridlines. Most templates don't use Excel's gridlines. That way, it's easier to see custom borders and shading, which you can use to draw attention to the important cells. To turn off gridlines, select Tools Options, and choose the View tab. Turn off the Gridlines checkbox (under the Window Options section at the bottom of the tab), and then click OK. Add the finishing touches. Once you have the basicstitles, captions, formulas, and so onit's time to create a distinct look. You can add borders, change fonts, and inject color. (Just remember not to go overboard with cell shading, or the output may be impossible to read on a black-and-white printer.) Delete extra worksheets, and name those that remain. Every workbook starts with three worksheets, named Sheet1, Sheet2, and Sheet3. The typical template has only one worksheet, and it's named appropriately (such as Expense Form). For details about deleting and renaming worksheets, flip back to Chapter 5.
Once you've perfected your template, you're ready to save it. Follow these steps: Select File Save As. In the "Save as type" drop-down listbox at the bottom of the window, choose "Template (*.xlt)". Excel automatically browses to the Templates folder, which is where Excel stores the templates you create on your computer. Typically, this is a folder like C:\Documents and Settings\[UserName]\Application Data\Microsoft\Templates (where UserName is the name of the Windows account you used to log in). Type the template name, and then click Save. The saved template file automatically appears in the General tab of the Templates dialog box, as shown in Figure 8-8. That means you can use it to build new spreadsheets. Just select File New (at which point the New Workbook task appears), and click the "On my computer link.
Figure 8-8. Your saved template automatically appears in the Templates dialog box. To remove the template, move the template file out of the Templates folder using Windows Explorer. 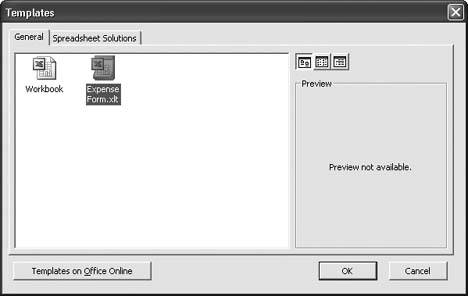
Note: Technically speaking, your templates don't need to appear in the Templates dialog box. You can save a template file anywhere on your computer and open it later. But doing so can be problematic: when you open a template file directly, Excel doesn't create a new workbook. That means it's easy to overwrite the template by accident. Also, you may have trouble tracking down a template you created earlier if it doesn't appear in the Templates dialog box.
|