Lesson 3: Configuring Outbound Connections
You can configure all outbound connections in Windows 2000 with the Network Connection wizard. Much of the work of configuring protocols and services is automated when you use this tool. Understanding the options available in the wizard will help you to configure connections efficiently.
There are three basic types of outbound connections:
- Dial-up connections
- Connections to a VPN
- Direct connections to another computer through a cable
After this lesson, you will be able to
- Configure outbound connections to a private network
- Configure outbound connections to an Internet service provider
- Configure outbound connections to a virtual private network
- Configure outbound connections directly to another computer
Estimated lesson time: 25 minutes
Dial-Up Connections
Dial-up connections are outbound dial-up connections to either private networks or to Internet service providers (ISPs). To create and configure an outbound dial-up connection, use the Network Connection wizard. On the Network Connection Type page, select Dial-Up To Private Network to create a connection to a private network, or select Dial-Up To The Internet to create a connection to an ISP.
The Dial-Up To A Private Network Option
If you select the Dial-Up To A Private Network option and click Next, you are prompted to type the telephone number of the computer or network to which you want to connect; this can be an ISP for an Internet connection or the modems for your private network. Enter the telephone number, click Next, and you are prompted to specify who can use this connection. If you want this connection to be made available to all users of this computer, click For All Users, and then click Next. If you want to reserve the connection for yourself, click Only For Myself. When you click Next, you will be prompted to type a name for the connection. If you would like a shortcut to appear on your desktop, select the Add A Shortcut To My Desktop check box. Click Finish to create the connection.
The Dial-Up To The Internet Option
If you have selected the Dial-Up To The Internet option and then you click Next, the Welcome To The Internet Connection Wizard starts (see Figure 5.10). The wizard presents the following three options:
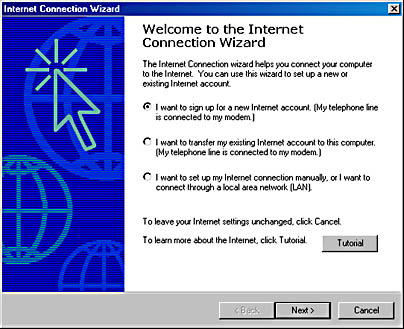
Figure 5.10 The Welcome To The Internet Connection Wizard page
- I Want To Sign Up For A New Internet Account. If you select this option, the wizard presents a three-step procedure for choosing an ISP, specifying your address and billing information, and setting up your e-mail account.
- I Want To Transfer My Existing Internet Account To This Computer. If you already have an account with an ISP and have obtained all the necessary connection information, you can select this option to connect to your account using your telephone line. If you select this option and click Next, you are prompted to enter the telephone number you dial to connect to your ISP or the modem for your private network. To complete the wizard, you are prompted for the user name and password that you use to log on to your ISP, and you will be prompted to type a name for the dial-up connection.
- I Want To Set Up My Internet Account Manually, Or I Want To Connect Through A Local Area Network (LAN). If you select this option, you have a choice of specifying that you connect to the Internet through a telephone line and modem or through a LAN. You are then prompted for a proxy server and other settings.
NOTE
To configure Internet connection sharing, ensure that Enable Internet Connection Sharing For This Connection is selected on the Sharing tab of the connection's properties dialog box.
Connections to a VPN
A VPN is a network that is created by using tunneling protocols such as PPTP or L2TP to create secure connections across an untrusted network. To create a new VPN connection, you also use the Network Connection wizard. On the Network Connection Type page, click Connect To A Private Network Through The Internet, click Next, and then do one of the following:
- If you need to establish a connection with your ISP or some other network before connecting to the VPN, click Automatically Dial This Initial Connection, select a connection on the list, and then click Next.
- If you don't want to automatically establish an initial connection, click Do Not Dial The Initial Connection, and then click Next.
You are then prompted to type the host name or IP address of the computer or network to which you are connecting. Type in the name or address and then click Next. If you want this connection to be made available to all users of this computer, click For All Users, and then click Next. If you want to reserve the connection for yourself, click Only For Myself. When you click Next, you will be prompted to type a name for the connection. Type in the name and then click Finish. If you would like a shortcut to appear on your desktop, select the Add A Shortcut To My Desktop check box. Click Finish to create the connection.
Direct Connections to Another Computer Through a Cable
You can also use the Network Connection wizard to create a direct cable connection to another computer. On the Network Connection Type page, click Connect Directly To Another Computer, click Next, and then do one of the following:
- If your computer will be the host for the connection, click Host, and then click Next.
- If your computer will be the guest for the connection, click Guest, and then click Next.
After specifying Host or Guest, you select the port that is connected to the other computer and then click Next. You must specify which users can access this connection and then click Next. You will be prompted to type a name for the connection. If you would like a shortcut to appear on your desktop, select the Add A Shortcut To My Desktop check box. Click Finish to create the connection.

Practice: Configuring an Outbound Connection
In this practice, you configure an outbound connection.
Exercise 1: Configure an Outbound Connection
- Log on as Administrator with a password of password.
- On the Start menu, point to Settings, and click Network And Dial-Up Connections.
The Network And Dial-Up Connections window appears.
- Double-click Make New Connection.
The Network Connection wizard appears.
- Click Next.
- On the Network Connection Type page, select Connect To A Private Network Through The Internet, and then click Next.
- On the Public Network page, select Do Not Dial The Initial Connection, and then click Next.
- On the Destination Address page, type 192.168.1.202 and then click Next.
NOTE
If your computer is on a network and there is a valid address that you can use to test your outbound connection, use that address instead of 192.168.1.202. - On the Connection Availability page, select Only For Myself, and click Next.
- Click Finish.
The Connect Virtual Private Connection dialog box appears.
- Ensure that the user name is set to Administrator, and type password for the password.
NOTE
If your computer is on a network and you entered a valid address in step 7, enter a valid user name and password in step 10. - Click Connect.
NOTE
If your computer is a standalone computer, this operation will fail. If your computer is on a network and you entered a valid address to a computer accepting virtual private connections in step 7 and a valid user name and password in step 10, a message will be displayed stating that Virtual Private Connection is now connected. - If your connection failed, click Cancel. If you connected successfully to another computer, double-click the connection icon in the system tray, click Disconnect, and then click Yes.
The Network And Dial-Up Connections window is again visible. Notice the Virtual Private Connection icon for the outbound connection you just created.
- Close all windows and log off.
Lesson Summary
In this lesson, you learned that you can configure all outbound connections in Windows 2000 using the Network Connection wizard. Using the Network Connection wizard automates much of the work of configuring protocols and services. Understanding the options found in the wizard helps you to configure the three basic types of outbound connections efficiently. The three types of outbound connections are dial-up connections, connections to a VPN, and direct connections to another computer through a cable.
EAN: N/A
Pages: 244
- Integration Strategies and Tactics for Information Technology Governance
- An Emerging Strategy for E-Business IT Governance
- Linking the IT Balanced Scorecard to the Business Objectives at a Major Canadian Financial Group
- Measuring and Managing E-Business Initiatives Through the Balanced Scorecard
- Measuring ROI in E-Commerce Applications: Analysis to Action