| Reason supports many major brands of control surfaces, allowing you to automatically map the knobs, faders, and buttons to the most-often-used controls on the Reason devices. A typical control surface will look similar to a mixer, and will have a number of knobs, faders, and buttons on it that can be used to control the virtual knobs, faders, and buttons in Reason. For Reason to detect a control surface, it must be a supported brand, and must be connected either directly to your computer via a USB cable or bidirectionally through a MIDI interface, with both MIDI in and out cables properly attached (Figure 2.16). Figure 2.16. This bidirectional MIDI setup connects a keyboard to a computer via a MIDI interface box. 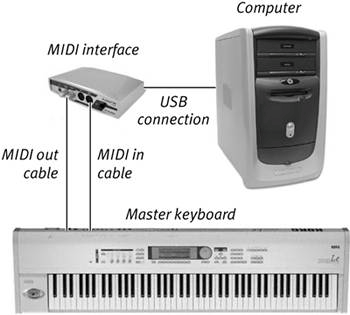
To detect control surfaces 1. | Select Preferences > Control Surfaces and Keyboards (in Mac, that's a submenu of the Reason menu).
| 2. | Click Auto-detect Surfaces (Figure 2.17).
Figure 2.17. Click the Auto-detect Surfaces button in the Preferences dialog. 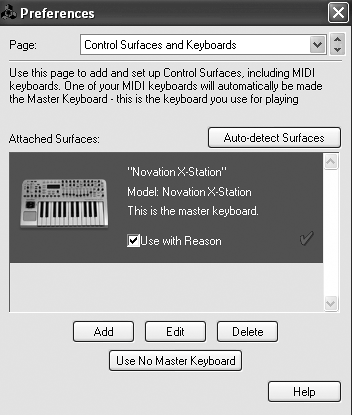
| 3. | To activate a surface for use in Reason, select the surface icon in the Attached Surfaces pane and click the Use with Reason check box (Figure 2.18).
Figure 2.18. Activate a surface in Reason by clicking the Use with Reason check box. 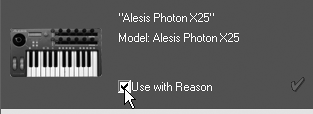
|
If you are not using a supported surface, or are using a unidirectional MIDI setup (MIDI out from your keyboard only), you can manually add your control surface. To manually add a control surface 1. | From the Control Surfaces and Keyboards page in the Preferences dialog, click the Add button (Figure 2.19).
Figure 2.19. Add a surface manually by clicking the Add button. 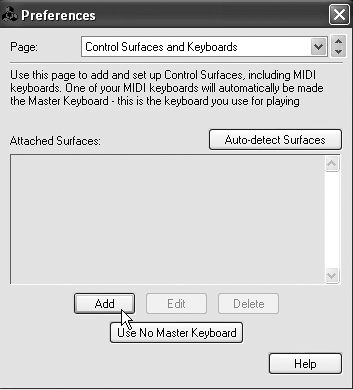
This will bring up the Control Surface edit window (Figure 2.20).
Figure 2.20. The Control Surface edit window lets you manually configure your control surface. 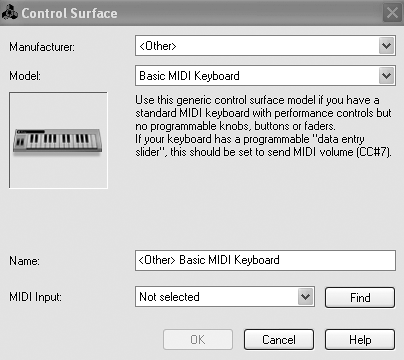
| 2. | Choose a manufacturer from the drop-down list, or select Other.
| 3. | Choose from the list of keyboard types, or choose Other (Figure 2.21).
Figure 2.21. Choose a generic keyboard type for an unsupported manufacturer. 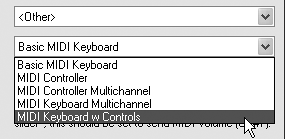
| 4. | If you are using Other, type in a name for your device (Figure 2.22).
Figure 2.22. Type whatever you want in the Name field. 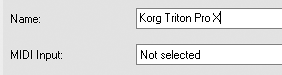
| 5. | Choose an input port for this device from the MIDI Input drop-down list (Figure 2.23).
Figure 2.23. Pick a MIDI input port from the list. 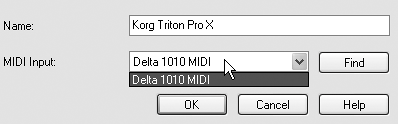
| 6. | If no MIDI input ports have been detected, follow the Find MIDI input procedure in the section "Using the Reason setup wizard" earlier in this chapter.
If no MIDI in ports are shown, make sure your keyboard is connected properly. If it is, you should be able to click Find and use the Find MIDI Input window again.
|
 Tip Tip
|