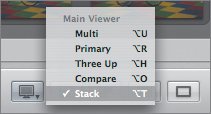
Choosing Image "Picks" Earlier we spent a lot of time organizing our images into carefully arranged stacks, and now it's time to explore the payoff for all of that hard work. In this section you'll learn how to use Aperture's comparison features to make quick work of selecting pick and alternate images from each stack. Remember, one of the goals of stacking images is to ultimately choose the best image (or pick) from each burst or sequence. These will be the images you'll take to the next stage of your workflow, be it editing, client approval, or final output. | | 1. | Select the first image in the Browser and then press Command-Option-S to switch to the Standard layout. Then, choose Stack from the Viewer Mode pop-up menu or press Option-T.
 In Stack Viewer mode, Aperture shows you the current pick on the left, bordered by an orange rectangle, and the second image in the stack on the right.
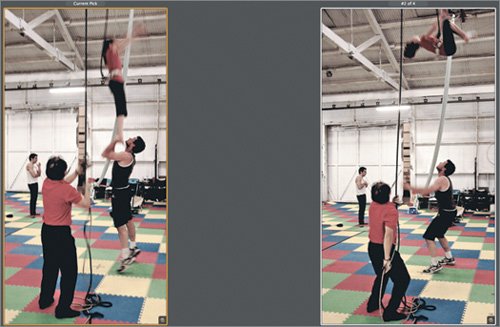 | 2. | Press the right arrow key. The right-hand image changes, but the pick image remains this same. With this mechanism, we can easily compare other images in the stack to the pick.
| 3. | Press the left arrow key to go back to the second image.
The second image in the stack is a better shot than the current pick, so we want to make it the pick.
| 4. | Press Command-\. Image number 2 becomes the new pick, the old pick falls to second place, and Aperture automatically selects the third image.
Come to think of it, the third image is even better.
| | | 5. | Press Command-\ to make the third (selected) image the pick.
Your images should now be in the following order:
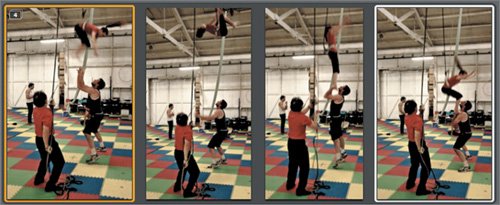 | 6. | Press the down arrow key. Aperture closes the stack you were just viewing and opens the next stack in the Viewer for you to evaluate.
 As you can see, Stack mode is designed to let you quickly navigate the individual images of a stack to make comparisons and select picks. It also makes it simple to jump from stack to stack as you finish your comparisons. As you can see, Stack mode is designed to let you quickly navigate the individual images of a stack to make comparisons and select picks. It also makes it simple to jump from stack to stack as you finish your comparisons.
|
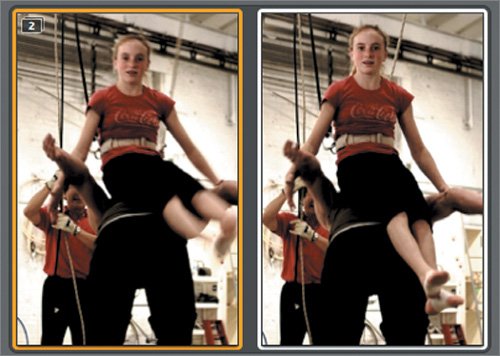
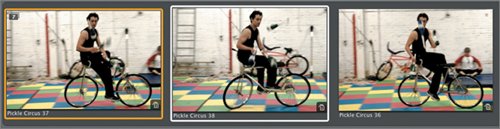
Promoting and Demoting Alternates In addition to selecting a pick from each stack, you might also want to order the remaining images so that the best alternates appear in descending order, left to right, from the pick. This makes it much easier to find a high-quality alternate image later if you need one. 1. | Find the stack of images of the juggling bicyclist.
| 2. | Select the first image in the stack. You should still be in Stack Viewer mode, so the stack pick should appear next to the first alternate image.
| 3. | The second image is better than the current pick, so press the right arrow key and then Command-\ to make it the new pick. Aperture will select the third image for comparison.
 The third image is not as good as the pick, but it's better than the second image, so let's promote it to the second position.
| | | 4. | Choose Stacks > Promote or press Command-[ to move the third image into second place.
 As you move through stacks selecting picks, you can promote alternate images in this way, and demote them by choosing Stacks > Demote or pressing Command-]. By promoting and demoting alternate images, you ensure that the images in your stacks are in descending order of quality, from best on the left to worst on the right. As you move through stacks selecting picks, you can promote alternate images in this way, and demote them by choosing Stacks > Demote or pressing Command-]. By promoting and demoting alternate images, you ensure that the images in your stacks are in descending order of quality, from best on the left to worst on the right.
| 5. | Press Option-U to return to Multi Viewer mode.
Note You can use the Promote and Demote commands in any view mode, and you can also use the Pick and Promote/Demote buttons at the top of Aperture's main window. |
Using Compare Mode Aperture provides one other Viewer mode, Compare mode, which is useful for comparing images in a stack and choosing picks and alternates. 1. | Select the following image:
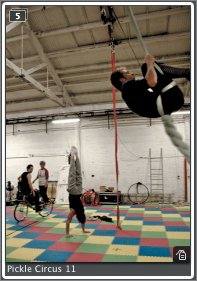 | 2. | Press Return. Aperture enters Compare mode, which has some similarities to and differences from the Stack mode you were just working in. In Compare mode, the selected image appears on the left, and the arrow keys let you cycle through images for comparison on the right.
| | | 3. | Select the third image in the stack, and press Command-\ to make it the new pick.
In Compare mode, as opposed to Stack mode, the leftmost image doesn't always show the pick. Instead, it shows whatever image you originally selected for comparison.
| 4. | Press the right arrow key to select the third image for comparison.
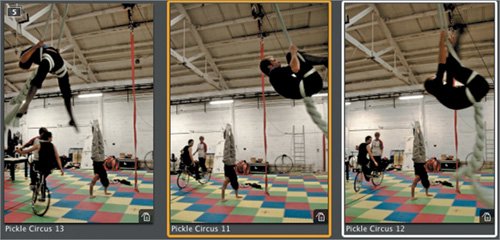 | 5. | Press Optionleft arrow. In Compare mode, you can use Option with the arrow keys to change the compare image, and the unmodified arrow keys to change the other image.
| 6. | Command-click the left image to exit Compare mode.
As in Stack mode, you can use the Promote and Demote commands to change the ranking of the images on the right. Compare mode also differs from Stack mode in that you can compare images from different stacks, or images that are not stacked at all.
|
Project Task Work your way through the rest of the stacks and select picks as desired. Keep in mind that you can zoom in to images or use the Loupe tool at any time for a closer look at image quality. |