| In addition to managing existing announcements, another administrative task is to add new ones. The records for announcements are straightforward and contain only two fields: one for the text and one for the date. The date information is stored in a date/time field in the data source; therefore, it must be properly formatted before it can be inserted. We'll use a bit of server-side validation to make sure our date is in the proper format; if it is not, we include code to trigger an error message. Step 1: Implement Add Announcement Design The first step is, of course, to create the basic page to hold the form and its elements. Create a basic dynamic page, either by hand or derived from a template.  In the InOutBoard folder, locate the folder for your server model and open the add_announcement page found there. In the InOutBoard folder, locate the folder for your server model and open the add_announcement page found there.
Add a table to the Content region of your page to contain the interface elements for the application. From the Snippets panel, drag the Recipes > InOutBoard > Wireframes > Add Announcement - Wireframe snippet into the Content editable region. Within the table, place another HTML table to hold the form and three elements: a text field, a text area, and a submit button. Be sure you leave space to hold a date validation error message. Place your cursor in the row below the words ADD ANNOUNCEMENT and insert the Recipes > InOutBoard > Forms > Add Announcement - Form snippet [r4-10].
Figure r4-10. 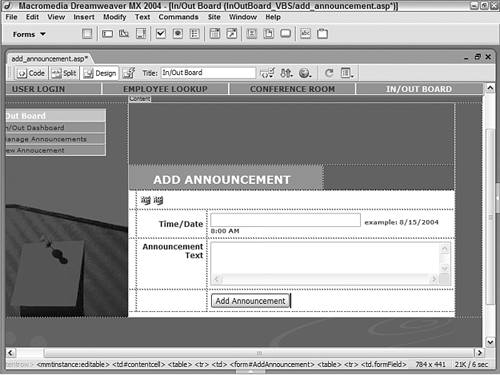
Step 2: Insert Record for Announcement After the user has entered the new announcement information and pressed the submit button, the Insert Record server behavior logic which we are about to apply takes over. For ASP From the Server Behaviors panel, choose Add (+) and select Insert Record. In the Insert Record dialog, select your connection from the list. Choose Recipes from the Connections list. Select the table in the data source to modify from the list. Choose Announcements from the Insert into Table list. Enter the path to the file you want the user to visit after the record has been updated in the After Inserting, Go To field. Choose Browse and locate the manage_announcement.asp file. Choose the form to use. Select AddAnnouncement from the Get Values From list. With the current form selected in the Get Values From list, set the form elements to their corresponding data source fields. Set the TimeAndDate form element to the AnnouncementDate data column and submit it as Date. Set the AnnouncementText form element to the AnnouncementText data column and submit it as Text. Verify your choices and click OK to close the dialog. Save the page.
For ColdFusion and PHP From the Server Behaviors panel, choose Add (+) and select Update Record. In the Update Record dialog, choose the current form. Select AddAnnouncement from the Submit Values From list. Select your data source from the list. Choose Recipes from the Data Source list. Enter your username and password, if needed. Select the table in the data source to insert into from the list. Choose Announcements (announcements for PHP) from the Insert Into Table list. Set the data source fields to their corresponding form elements. Make sure the AnnouncementID data column is set as an unused Primary Key. Set AnnouncementDate to the FORM.TimeAndDate form element and submit it as Date. Set AnnouncementDisplayed to not get a value. Set AnnouncementText to the FORM.AnnouncementText form element and submit it as Text.
Enter the path to the file you want the user to visit after the record has been inserted in the After Inserting, Go to field. Choose Browse and locate the manage_Announcement file for your server model. Verify your choices and click OK to close the dialog. Save the page.
Note Although the announcement record will be entered into the data source, it will not immediately appear on the In/Out Dashboard page. To ensure that only properly cleared announcements are seen, this application requires that the Display checkbox show as checked on the Manage Announcements page thus, as it is described in Web jargon, pushing the announcement live.
Step 3: Server-Side Form Validation Two separate code blocks need to be inserted to validate the user-entered date. One code block handles the processing and makes sure a valid date is received, and a second code block outputs an error message if a problem is found. The trick here is to place the error message code block first, so that the page is checked when it is first loaded. Place your cursor in the row below the Add Announcement label and above the Time/Date label and text field. Insert the following code: From the Snippets panel, open the Recipes > InOutBoard > Custom Code folder for your server model and insert the Date Error - Dynamic Text snippet. 
| [View full width] <% if (cStr(Request.QueryString("badDate")) <> "") Then Response.Write("The date you entered was not in the proper  format. Dates should be in the format mm/dd/yyyy. <br>(Use your browser's back button to edit your previous entry).")%> format. Dates should be in the format mm/dd/yyyy. <br>(Use your browser's back button to edit your previous entry).")%> | 
| [View full width] <%=(String(Request.QueryString("badDate")) != "undefined") ?"The date you entered was not in the proper format. Dates should be in the format mm/dd/yyyy. <br> (Use your browser's back button to edit your previous entry) .":""%> | 
| [View full width] <cfif isDefined("URL.badDate")>The date you entered was not in the proper format. Dates should be in the format mm/dd/yyyy . <br> (Use your browser's back button to edit your previous entry).</cfif> | 
| [View full width] <?php echo (isset($_GET['badDate']))?"The date you entered was not in the proper format. Dates should be in the format mm/dd/yyyy. <br>(Use your browser's back button to edit your previous entry).":""; ?> |
Now, we're ready to add the second code block to perform the date validation. In Code view, place your cursor at the top of the page, just after the connection code, if any. Insert the following code: From the Snippets panel, open the Recipes > InOutBoard Custom Code folder for your server model and insert the Server-side Date Validation snippet. The server-side data validation is a powerful bit of code that could easily be adapted to different applications. Test your page either by entering into Live Data view and adding the URL parameter badDate=true or by previewing in the browser and entering an improper date format [r4-11].
Figure r4-11. 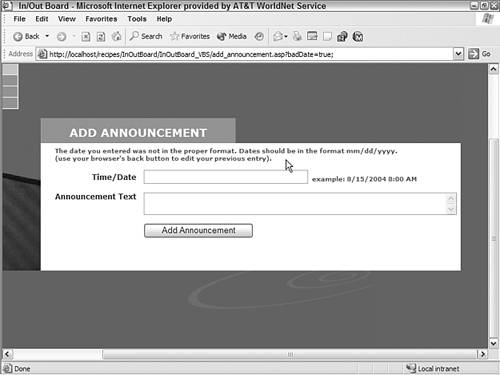
Save the page.
The entire application is now ready for testing and deployment. |