| Forgotten passwords are a fact of life in the modern world, and unless handled dynamically, they're an administrator's nightmare. With the page we are about to build, users enter their mailing address and request their password. The application responds by looking up their mailing address, and if a match is found, the password is emailed to the user. Setting Up for Server-Side Email ASP, ColdFusion, and PHP all use different mechanisms to handle email. A separate email component is necessary for ASP, and numerous commercial ones are available. One of the most common is called Microsoft CDONTS (an abbreviation for Collaboration Data Objects for Windows NT Server). The CDONTS component is standard on all Windows servers since IIS 4.0 and up to Windows XP server, which uses a newer version called CDOSYS. Coding for CDOSYS is slightly different from that for CDONTS; examples for both are included in this recipe. Although the component is included in most Windows servers, it might not be registered with the system. To register CDONTS, make sure cdonts.dll is included in the Windows directory that contains the other DLLs (on Windows 2000, [system drive letter]:\WINNT\system32). Then choose Start > Run and enter regsvr32 cdonts.dll in the Run dialog. The CDONTS component requires a valid SMTP server to successfully send the email. ColdFusion, on the other hand, includes the email component right out of the box, and no additional component is required. You do, however, need to specify a valid SMTP server. In ColdFusion MX, this setting is found by entering the Administrator and selecting Server Settings > Mail Server. With ColdFusion 5, it is located at Server Settings > Mail/Mail Logging. The mail() function is built into PHP, so the only configuration necessary is in the PHP.ini file. If the web space is hosted, the configuration is completed for you. However, if you're testing on your own development server, you'll need to adjust a couple of settings within the [mail function] section of the PHP.ini file. Windows users should set the SMTP setting to your mail server (that is, smtp.myisphost.com), and the sendmail_from variable should be entered as your email address. Macintosh users (connecting through Linux or Unix on OS X) need to set the sendmail_path variable to the location of the sendmail program on your system. You can locate this by opening a terminal window and entering whereis sendmail. |
Step 1: Implement Send Password Design We'll start by building the HTML page: Open a new dynamic page, either constructing one by hand or deriving one from a template.  In the UserLogin folder, locate the folder for your server model and open the send_password page found there. In the UserLogin folder, locate the folder for your server model and open the send_password page found there.
Add a table to the content region of your page to contain the interface elements for the application. From the Snippets panel, drag the Recipes > UserLogin > Wireframes > Send Password - Wireframe snippet into the Content editable region. Within the table, insert the form and any necessary form elements for the application. For this application, a single text field for entering the user's email address and a submit button are all that are needed. Place your cursor in the row below the words SEND PASSWORD in the second cell and insert the Recipes > UserLogin > Forms > Send Password - Form snippet [r1-16].
Figure r1-16. 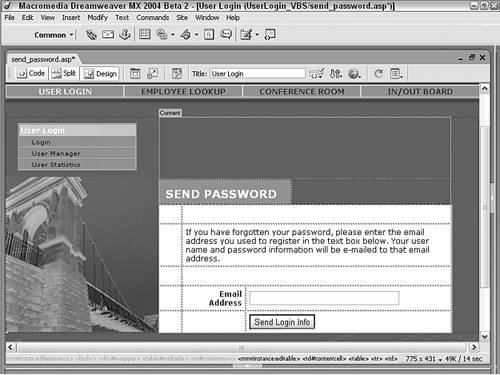
Step 2: Add Database Components For this application, the initial task is to find a match between the submitted email address and those entered in the database of registered users. If found, a single record the one that includes the submitted email address is returned to the recordset. This recordset will later be used to email the password to the user. For ASP and PHP From the Bindings panel, choose Add (+) and select Recordset (Query). If the simple view is displayed, select Advanced. Because we're defining SQL variables, the SQL must be hand-coded. Enter an appropriate name for the recordset. Enter LostPassword in the Name field. Choose your data source connection from the list. Select Recipes from the Connections list. Enter the following code in the SQL field: SELECT UserName, UserPassword FROM Users WHERE UserEmail = 'EmailParam' In the Variables section, select Add (+) and enter EmailParam under the Name column. Enter an email address that should be used if the email field is blank, such as Recipesadmin@idest.com in the Default column. In the Run-time Value column, enter code that gathers the data from the form field: 
| Request.Form("EmailAddress") | 
| Request.Form("EmailAddress") | 
| $_POST['EmailAddress'] |
Click OK to confirm your choices and insert the recordset. Save your page when the operation is complete.
Note Although I'm happy to accept your emails (idest.com is my domain name), you'd be better served by substituting your own administrator's address.
For ColdFusion From the Bindings panel, choose Add (+) and select Recordset (Query). If the simple view is displayed, select Advanced. Because we're defining SQL variables, the SQL must be hand-coded. In the Name field, enter an appropriate name. Enter LostPassword in the Name field. Choose your data source connection from the list. Select Recipes from the Data Source list. If necessary, enter the User Name and Password in their respective fields. Enter the following code in the SQL field: SELECT UserName, UserPassword FROM Users WHERE UserEmail = '#FORM.EmailAddress#' In the Page Parameters section, select Add (+) to display the Add Parameter dialog. In the Add Parameter dialog, make sure FORM.EmailAddress in displayed in the Name field. In the Default Value fields, enter an email address that should be used if the email field is blank, such as Recipesadmin@idest.com, and click OK to close the Add Parameter dialog. When you're done, click OK to close the Recordset dialog.
Note I'm sure the administrator would appreciate it if you substituted his or her email address rather than using mine.
Step 3: Insert Confirmation Message Our next action is to create a custom error message that displays if the login fails. By keeping the error message on the same page, we simplify the user experience. Place the cursor where you'd like the error message to appear. Put the cursor in the row above the Email Address form element. Add the following error message code: From the Snippets panel, open the Recipes > UserLogin > Custom Code folder for your server model and insert the Send Email Confirmation Message snippet.
| <%=ConfirmMessage%> |
| <%=ConfirmMessage%> | 
| <cfoutput>#ConfirmMessage#</cfoutput> |
| <?php echo $ConfirmMessage; ?> |
If you entered the code by hand in Code view, be sure to remove the nonbreaking space character, .
ColdFusion users also need to add a CFParam to the page that sets the ConfirmMessage variable to an empty string. From the Bindings panel, select Add (+) and choose CFParam. In the CFParam dialog, enter ConfirmMessage in the Name field. Be sure to leave the Default field blank and click OK to close the dialog.
The new CFParam is displayed in the Bindings panel. Step 4: Add Logic to Send Email With the recordset defined, we're ready to verify it and send the email. The first coding task is to make sure that the recordset is not empty, meaning that a match was found to the submitted email address. After that has been verified, the email will be sent and a confirmation message displayed. For ASP Select the LostPassword recordset from the Server Behaviors panel to highlight the recordset. In Code view, add a line break immediately after the recordset. Which of the following two steps you take depends on whether your system uses CDONTS (primarily Windows 2000 servers) or CDOSYS (Windows XP Pro and Windows 2003 servers). Insert the following code for CDONTS-based email: From the Snippets panel, open the Recipes > UserLogin > Custom Code folder for your server model and insert the Send Email - CDONTS. As you might note, the newMail.send() method takes four arguments: the sender's email address, the destination email address, the subject, and the body of the message. The code block also contains a confirmation message that displays on the user's screen after the email has been sent. Customize the code containing the sender's email address (which now reads "usermanager@yourcompany.com") and the subject line ("Re:Your MyCompany Login Information"). Insert the following code for CDOSYS-based email: From the Snippets panel, open the Recipes > UserLogin > Custom Code folder for your server model and insert the Send Email CDOSYS snippet. For CDOSYS, you'll need to customize the smtpserver setting (in the snippet as smtp.mycompany.com) to your own, as well as the sysMail.From email address (in the snippet as usermanager@yourcompany.com). Save the page as send_password.asp.
For ColdFusion In Code view, place a line break above the <html> tag and below the </cfquery> tag. Insert the following code: From the Snippets panel, open the Recipes > UserLogin > Custom Code folder for your server model and insert the Send Email snippet. Customize the from, subject, and if you like, ConfirmMessage variable values. Be sure not to alter any code containing data source fields. Save your page.
For PHP In Code view, place a line break above the <html> tag. Insert the following code: From the Snippets panel, insert the Recipes > UserLogin > Custom Code_PHP > Send Email snippet. Customize the from, subject, and if you like, ConfirmMessage variable values. Be sure not to alter any code containing data source fields. Save your page.
|