3.2. Displaying Web Documents
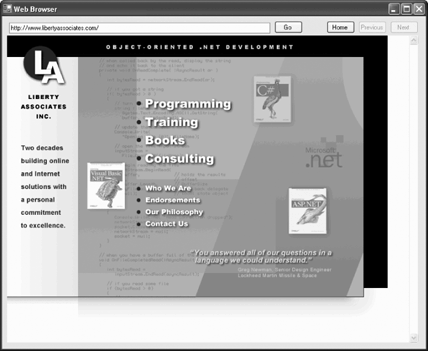
| Create a new form and name it frmWeb. Resize the form to 800,700 and drag a Web Browser from the Toolbox onto the new form. You'll find that it fills the form. Click on the smart tab and click on the "Undock in parent container" link, as shown in Figure 3-4. Figure 3-4. Undock the web formShrink the web form down just enough to add a text box (which you'll name txtURL) and four buttons (btnGo, btnHome, btnPrevious, and btnNext), as shown in Figure 3-5. Figure 3-5. Designing the web browser 3.2.1. Setting Web Browser Event HandlersIt would be useful to disable the Previous button when it is not possible to go back any further, and to disable the Next button when there is no next page. The Web Browser has two properties (CanGoBack and CanGoForward ) that you can test. Rather than testing these every time the form is navigated, it's more efficient to respond to the events that fire when these properties change CanGoBackChanged and CanGoForwardChanged as shown in Example 3-4. Example 3-4. CanGoBackChanged and CanGoForward event handlersPrivate Sub WebBrowser1_CanGoBackChanged( _ ByVal sender As System.Object, _ ByVal e As System.EventArgs) Handles WebBrowser1.CanGoBackChanged btnPrevious.Enabled = WebBrowser1.CanGoBack End Sub Private Sub WebBrowser1_CanGoForwardChanged( _ ByVal sender As System.Object, _ ByVal e As System.EventArgs) Handles WebBrowser1.CanGoForwardChanged btnNext.Enabled = WebBrowser1.CanGoForward End Sub In addition, you'll handle the Navigating event from the browser to set the cursor to a Wait cursor while the page is loading (see Example 3-5). Example 3-5. Navigating event handlerPrivate Sub WebBrowser1_Navigating( _ ByVal sender As System.Object, _ ByVal e As System.Windows.Forms.WebBrowserNavigatingEventArgs) _ Handles WebBrowser1.Navigating Me.Cursor = Cursors.WaitCursor End Sub Finally, you'll handle the Navigated event, which fires once the new page is loaded, as shown in Example 3-6. Example 3-6. Navigated event handlerPrivate Sub WebBrowser1_Navigated( _ ByVal sender As System.Object, _ ByVal e As System.Windows.Forms.WebBrowserNavigatedEventArgs) _ Handles WebBrowser1.Navigated Me.txtURL.Text = Me.WebBrowser1.Url.ToString( ) Me.Cursor = Cursors.Default End Sub As you can see, once the page is loaded, you load its URL into txtURL and you reset the cursor to the default. You change the URL in the Navigated event in case the user has navigated through hyperlinks (so that the text box is kept up to date). There are a number of ways to set the initial URL for the browser. You can set the URL property of the browser, or you can set the initial URL programmatically. You'll choose the latter, because you want to use the same address for the Home button. To make this work, you'll add a constant member of the frmWeb class that was declared for you by Visual Studio 2005 in the code file for the form: Const home As String = "http://www.libertyassociates.com" Next, navigate to that location in the form's Load event handler, as shown in Example 3-7. Example 3-7. Web form Load event handler Private Sub frmWeb_Load( _ ByVal sender As System.Object, _ ByVal e As System.EventArgs) _ Handles MyBase.Load Me.WebBrowser1.Navigate(home) Me.btnNext.Enabled = False Me.btnPrev.Enabled = False End Sub The bold code, which calls the Navigate( ) method on the WebBrowser control, causes the web browser to open to the home page (and to disable the Next and Previous buttons), as shown in Figure 3-6. Figure 3-6. Web browser home page
A number of event handlers will all do the same thing: tell the web browser to navigate to whatever URL is in the text box. So factor that logic out to a helper method of the frmWeb class, as shown in Example 3-8. Example 3-8. GoToURL helper class Private Sub GoToURL( ) If Not Me.txtURL.Text.Equals("") Then Me.WebBrowser1.Navigate(Me.txtURL.Text) End If End Sub Notice that if the URL text is blank, the method does nothing, but if the user navigates to a new page, that new page is shown in the text box. If the user enters a URL in the text box and then hits tab (to leave the URL text box), you'll want to invoke the GoToURL method. The same logic will apply if the user presses the Go button, so you'll want to handle both events in the Leave event handler shown in Example 3-9. Example 3-9. Leave event handler Private Sub TextBox1_Leave( _ ByVal sender As System.Object, _ ByVal e As System.EventArgs) _ Handles txtURL.Leave, btnGo.Click GoToURL( ) End Sub
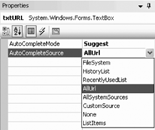
Finally, if the user enters a URL and presses the Enter key, you'll want to take that as a signal to go to the URL as well. To do so, you'll examine each key pressed in the TextBox to see if it is the enter key in the KeyUp event handler shown in Example 3-10. Example 3-10. KeyUp event handler Private Sub TextBox1_KeyUp( _ ByVal sender As System.Object, _ ByVal e As System.Windows.Forms.KeyEventArgs) Handles txtURL.KeyUp If e.KeyCode = Keys.Enter Then GoToURL( ) End If End Sub 3.2.2. Adding an Auto-Complete Text Box to Navigate URLsThe text box should display all the URLs that match the text you've begun to type (this is how Internet Explorer behaves, why not you?) That turns out to be easy, thanks to two properties of the text box control: AutoCompleteMode and AutoCompleteSource, as shown in Figure 3-7. Figure 3-7. Text box properties The AutoCompleteMode may be Suggest, Append, or SuggestAppend (or none). Suggest provides a drop down (see Figure 3-8), Append attempts to complete the listing for you. Whatever mode you choose, you must also tell the text box where to get the data to use to try to complete your entry. Your choices are shown in Figure 3-7. For this example, select Suggest for AutoCompleteMode, and AllUrl for AutoCompleteSource. As the user enters text, the auto-complete box provides suggested matches, as shown in Figure 3-8 Figure 3-8. Text box with URL history Clicking on a choice in the text box causes the browser to navigate to the selected page, as shown in Figure 3-9.[*]
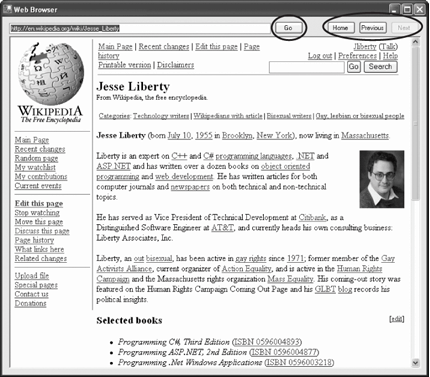
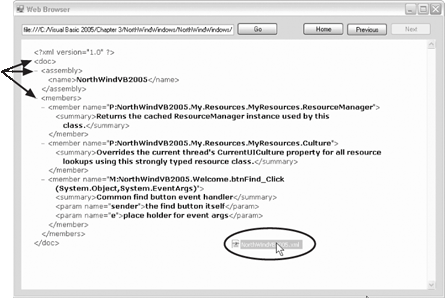
As the user follows links, the txtURL text box is updated and the Next and Previous buttons will be enabled or disabled as appropriate. The WebBrowser control keeps track of its own history, so implementing the Next and Previous buttons' event handlers is fairly trivial, as shown in Example 3-11. Figure 3-9. Using buttons and events in browsing Example 3-11. Next and Previous button Click event handlersPrivate Sub btnPrev_Click( _ ByVal sender As System.Object, _ ByVal e As System.EventArgs) _ Handles btnPrev.Click Me.WebBrowser1.GoBack( ) End Sub Private Sub btnNext_Click( _ ByVal sender As System.Object, _ ByVal e As System.EventArgs) _ Handles btnNext.Click Me.WebBrowser1.GoForward( ) End Sub You can now navigate from page to page, and move back and forth through the pages you've seen. Finally, the browser has a method GoHome that takes you to the URL marked as Home in Internet Explorer. Example 3-12 shows the implementation for the Home button Click event. Example 3-12. Home button Click event handler Private Sub btnHome_Click( _ ByVal sender As System.Object, _ ByVal e As System.EventArgs) Handles btnHome.Click Me.WebBrowser1.GoHome( ) End Sub 3.2.3. Displaying XML documentsOne very powerful reason for having a web browser built into your application is to enable users to XML documents. The web browser automatically understands the hierarchical structure of such documents. 3.2.4. Using Drag and DropTo see an XML document in your browser, you can locate the document in Windows Explorer and then just drag and drop it onto the Web Browser control (as shown in the circled area in Figure 3-10). When you drop the document in the browser, it is displayed and the Navigated event fires. As shown earlier, this causes the URL of the XML document to appear in the text box above the browser, as shown in Figure 3-10. Figure 3-10. Viewing XML documents
|
EAN: 2147483647
Pages: 162
