6.1 Code-Behind
| In traditional ASP, the interweaving of script with HTML can produce source control nightmares and difficult-to-maintain ASP pages. ASP.NET addresses this problem by giving programmers the ability to separate the executable code from the presentation code. You write the HTML in a page file (with a .aspx extension), and you write the C# or VB.NET code in the code-behind file (with a .cs or .vb extension, depending on its language), which is another way of saying the "code file behind the form." In the code-behind file, you create a class (which can be any class derived from the Page class) that serves as the base class for the web page you create in the .aspx file. This relationship between your class and the web page is established by a Page directive at the top of the .aspx file: <%@ Page inherits="CodeBehindDemo" %> The inherits attribute identifies the class created in the code-behind file from which this .aspx file will derive. When a web form is compiled, its page is parsed and a new class is generated and compiled. This new class derives from the class identified in the inherits keyword, which in turn derives from System.Web.UI.Page. Now the only question is, "How does the compiler know where to find this code-behind file class to derive from?" The answer depends on whether or not you are working in the Visual Studio .NET (VS.NET) IDE or using a text editor to work directly with the source files. If you're working in the VS.NET IDE, then the development environment will automatically pre-compile the class in the code-behind file and use the inherits attribute to point to that class. The .dll file that is created is placed in the \bin subdirectory in the application virtual directory. You will notice that VS.NET also puts a codebehind attribute in the Page directive, which points to the code-behind file. The codebehind attribute is used to keep track of the code-behind file so that as you make changes to the page, VS.NET can make the appropriate changes to the code-behind file. Using VS.NET will be covered in more detail later in this chapter. If you are not using a development environment such as VS.NET, but rather editing the files directly in a text editor, then you need to include the src attribute in the Page directive to identify the file containing the class specified in the inherits attribute for the JIT compiler: <%@ Page inherits="CodeBehindDemo" src="/books/2/655/1/html/2/CodeBehind.cs" %> If the src string does not include a fully qualified path, then the compiler assumes that the file is in the same directory as the .aspx file. If the src attribute is missing, then the compiler will look in the \bin subdirectory of the application virtual directory for a .dll that contains the class marked with the inherits attribute. In order to convert an .aspx file from in-line code to code-behind, you need to make modifications both to the .aspx file as well as to the code-behind file, as follows:
To better understand code-behind, modify one of the Calendar examples from Chapter 5 (Example 5-43 in C# or Example 5-44 in VB.NET) to use code-behind. These modifications will entail removing the entire script block and changing the Page directive in the .aspx file, and creating a code-behind file that essentially contains the excised script block. The easiest way to accomplish this is to copy the .aspx file twice: once to the file to use for the new .aspx file and once to the file to use for the code-behind file. Then edit each of those new files. In this example, the original Calendar example .aspx files will be copied and renamed as shown in Table 6-2.
It is important that the code-behind file have the correct file extension. This tells the framework which compiler to use to compile the code-behind file. Valid file extensions are:
Example 6-1 shows the .aspx file modified to use code-behind for C#. Since the HTML is exactly the same in both C# and VB.NET, Example 6-2 shows only the Page directive for the VB.NET version. Example 6-1. Code-behind page using C#, csCodeBehind.aspx<%@ Page inherits="CodeBehindDemo" src="/books/2/655/1/html/2/CodeBehind.cs" %> <html> <body> <form runat="server"> <h1>ASP Controls</h1> <h2>Calendar Control</h2> <h2>More Selections</h2> <asp:Calendar SelectionMode="DayWeekMonth" ShowGridLines="true" ShowNextprevMonth="true" CellPadding="7" CellSpacing="5" DayNameFormat="FirstTwoLetters" FirstDayOfWeek="Monday" NextPrevFormat="CustomText" NextMonthText="Next >" PrevMonthText="< Prev" onSelectionChanged="SelectionChanged" DayHeaderStyle-BackColor="Black" DayHeaderStyle-ForeColor="White" DayHeaderStyle-Font-Name="Arial Black" runat="server" > <DayStyle BackColor="White" ForeColor="Black" Font-Name="Arial" /> <NextPrevStyle BackColor="DarkGray" ForeColor="Yellow" Font-Name="Arial" /> <OtherMonthDayStyle BackColor="LightGray" ForeColor="White" Font-Name="Arial" /> <SelectedDayStyle BackColor="CornSilk" ForeColor="Blue" Font-Name="Arial" Font-Bold="true" Font-Italic="true"/> <SelectorStyle BackColor="CornSilk" ForeColor="Red" Font-Name="Arial" /> <TitleStyle BackColor="Gray" ForeColor="White" HorizontalAlign="Left" Font-Name="Arial Black" /> <TodayDayStyle BackColor="CornSilk" ForeColor="Green" Font-Name="Arial" Font-Bold="true" Font-Italic="false"/> <WeekendDayStyle BackColor="LavenderBlush" ForeColor="Purple" Font-Name="Arial" Font-Bold="false" Font-Italic="false"/> </asp:Calendar> <br/> <asp:Label runat="server" /> <br/> <asp:Label runat="server" /> <br/> <asp:Label runat="server" /> <br/> <table> <tr> <td> Select a month: </td> <td> <asp:DropDownList id= "ddl" AutoPostBack="true" onSelectedIndexChanged = "ddl_SelectedIndexChanged" runat="server"> <asp:ListItem text="January" value="1" /> <asp:ListItem text="February" value="2" /> <asp:ListItem text="March" value="3" /> <asp:ListItem text="April" value="4" /> <asp:ListItem text="May" value="5" /> <asp:ListItem text="June" value="6" /> <asp:ListItem text="July" value="7" /> <asp:ListItem text="August" value="8" /> <asp:ListItem text="September" value="9" /> <asp:ListItem text="October" value="10" /> <asp:ListItem text="November" value="11" /> <asp:ListItem text="December" value="12" /> </asp:DropDownList> </td> <td> <asp:Button text="TGIF" onClick="btnTgif_Click" runat="server" /> </td> </tr> </table> </form> </body> </html> Example 6-2. Code-behind page directive using VB.NET, vbCodeBehind.aspx<%@ Page inherits="CodeBehindDemo" src="/books/2/655/1/html/2/CodeBehind.vb" %> In Example 6-1 and Example 6-2, the only changes necessary from the original .aspx file are to remove the script block entirely and modify the Page directive. The Page directive modifications are intended to:
Example 6-3 shows the code-behind file for C#. Example 6-3. CodeBehind.csusing System; using System.Web; using System.Web.UI; using System.Web.UI.WebControls; public class CodeBehindDemo : Page { protected Calendar cal; protected Label lblCount; protected Label lblTodaysDate; protected Label lblSelected; protected DropDownList ddl; // This Page_Load makes the selected days visible first time // the TGIF button is clicked by initializing the VisibleDate // property. protected void Page_Load(Object sender, EventArgs e) { if (!IsPostBack) { cal.VisibleDate = cal.TodaysDate; ddl.SelectedIndex = cal.VisibleDate.Month - 1; } lblTodaysDate.Text = "Today's Date is " + cal.TodaysDate.ToShortDateString( ); } protected void SelectionChanged(Object sender, EventArgs e) { lblSelectedUpdate( ); lblCountUpdate( ); } protected void ddl_SelectedIndexChanged(Object sender, EventArgs e) { cal.SelectedDates.Clear( ); lblSelectedUpdate( ); lblCountUpdate( ); cal.VisibleDate = new DateTime(cal.TodaysDate.Year, Int32.Parse(ddl.SelectedItem.Value), 1); } protected void btnTgif_Click(Object sender, EventArgs e) { int currentMonth = cal.VisibleDate.Month; int currentYear = cal.VisibleDate.Year; cal.SelectedDates.Clear( ); for (int i = 1; i <= System.DateTime.DaysInMonth(currentYear, currentMonth); i++ ) { DateTime date = new DateTime(currentYear, currentMonth, i); if (date.DayOfWeek == DayOfWeek.Friday) cal.SelectedDates.Add(date); } lblSelectedUpdate( ); lblCountUpdate( ); } private void lblCountUpdate( ) { lblCount.Text = "Count of Days Selected: " + cal.SelectedDates.Count.ToString( ); } private void lblSelectedUpdate( ) { if (cal.SelectedDate != DateTime.MinValue) lblSelected.Text = "The date selected is " + cal.SelectedDate.ToShortDateString( ); else lblSelected.Text = ""; } } Example 6-3 shows several changes from the original code in the inline script block:
Example 6-4 shows the code-behind file for VB.NET. It makes the same functional changes as for the C# file, with only syntactic changes. Example 6-4. CodeBehind.vbImports System Imports System.Web Imports System.Web.UI Imports System.Web.UI.WebControls public class CodeBehindDemo Inherits Page protected cal as Calendar protected lblCount as Label protected lblTodaysDate as Label protected lblSelected as Label protected ddl as DropDownList ' This Page_Load makes the selected days visible first time ' the TGIF button is clicked by initializing the VisibleDate ' property. protected sub Page_Load(ByVal Sender as Object, _ ByVal e as EventArgs) if not IsPostBack then cal.VisibleDate = cal.TodaysDate ddl.SelectedIndex = cal.VisibleDate.Month - 1 end if lblTodaysDate.Text = "Today's Date is " & _ cal.TodaysDate.ToShortDateString( ) end sub protected sub SelectionChanged(ByVal Sender as Object, _ ByVal e as EventArgs) lblSelectedUpdate( ) lblCountUpdate( ) end sub protected sub ddl_SelectedIndexChanged(ByVal Sender as Object, _ ByVal e as EventArgs) cal.SelectedDates.Clear( ) lblSelectedUpdate( ) lblCountUpdate( ) cal.VisibleDate = new DateTime(cal.TodaysDate.Year, _ Int32.Parse(ddl.SelectedItem.Value), 1) end sub protected sub btnTgif_Click(ByVal Sender as Object, _ ByVal e as EventArgs) dim currentMonth as integer = cal.VisibleDate.Month dim currentYear as integer = cal.VisibleDate.Year cal.SelectedDates.Clear( ) dim i as integer for i = 1 to System.DateTime.DaysInMonth(currentYear, currentMonth) dim dt as DateTime = new DateTime(currentYear, currentMonth, i) if dt.DayOfWeek = DayOfWeek.Friday then cal.SelectedDates.Add(dt) end if next lblSelectedUpdate( ) lblCountUpdate( ) end sub private sub lblCountUpdate( ) lblCount.Text = "Count of Days Selected: " & _ cal.SelectedDates.Count.ToString( ) end sub private sub lblSelectedUpdate( ) if (cal.SelectedDate <> DateTime.MinValue) then lblSelected.Text = "The date selected is " & _ cal.SelectedDate.ToShortDateString( ) else lblSelected.Text = "" end if end sub end class When either Example 6-1 or Example 6-2 is run, the relevant using the code-behind pages from Example 6-3 or Example 6-4, the result shown in Figure 6-1 is identical to the result produced by the inline code of Example 5-43 and Example 5-44 and shown in Figure 5-24. Figure 6-1. Code-behind from Example 6-1 or Example 6-2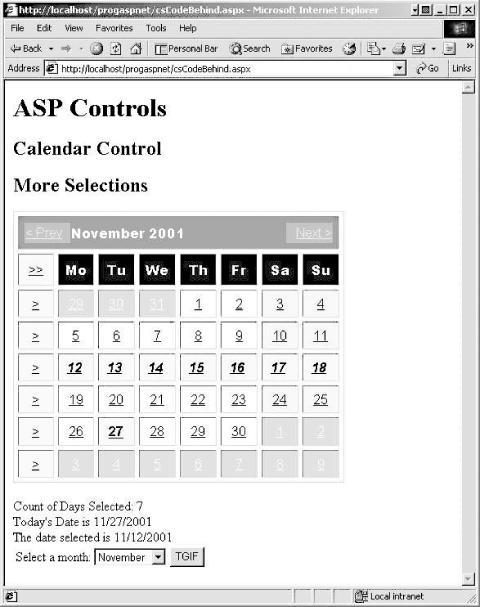 |

EAN: 2147483647
Pages: 156