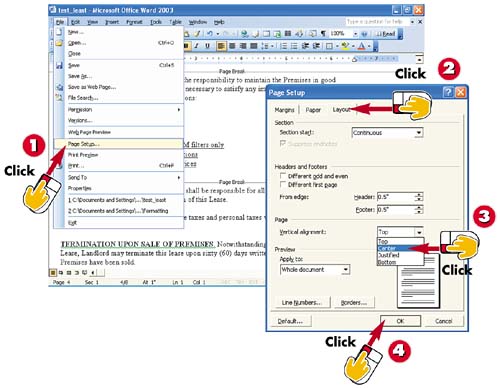
Open the File menu and select Page Setup to open the Page Setup dialog box. (Be sure the cursor is in the page you want to center.)
Select the Layout tab.
In the Page area, click the down arrow next to the Vertical Alignment field and select Center from the list.
Click OK and your document will be centered on the page. (You cannot see this in Normal view.)
INTRODUCTION
Have you ever wanted to quickly center information on a page, but it took you forever? Well, Word has a page-settings option that allows you to center your text or graphics on the page immediately. Keep in mind that this option affects all the pages in your document, unless you insert a "next page" section break (refer to the task "Inserting a Section Break" earlier in this part) and return the document-centering option back to the default setting (top).
TIP
Centering One Page
If you want to have only one page centered and the pages before and/or after it to be regular (default to top), make sure you insert a next page section break before and after the section of text you want to center on the page.
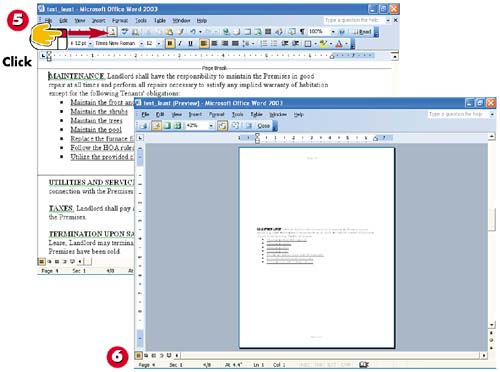
Click the Print Preview button on the Standard toolbar.
In Print Preview, you can see what your centered page will look like.
HINT
Adding a Page Border
Choose Format, Borders and Shading to open the Borders and Shading dialog box; click the Page Border tab. Select from the Setting and Style options as to how you want the border to look, and click OK.
TIP
Adding a Watermark
Choose Format, Background, Printed Watermark to open the Printed Watermark dialog box. Select whether you want the watermark to be a picture or text (click the Text field to choose from the default watermark text options) and click OK. Click the Print Preview button on the Standard toolbar to see what your watermark will look like.