Exploring Resource Creation Tools
The following sections briefly discuss the tools you can use to create resources. For your purposes, you only need a text file, ResGen, and Assembly Linker, but I provide you with enough information to find out about the other tools available to you.
Using ResGen
ResGen is probably the most useful tool for creating .resources files. A file with the extension of .resources is the file that contains the binary information for displaying localized resources. ResGen can take a .txt file and convert it to a .resx, which is an Extensible Markup Language (XML) Resource File, or a .resources file. It can convert a .resx file to a .resources file or a .txt file, and it can convert a .resources file into a .resx or .txt file.
| Caution | If you use ResGen to reverse a .resources file to a .txt file, any image or audio data will be lost. An entry describing the resource will display in the text file, but there will be no associated data. |
So, how do you create the text file that will be used as an input to ResGen, and what format does it take? Well, hopefully you do not need help creating a text file. There are only two formats that can be used in the file: the first is a comment, and the second is the resource information. The following are examples of both:
Comment: ;This is a comment and MUST come at the beginning of a line ; comments start with a semi-colon. Resource: COURTESY = Hello Mr. Smith
Again, the comment must come at the beginning of a line. If you put it at the end of the line, it will be included as part of the resource string. The format for a resource string is pretty straightforward as it is a name-value pair. You must separate the name and value with an equals (=) sign. The capitalization of the name is a naming convention and makes it easier to see what you are retrieving in your code.
| Note | Comments are for your use only. They are not compiled into the resource and therefore are not decompiled if you use ResGen to convert a .resources file to a .txt file. |
Some people may find creating a .resx file a little easier because it is created through an editor. To demonstrate this, start a new Visual Basic .NET (VB .NET) console application (the name of the project is unimportant). Select Project Add New Item and select the Assembly Resource File template. Call the file MyResourceTest.resx. You will see the screen shown in Figure 13-1, which is a grid for entering resource information.
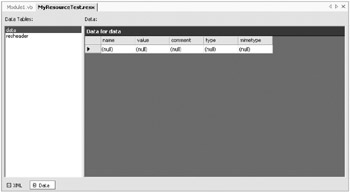
Figure 13-1: MyResourceTest resource editor
To demonstrate how ResGen works, enter the name FIRST_NAME and the value First Name. The data is stored in XML format, which you can see if you switch to the XML view. Save the file and exit the project.
| Tip | The easiest way to perform this next step is to copy the ResGen.exe file to the local directory or set the path environment variable so that it points to the folder that contains the ResGen.exe application. If you are using .NET 1.1 it will be located in the folder \Microsoft Visual Studio .NET 2003\SDK\v1.1\Bin. If you are using .NET 1.0, it will be located in the folder \Microsoft Visual Studio .NET\FrameworkSDK\bin. |
Switch to the command line and type in the following command:
Resgen.exe MyResourceTest.resx MyResourceTest.resources
You should receive output identical to this:
Read in 1 resources from 'MyResourceTest.resx' Writing resource file... Done.
To reverse engineer it into a text file, simply set the input file as the resource file and the output file as a .txt file.
Using Assembly Linker
Assembly Linker creates a satellite assembly from a .resources file. This application can also generate multifile assemblies. It has considerably more power than the assembly capabilities of the Visual Studio .NET Integrated Development Environment (IDE), and a detailed explanation is beyond the scope of this chapter. You will use this utility to turn your .resources file into an assembly that can be consumed by your application.
Using the IDE Forms Designer
The IDE Forms Designer allows you to create one form per language. This gives you the advantage of not having to create labels, command buttons, and other controls that are larger than necessary. Each of the forms is packaged into its own assembly with other forms of the same language. The disadvantage to this of course is that depending on the number and complexity of the forms, your application, with all of its assemblies, may become much larger in size.
| Note | For additional information on this, see the MSDN help topic "Walkthrough: Localizing Windows Forms." |
Using WinRes
The WinRes editor is a tool that is external to the .NET IDE (it is a subset of the .NET IDE) that is designed to edit form resources (.resx files that contain physical information about a form). You cannot write code within WinRes or do anything else except modify physical properties of the form. Most importantly, you can modify the text in controls. To use the WinRes editor, you must set the Localizable property of the form to True. Figure 13-2 shows the WinRes editor. You can see from the list of available properties for the selected button that you only have access to a subset of the properties.
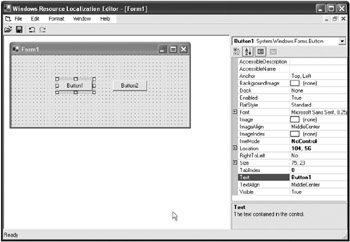
Figure 13-2: The WinRes editor
You can find the WinRes editor in the same folder as ResGen.
EAN: 2147483647
Pages: 148