Flylib.com

Books Software


Other Neat Tricks with Images


Other Neat Tricks with Images

Now that you've learned about inline images, images as links, and how to wrap text around images, you know what most people do with images on web pages. But you can play with a few newer tricks as well.

All the attributes in this section were originally Netscape extensions. They were later incorporated into HTML 3.2, but most have been deprecated in its successor, HTML 4.01.

Image Dimensions and Scaling

Two attributes of the <img> tag, height and width , specify the height and width of the image in pixels. Both became part of the HTML 3.2 specification, but they're deprecated in HTML 4.01 in favor of style sheets.

If you use the actual height and width of the image in these attributes (which you find by opening the image file directly in your browser), some older browsers will load and display your web pages much faster than if you don't include the values.

Why? Old browsers (Netscape 4 and Internet Explorer 3) couldn't alter the layout of pages as they were being loaded, so the size of every element on the page had to be determined before the page could be displayed. These days, browsers can resize elements on the fly so users don't have to wait for images to download before the page can be displayed. Even so, providing the proper height and width can help your pages render a bit more smoothly, so you should still include them if possible.

Tip

Not only will browsers usually tell you the size of any image you open (in the title bar of the browser window). Just about any application that lets you view or edit image files will display the dimensions of an image as well.


If the values for width and height are different from the actual width and height of the image, your browser will resize the image to fit those dimensions. Because smaller images take up less disk space than larger images and therefore take less time to transfer over the network, you can just create a smaller version and then scale it to the dimensions you want on your web page. The downside of this technique is that the imagescaling algorithms built into browsers are not always the best. If you use the height and width attributes to change the size of an image, be prepared for it to look pretty bad, especially if the aspect ratio is not preserved (in other words, you take a 100-by-100 pixel image and expand it into a 200-by-400 pixel image).

Caution

Don't perform reverse scaling creating a large image and then using width and height to scale it down. Smaller file sizes are better because they take less time to load. If you're going to display a small image, make it smaller to begin with.


More About Image Borders

You learned about the border attribute of the <img> tag as part of the section on links, where setting border to a number or to determined the width of the image border (or hid it entirely).

By default, images that aren't inside links don't have borders. However, you can use the border attribute to include a border around any image, as follows :


<p><img src="eggplant.gif" alt="Eggplant" align="left" border="5"


width="102" height="178" />

This is an eggplant. We intend to stay a good ways away from it,
because we really don't like eggplant very much.

</p>


Figure 7.28 shows an image with a border around it.

Figure 7.28. An image border.
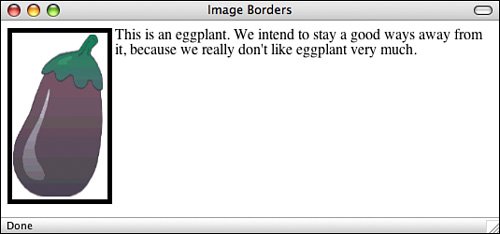


Using Color

As you've seen, one way to add a splash of color to the black, gray, and white on your web pages is to add images. However, several HTML attributes enable you to change the colors of the page itself, including changing the background color, changing the color of the text and links, and adding spot color to individual characters .

In this section, you'll learn how to make all these changes in HTML 3.2. However, as is the case with most of the presentational attributes we've covered thus far, color attributes are deprecated in HTML 4.01 in favor of style sheets. You'll learn more about the style sheet approach in Lesson 9.

Specifying Colors

Before you can change the color of any part of an HTML page, you have to know what color you're going to change it to. You can specify colors using the color extensions to HTML in two ways:

  • Using a hexadecimal number representing that color

  • Using one of a set of predefined color names

The most flexible and widely supported method of specifying a color is to use the numeric identifier. Most image-editing programs have what's called a color picker a tool for choosing a single color from a range of available colors. Some color pickers display the value of that color in RGB form as three numbers representing the intensity of red, green, and blue in that color. Each number is usually 0 to 255, with 0 0 0 being black and 255 255 255 being white. If you use one of these tools, you'll have to convert the decimal numbers to hexadecimal. These days, most tools with color pickers also provide the hexadecimal values for red, green, and blue, which is what web browsers require. In fact, the color picker that's built into the Mac OS includes the hexadecimal values to make things easy on web publishers.

The final hex number you need is all three numbers put together with a hash sign ( # ) at the beginning, as in the following:

#000000
#de04e4
#ffff00


Netscape and Internet Explorer support a much easier way of indicating colors. Rather than using arcane numbering schemes, you just choose a color name such as Black, White, Green, Maroon, Olive, Navy, Purple, Gray, Red, Yellow, Blue, Teal, Lime, Aqua, Fuchsia, or Silver.

Although color names are easier to figure out and remember than the numbers, only a few colors have names that are well supported by web browsers. After you have a color name or number in hand, you can apply that color to various parts of your HTML page.

There are also a number of websites that are designed to help web designers choose colors. One of the best is Color Schemer at http://www.colorschemer.com/online.html. It enables you to view several colors next to each other to see how they match, and will even suggest colors that match the ones you choose. The current Color Schemer interface appears in Figure 7.29.

Figure 7.29. Color Schemer.


Changing Background Color of a Page

To change a page's background color, decide what color you want and then add the bgcolor attribute to the <body> tag. The <body> tag, in case you've forgotten, is the tag that surrounds all the content of your HTML file. <head> contains the title, and <body> contains almost everything else. bgcolor is an HTML extension introduced by Netscape in the 1.1 version of the browser and incorporated into HTML 3.2.

To use color numbers for backgrounds, you enter the value of the bgcolor attribute of the <body> tag (the hexadecimal number you found in the preceding section) in quotation marks. They look like the following:

<

body bgcolor

=

"#ffffff">

<

body bgcolor

=

"#934ce8"

>


To use color names, simply use the name of the color as the value to bgcolor :

<

body bgcolor

=

"white">

<

body bgcolor

=

"green"

>


Note

Some browsers enable you to indicate color numbers without the leading hash sign ( # ). Although this method might seem more convenient , it's incompatible with many other browsers.


Changing Text Colors

It wouldn't make much sense to change the background color of a page if you couldn't change the text colors as well. Just as you can use the bgcolor attribute of the <body> tag to change a page's background color, there are attributes that enable you to modify text colors on a page.

Text colors are specified with the same identifiers as background colors. The following attributes can be added to the <body> tag of a page to alter the color of the page text and link colors:

text

Controls the color of all the page's body text except for link text, including headings, body text, text inside tables, and so on.

link

Controls the color of link text for links that the user has not already clicked on.

vlink

Controls the color of links that the user has already visited.

alink

Controls the color of a link while the user is clicking on it. When the user clicks on a link, it changes to this color. When he or she releases the mouse button, it switches back.


Remember the haunted house image that you inserted on a page earlier? The page would be decidedly spookier with a black background, and orange text would be so much more appropriate for the holiday. To create a page with a black background, orange text, and deep red unvisited links, you might use the following <body> tag:

<

body bgcolor

=

"#000000" text

=

"#ff9933" link

=

"#800000"

>


Using the following color names for the background and unfollowed links would produce the same effect:

<

body bgcolor

=

"orange" text

=

"black" link

=

"#800000"

>


Both these links would produce a page that looks something like the one shown in Figure 7.30.

Figure 7.30. Background and text colors.


Spot Color

When you change a page's text colors by using attributes to the <body> tag, that change affects all the text on the page. Spot color is the ability to change the color of individual characters on your page, which you can use instead of or in addition to a global text color.

In yesterday 's lesson you learned about using the HTML tag <font> for setting the font size and font name. A third attribute to <font> , color , enables you to change the color of individual words or phrases. The value of color is either a color name or number:


<p>

When we go out tonight, we're going to paint the town

<font color="#ff0000">

RED

</font>

.


Of course, you can use font spot colors in addition to font names and sizes.

Specifying Colors with CSS

Needless to say, there are ways to specify color on a page using Cascading Style Sheets. First, let's look at how colors are specified using CSS. The two methods available in HTML are also available in CSS. You can specify colors by name or by using a six-digit hexadecimal specification. There are some other options as well. You can specify colors using a three-digit hexadecimal number, which is shorthand for cases where both digits in each pair are the same. For example, if the color you're using is #FFFFFF (white), you can just specify it as #FFF . Or, if you want a light blue such as #66CCFF , you can specify it as #6CF .

You can also specify colors using decimal values or percentages. For example, #66CCFF can be specified as (102, 204, 255) using decimal notation. Or, if you prefer, using percentages, like this: (40%, 80%, 100%) . If you don't want to worry about these alternative methods, that's fine. You can just use the same ones that you use when specifying colors in HTML.

Color-Related Properties

There are two key properties when it comes to assigning colors to elements using CSS color and background-color . These properties are more flexible than specifying colors using the <font> tag for a number of reasons. The most obvious is that you can specify not only the text color for an element, but also the background color using CSS. For example, to indicate that a paragraph should have white text on a black background, you could use the following code:

<

p style

=

"color: #fff, background-color: #000"

>This paragraph has
white text on a black background.<

/p

>


You can also use these properties to adjust the colors on the whole page by applying them to the body tag. Here's an example:

<

body style

=

"color: #fff; background-color: #00f"

>


This page will have white text on a blue background. That's all there is to using colors with CSS. There are other ways that color can be used, and more important, in Lesson 9, you'll see how you can apply color to elements on a page without using the style attribute, which can be cumbersome.