Enhancing and Extending the Portal
| The easiest way to change the appearance is to edit the application's style sheet, contained in a file named portal.css. By editing this file, you can easily adjust the background color, font style and size, the appearance of the tabs, and many other things. For more information about Visual Studio .NET's style-sheet-editing functionality, see the previous section entitled "Effective Use of Style Sheets."
NOTE: You can add mouse-over images (which allow the mouse-over image to change easily) by editing the portal.css file, as follows: a.link2:link { background-image: url(button1.gif); height: 25px; width: 100px; text-align: center; } a.link2:hover { background-image: url(button2.gif); height: 25px; width: 100px; text-align: center; } Now all you need to do is call it like this: <a > Button</a> You could also edit many images to change the appearance of the application. They can be found in the Data directory within the application's directory. Extending the portal involves adding additional modules, and then using the administrative functionality to add the modules into the portal settings. I've added a module to the IBuySpy Portal application that's on www.ASPNET-Solutions.com. The one that I added is simple and has no databound components. It avoids the complication of data access. Here's a summary of the steps I took to add a desktop tab with its own module:
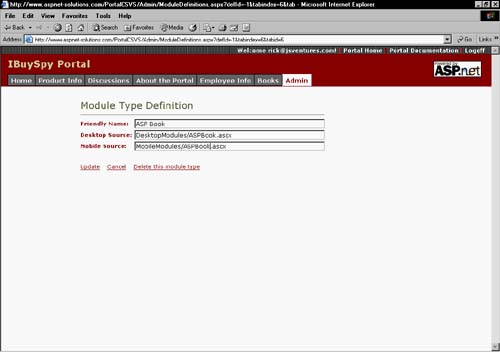
Adding a User Control is simple. In the Solution Explorer pane, right-click the project name and select Add New Item. Select User Control as the item type, and enter the name (for the one I added, I named it ASPBook.ascx). You need to edit the code behind so that the control inherits from PortalModuleControl instead of System.Web.UI.UserControl (the default when controls are created). Note that PortalModuleControl itself inherits from System.Web.UI.UserControl. Change from: public abstract class ASPBook : System.Web.UI.UserControl { private void Page_Load(object sender, System.EventArgs e) { // Put user code to initialize the page here } } to: public abstract class ASPBook : ASPNetPortal.PortalModuleControl { private void Page_Load(object sender, System.EventArgs e) { // Put user code to initialize the page here } } You'll have to add content to the .ascx file so that it has the content and functionality that you need. For the one I added, I just pasted in some text and an image link. You'll have to add the module definition from the IBuySpy admin page. (Well, you don't really have to, but it sure saves a lot of extra effort on your part.) It's pretty simple; just add the module name, the desktop source-file name, and the mobile source-file name, as shown in Figure 18.12. Figure 18.12. You Must Add a Module Definition.
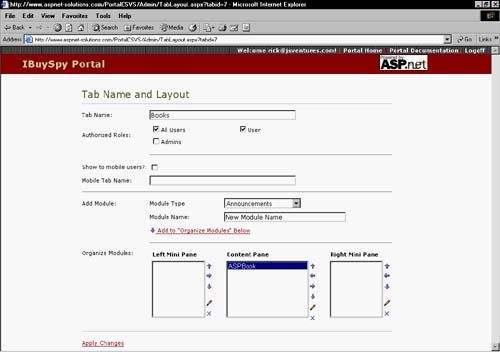
Now that the module has been added, a tab must be added. Here again, you could do it manually by adding entries to the database tables, but it's a lot easier to use the admin page in the application, as shown in Figure 18.13. Figure 18.13. You Must Add the Module to a New Tab.
It's important that you compile the application before trying to see your newly created control. If you don't compile, you'll get a runtime error because it won't be able to find the user control.
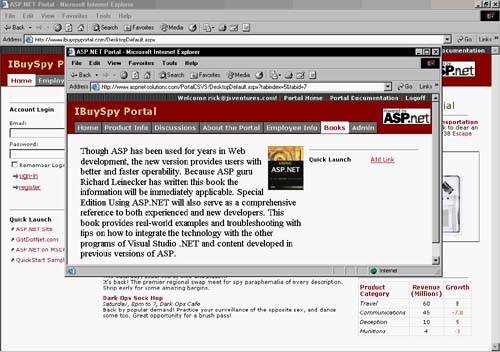
NOTE: When you first compile the application, it may not compile because it can't find the System.Mobile assembly. This happened to me, and to fix it I had to add the reference from the Solution Explorer. To do this in Visual Studio .NET, right-click Reference in the Solution Explorer window. Select System.Mobile from the .NET Components list, and add it. The tab and module that I added aren't too fancy, but they give you the steps necessary to add a new section to the portal. Figure 18.14 shows my new user control. Figure 18.14. The New Tab and Its Module Simply Display Static Text.
TIP: By default in IBuySpy Portals, if you create a new page of content, it is treated as a tab. Sometimes, though, you want to have many pages of content but not clutter up the top navigation with lots of tabbed menu buttons. There is a solution for this. Specify the name of tabs (in the TabName property) that you don't want to appear in the top navigation bar by preceding the tab name with an underscore (_) character. In the file DesktopPortalBanner.ascx.cs (or DesktopPortalBanner.ascx.vb for VB), find the section of code toward the bottom commented as "Dynamically render portal tab strip". Here, you can modify the line that adds the tab to the collection with the following: C# if( tab.TabName[0] == '_' ) { authorizedTabs.Add( tab ); } VBIf tab.TabName[0] = '_' Then authorizedTabs.Add(tab) |
EAN: N/A
Pages: 175