| Image maps link the areas of an image with a series of URLs so that a click in a particular area brings the user to the corresponding page. Client-side image maps run quickly because they are interpreted in your visitor's browser and don't have to consult the server for each click. In contrast to server-side image maps, they do not require a CGI script, and thus are simpler to create. Only very old browsers may not understand them. Figure 6.29. You can put the map anywhere you like in your (X)HTML document. Each clickable area is defined by its own set of coordinates, and has its own corresponding URL. Then, don't forget to add the usemap attribute to the image that will serve as the map. 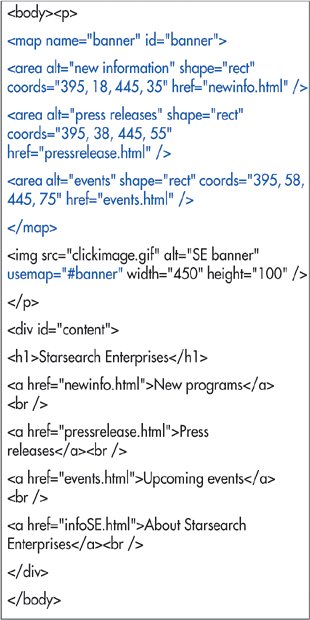
To create a client-side image map: 1. | In the (X)HTML document that contains the image, type <map.
| 2. | Type name="label" >, where label is the name of the map.
| 3. | Type <area to define the first clickable area.
| 4. | Type alt="info", where info describes what will happen when the visitor clicks.
| 5. | Type shape="type", where type represents the area's shape. Use rect for a rectangle, circle for a circle, and poly for an irregular shape.
| 6. | For a rectangle, type coords="x1, y1, x2, y2", where x1, y1, x2, and y2 represent the upper-left and lower-right corners of the rectangle, as obtained on page 116, and shown in Figure 6.28.
For a circle, type coords="x, y, r" where x and y represent the center of the circle and r is the radius.
For a polygon, type coords="x1, y1, x2, y2" (and so on), giving the x and y coordinates of each point on the polygon.
| | | 7. | Type href="url.html", where url.html is the address of the page that should appear when the user clicks in this area.
Or type nohref if a click in this area should have no result. For XHTML add ="nohref" immediately thereafter.
| 8. | If desired, type target="name", where name is the name of the window where the page should appear (see page 108).
Figure 6.30. When your users point at one of the defined areas, the destination URL appears in the status bar at the bottom of the window. 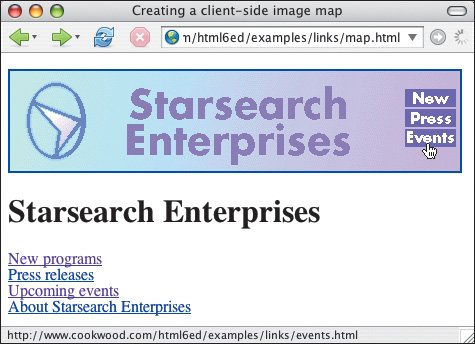
| 9. | If desired, add a keyboard shortcut by typing accesskey="x" (see page 112).
| 10. | Type /> to complete the clickable area.
| 11. | Repeat steps 310 for each area.
| 12. | Type </map> to complete the map.
| 13. | Type <img src="/books/2/62/1/html/2/image.gif", where image.gif is the name of the image to be used as an image map.
Figure 6.31. And if a user clicks the link, the browser immediately displays the corresponding page. 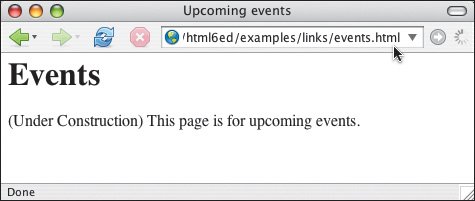
| 14. | Add image attributes, including alt.
| 15. | Type usemap="#label", where label is the map name defined in step 2.
| 16. | Type the final /> for the image.
|
 Tips Tips
Usually, maps are in the same (X)HTML document as the image that uses them. Internet Explorer, however, can use maps that are in an external (X)HTML file. Just add the full URL of that file in front of the label name: usemap="map.html#label". With overlapping areas, most browsers use the URL of the first area defined. The target attribute is only allowed in (X)HTML transitional and frameset. The id attribute in map is required in XHTML strict, but most browsers need the name for it to work. So use both.
|