Controlling the Status Bar
| [ LiB ] |
Controlling the Status Bar
One of the simplest and most powerful tricks you can do with JavaScript is to take control of the browser's status bar. You can do this using the window object's status property. In the next four sections, I will show you examples that include how to post a message to the status bar, how to post a blinking message, how to post a message and have it scroll over and over again, and finally how to use the status bar as a tool for displaying link descriptions.
NOTE
TIP
Don't get carried away when working with the browser's status bar.You may have seen examples of Web designers going a little overboard with their use of the status bar. Like anything, use this information in moderation .
Posting a Message to the Status Bar
Ordinarily, browsers use the status bar to display either the URL of the currently selected link or a description of the selected browser toolbar or menu option. However, as the following example shows, you can change this default behavior.
<HTML> <HEAD> <TITLE>Script 4.1 - Posting a message in the status bar</TITLE> <SCRIPT LANGUAGE="JavaScript" TYPE="Text/JavaScript"> <!-- Start hiding JavaScript statements function PostMsg() { window.status = "You should see the new message in the status bar" } // End hiding JavaScript statements --> </SCRIPT> </HEAD> <BODY onLoad="window.status = 'Welcome to my status bar script!'"> <FORM> <INPUT NAME="myButton" TYPE="button" VALUE="Post Status Bar Message" onClick="PostMsg()"> </FORM> </BODY> </HTML> The first thing this example does is create a script in the head section that defines a function named PostMsg() . This function is used to display information in the browser's status bar. The function contains a single statement that uses the window object's status property to post a message on the status bar as shown below.
function PostMsg() { window.status = "You should see the new message in the status bar" } Note that in this HTML page the <BODY> tag has been modified to include the onLoad event handler as shown here.
onLoad="window.status = 'Welcome to my status bar script!'"
This statement uses the window.status property to place a message on the browser's status bar as soon as the page loads. The script next defines a form that contains a single button named myButton . When the user clicks on the button, the button's onClick event handler executes the PostMsg() function, which then writes its message on the browser's status bar.
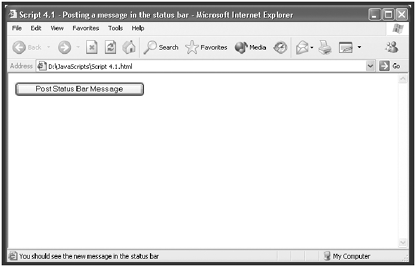
When you load this page and click on the Post Status Bar Message button, you will see the results as shown in Figure 4.1.
Figure 4.1. Manually posting a message in the status bar

Posting a Blinking Message to the Status Bar
The following example shows you how to get just a bit fancier with the messages you post to the status bar. In this script, you are going to post a message in the status bar that blinks every second. You can use this technique to attract the visitor's attention to messages that otherwise might be missed.
<HTML> <HEAD> <TITLE>Script 4.2 - Posting a blinking message in the status bar</TITLE> <SCRIPT LANGUAGE="JavaScript" TYPE="Text/JavaScript"> <!-- Start hiding JavaScript statements window.status=""; msg_on = "yes"; function CycleStatusbar() { if (msg_on == "yes") { msg_on = "no"; window.status="This message should be blinking in your status bar!"; } else { msg_on = "yes"; window.status=""; } setTimeout("CycleStatusbar();",1000); } // End hiding JavaScript statements --> </SCRIPT> </HEAD> <BODY onLoad="CycleStatusbar()"> <H3>Blinking Status bar Example</H3> </BODY> </HTML> The bulk of the work in this script occurs in the head section. First, the status bar is cleared of any existing messages by the window.status="" statement. Next, a variable named msg_on is assigned an initial value of yes . The CycleStatusbar() function that follows toggles the value of this variable from yes to no with each execution.
As its name implies, the CycleStatusbar() function displays and removes a message over and over again in the status bar to produce a blinking effect. When first called, the function checks the value of msg_on ; because the variable equals yes , the function writes its message on the browser's status bar. The function then passes control to the next statement in the script.
The setTimeout("CycleStatusbar();",1000) ; statement tells the browser to run the CycleStatusbar() function again in 1000 milliseconds (one second). Once it's activated, the setTimeout() method executes the CycleStatusbar() function again. This time when it runs, the value of msg_on will equal no , so the function executes the window.status="" statement (clearing the status bar of any text) and toggles the value of msg_on back to yes . As you can see, the combination of the CycleStatusbar() function and the setTimeout() method creates a loop that writes and clears the message from the status bar.
NOTE
The setTimeout() method belongs to the window object. Its purpose is to automate the execution of JavaScript statements or functions after a specified number of milliseconds has passed.This method does not force the script to wait until it executes. Instead, it enables the browser to continue processing.
The page's <BODY> tag has been modified with the addition of onLoad="CycleStatusbar() , which initiates the loop in the head section of the page.
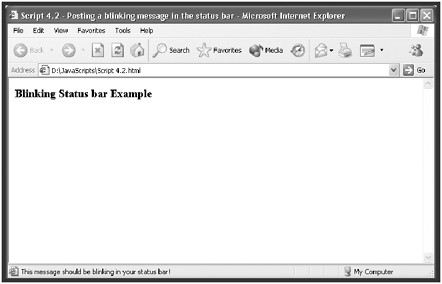
If you run this example, you will see that the message appears in and disappears from the browser's status bar once every second. Figure 4.2 shows what the status bar looks like during an interval in which the message is displayed.
Figure 4.2. Posting a blinking message on the browser's status bar

Scrolling a Message in the Status Bar
Whereas the previous example used the window.setTimeout() method to produce a blinking effect in the browser's status bar, this next JavaScript uses the same method to display a message that scrolls across the status bar. The message appears and then moves off the screen, only to reappear again.
<HTML> <HEAD> <TITLE>Script 4.3 - Scrolling a message in the status bar</TITLE> <SCRIPT LANGUAGE="JavaScript" TYPE="Text/JavaScript"> <!-- Start hiding JavaScript statements msg = " Let me hypnotize you with this message.... " + " "; i = 0; function CycleMsg() { window.status = msg.substring(i, msg.length) + msg.substring(0, i); i++; if (i > msg.length) { i = 0; } window.setTimeout("CycleMsg()",200); } // End hiding JavaScript statements --> </SCRIPT> </HEAD> <BODY onLoad="CycleMsg()"> <H3>Scrolling Status Bar Message Example</H3> </BODY> </HTML> As with the preceding examples, the only code in the body section of this page is an onLoad statement that calls a function named CycleMsg() :
<BODY onLoad="CycleMsg()">
This function initiates a loop in the HTML page's head section that manages the scrolling message. The first statement in the script defines a variable named msg and assigns it the text message to be scrolled. Note that I added a number of blank spaces in front of and following the message text itself as shown below. These spaces create a longer message field, enabling the message to remain displayed in its entirety for a longer period before it begins to disappear off the left side of the status bar.
msg = " Let me hypnotize you with this message.... " + " ";
The script then sets a variable named i equal to 0. The CycleMsg() function uses this variable to control the movement of the message across the status bar. The first statement in the function displays the message; it uses the msg.substring() method to display a portion of the message beginning at position 0 and ending with position msg.length (a number representing the total length of the message). On the first iteration, the entire message is displayed beginning with position 0 and going through the last character in the message (position msg.length ). Appended to this string is a substring of the message that begins with position 0 and ends with position 0 on this first iteration.
function CycleMsg() { window.status = msg.substring(i, msg.length) + msg.sub- string(0, i); i++; if (i > msg.length) { i = 0; } window.setTimeout("CycleMsg()",200); } After displaying this initial message, the function increments the value of i by 1. It also checks to see whether the function has been executed enough times for the value of i to exceed the value stored in msg.length .
When this occurs, the function sets i back to 0 so that the whole process can start over. Before it completes its first execution, the function schedules itself to execute again in .2 seconds with the window.setTimeout ("CycleMsg()",200) statement.
When the function next executes, the value of i equals 1. When the window.status property is set this time, the first msg.substring() method contains one less character because it starts at character position 1 instead of 0. The second msg.substring() method contains an additional character beginning at 0 and going through to 1. As you can see, with each iteration, the leading character of the message is stripped from the first substring and placed into the second substring. This has the effect of bringing the message's initial character around to the back of the displayed message, creating the scrolling effect. After the entire message has been processed , the value of i is reset to 0, the script is back at its starting point, and everything is repeated.
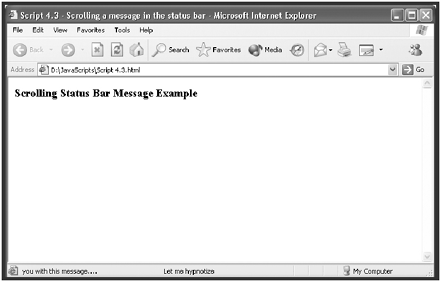
If you load this page, you will see that the message appears and then slowly scrolls from right to left until it begins to disappear off the left side of the status bar, only to begin reappearing again on the right side of the status bar. Figure 4.3 shows what the message looks like partway through the scroll.
Figure 4.3. Posting a scrolling message on the browser's status bar

Providing Link Descriptions in the Status Bar
This final status bar example shows you how to post descriptive phrases for the links on your Web pages on the browser's status bar whenever a visitor moves the mouse pointer over the links.
<HTML> <HEAD> <TITLE> Script 4.4 - Providing link descriptions in the status bar</TITLE> <SCRIPT LANGUAGE="JavaScript" TYPE="Text/JavaScript"> <!-- Start hiding JavaScript statements function PostMsg(msg) { window.status = msg; } function ClearMsg() { window.status=""; } // End hiding JavaScript statements --> </SCRIPT> </HEAD> <BODY> <A HREF="http://www.netscape.com" onMouseOver="PostMsg('Visit Netscape'); return true;" onMouseOut="ClearMsg();"> Netscape's Web site</A><P> <A HREF="http://www.microsoft.com" onMouseOver="PostMsg('Visit Microsoft'); return true;" onMouseOut="ClearMsg();"> Microsoft's Web site</A><P> </BODY> </HTML> This script contains two functions in the head section. One displays a message that is passed to it as an argument in the status bar, and the other function clears the message:
function PostMsg(msg) { window.status = msg; } function ClearMsg() { window.status=""; } Two links in the body section of the script execute the onMouseOver and onMouseOut events in order to call the status bar functions. When visitors move the mouse pointer over a link, its associated onMouseOver event handler calls the PostMsg() function, passing it a message that describes the link. When visitors move the mouse away from the link, the link's onMouseOut event handler calls the ClearMsg() function and clears the browser's status bar.
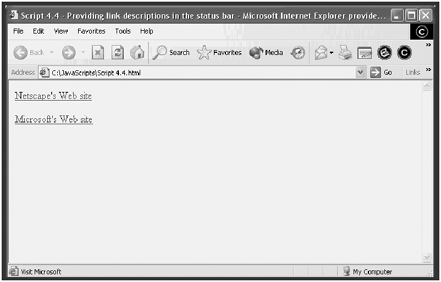
<A HREF="http://www.netscape.com" onMouseOver="PostMsg('Visit Netscape'); return true;" onMouseOut="ClearMsg();"> Netscape's Web site</A><P> <A HREF="http://www.microsoft.com" onMouseOver="PostMsg('Visit Microsoft'); return true;" onMouseOut="ClearMsg();"> Microsoft's Web site</A><P> Figure 4.4 shows the result of loading this page and moving the pointer over the Microsoft link. Clicking on the link instructs the browser to load the associated URL for that link.
Figure 4.4. Posting descriptive messages on the browser's status bar when a visitor moves the mouse pointer over a link

| [ LiB ] |
EAN: 2147483647
Pages: 84