| You can also set up WordPress on your ISP's server or on your own server. This is a multi-step process: - Create a MySQL database for the WordPress installation.
- Download WordPress from the wordpress.org Web site and extract its files.
- Create the WordPress configuration file.
- Copy the WordPress files to a directory on the server.
- Run the WordPress installer.
The following pages provide instructions for each of these steps. Tips  | These instructions assume that the server is already running MySQL and PHP, as well as a compatible Web browser. You can learn more about the minimum software requirements for installing and running WordPress in the Introduction. You can also install WordPress on a computer running Mac OS X 10.4 Tiger or later. Remember, you must have an always-on Internet connection and fixed IP address (or dynamic DNS setup) if you want your blog accessible over the Internet. How you create a MySQL database depends on the tools and access available on your server. The following pages offer several examples; choose the one that's best for you. If you are unable to connect to MySQL or create a new database as discussed here, you may need to ask your system administrator to create the database for you or try one of the other techniques covered in this section to create the database. Be sure to write down the exact name of the MySQL database you create; you'll need this information later in the WordPress installation process. A complete discussion of MySQL is far beyond the scope of this book. To learn more about MySQL, pick up a copy of MySQL: Visual QuickStart Guide by Larry Ullman.
|
To create a MySQL database with MySQL Administrator 1. | Launch MySQL Administrator.
| 2. | In the Connect to MySQL Instance dialog that appears (Figure 6), enter the information needed to connect to the server and click Connect.
Figure 6. Use this dialog to connect to MySQL on the server. 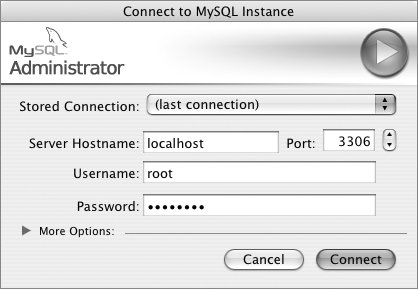
| 3. | The Information window for the server appears. Click the Catalogs button to display existing catalogs (Figure 7).
Figure 7. The Catalog window lists all Schemata (or databases) you have access to. 
| 4. | Click the + button beneath the Schemata list.
| 5. | Enter a name for the database in the Create Schema dialog that appears (Figure 8) and click OK. The new database is added to the Schemata list (Figure 9).
Figure 8. Enter a name for the new database in the Create Schema dialog. 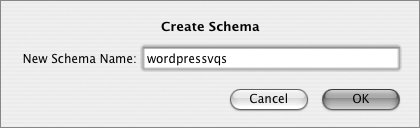
Figure 9. The database you created is added to the Schemata list. 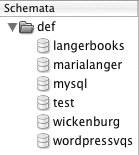
| 6. | Exit or Quit MySQL Administrator.
|
Tips | MySQL Administrator is a graphic user interface tool for working with MySQL. Windows and Macintosh versions are available. You can download it from the MySQL Web site at www.mysql.com. If you're not sure what to enter in step 2, consult your system administrator.
|
To create a MySQL database using your ISP's tools 1. | Login to your account maintenance pages on your ISP's server and navigate to the page you can use to create or maintain MySQL databases. Figure 10 shows an example of the page on Maria's ISP, GoDaddy.com.
Figure 10. Many ISPs, like GoDaddy.com (shown here), offer Web-based tools for creating and maintaining MySQL databases. 
| 2. | Follow the instructions that appear onscreen to create a new MySQL database.
|
Tip
To create a MySQL database from the command line 1. | Use a command line interface application, such as a DOS prompt in a Console window on Windows or Terminal on Unix or Mac OS, to connect to MySQL.
| 2. | Type CREATE DATABASE databasename; (where databasename is the name of the database you want to create) and press  . MySQL should confirm that the query was OK (Figure 11). . MySQL should confirm that the query was OK (Figure 11).
Figure 11. If you have physical access to the server, you can use a command line interface to create a MySQL database. In this example, I'm using the Terminal application on a Mac OS X 10.4 server. 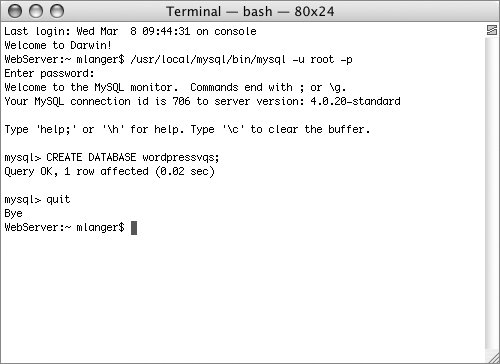
| 3. | Type quit and press .
|
Tip
To download and extract WordPress 1. | Use your Web browser to visit wordpress.org (Figure 12).
Figure 12. The WordPress.org home page. 
| 2. | Click the Download link near the top of the page.
| 3. | On the Download WordPress 2 page (Figure 13), click the DOWNLOAD.ZIP link.
Figure 13. The Download WordPress 2 page offers links for downloading WordPress files. 
| 4. | If a dialog like the one in Figure 14 appears, select the Open with option and choose an application to open the file. In most instances the correct application will already be selected for you.
Figure 14. A dialog like this may appear when you click a download link. 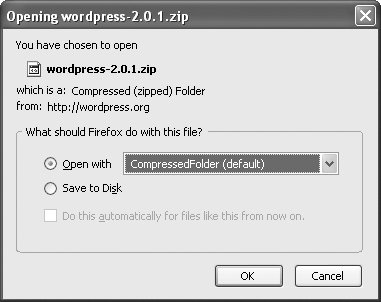
| 5. | Wait while WordPress is downloaded.
| 6. | Exit or Quit your Web browser program.
| 7. | If necessary, locate and double-click the wordpress-2.x.x.zip file you just downloaded to extract its contents. You should end up with a folder named wordpress that's full of PHP files and folders (Figure 15).
Figure 15. After extracting compressed files, you should wind up with a wordpress folder that contains PHP files and folders. 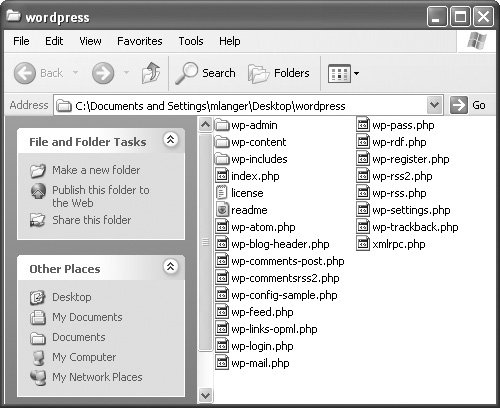
|
To create the wp-config.php file 1. | Open the file named wp-config-sample.php in the wordpress folder with your favorite text editor. Figure 16 shows the file opened with Maria's favorite, TextWrangler.
Figure 16. The wp-config-sample.php file is a template for creating a WordPress configuration file. 
| 2. | Locate the line that says define('DB_NAME', 'wordpress'); and replace wordpress with the name of the MySQL database you created for your blog.
| 3. | Locate the line that says define('DB_USER', 'username'); and replace username with a MySQL user name that has full access to the database file.
| 4. | Locate the line that says define('DB_PASSWORD', 'password'); and replace password with the password for the user name you entered in step 3.
| 5. | If your database host is not localhost, locate the line that says define('DB_host', 'localhost'); and replace localhost with the domain name or IP address of the database host. If you're not sure what this is, ask your system administrator or consult the settings screen for your MySQL database on your ISP's server.
| 6. | When you're finished making changes, it might look like Figure 17. Check your typing carefully! Be sure you entered the database name, user name, and password correctly and did not remove any single quote characters, punctuation, or parentheses characters or make any other changes in the file.
Figure 17. When you're finished, your configuration file should have your database information in it. 
| 7. | Save the file as wp-config.php in the wordpress folder.
| 8. | Exit or Quit your text editor.
|
Tips | It's vital that you use a text editor that saves files in plain text format. Word processors like Microsoft Word often introduce additional characters to documents and should not be used for editing PHP files such as those used by WordPress. You can find more information about using text editors in Appendix C.
|
To copy WordPress files to your server 1. | Use your favorite FTP client program to open your Web directory on the server. Figure 18 shows Fetch on Mac OS opening a Web directory on a GoDaddy.com server.
Figure 18. Here's the root directory for a Web site opened with Fetch, a Mac OS FTP client. 
| 2. | Copy (or put) the wordpress folder or its contents in the Web directory:
- To access your blog by entering //www.example.com/wordpress/, put the wordpress folder into the Web directory. This installs the WordPress files in the wordpress folder in your root Web directory.
- To access your blog by entering www.example.com put the contents of the wordpress folder into the Web directory (Figure 19). This installs the WordPress files in your root Web directory (Figure 20). Keep in mind that this will overwrite any files in that directory that have the same name, such as index.php.
Figure 19. In this example, we're putting the individual WordPress files right into the Web site's root directory. 
Figure 20. The Web site's root directory with the individual WordPress files copied into it. 
| 3. | Exit or Quit your FTP client.
|
Tips | You can learn more about FTP tools and how to use them in Appendix B. If you want your blog to be your Web site, copy the contents of the wordpress folder to your Web site's root directory. That's what's shown in Figures 19 and 20. To access your blog by entering something like www.example.com/myblog, change the name of the wordpress folder to myblog before copying the folder to your root Web directory. You can name your blog folder anything you like, as long as the name does not contain spaces or special characters.
|
To run the WordPress installer 1. | If WordPress is installed in its own folder in your Web site's root directory, use your Web browser to open www.example.com/wordpress/wp-admin/install.php.
or
If the individual WordPress files are installed in your Web site's root directory (Figure 20), use your browser to open www.example.com/wp-admin/install.php.
| 2. | The first WordPress installation screen should appear (Figure 21). Click the First Step link.
Figure 21. The first screen of the WordPress installer. 
| 3. | In the First Step window (Figure 22), fill in the form:
- Weblog title is the name of your blog or site.
- Your e-mail is your e-mail address.
Figure 22. The first step prompts you for some very basic information about your blog. 
| 4. | Click the Continue to Second Step button.
| 5. | The Second Step window appears (Figure 23). The installation is complete. Write down your login information.
Figure 23. The second step just tells you that installation is done. Can't be much easier than that! 
| 6. | You have three choices to continue:
- Follow the instructions on the next page to view your blog.
- Follow the instructions later in this chapter to log in to your blog.
- Exit or quit your browser and do something else.
|
Tip
To view your blog Use your Web browser to view the URL for your blog: 1. | If you installed the wordpress folder inside your Web site's root directory, view www.example.com/wordpress.
| 2. | If you installed the contents of the wordpress folder inside your Web site's root directory, view www.example.com.
|
Your blog's home page appears in your Web browser window, with a sample post and comment formatted with the default WordPress theme (Figure 24). Figure 24. Here's a WordPress blog, freshly installed on an ISP's server. 
Tip
|