| Paragraph formatting is applied to selected paragraphs (Figure 35) or, if no paragraphs are selected, to the paragraph in which the insertion point is blinking (Figure 36). Figure 35. In this example, the first four paragraphs are completely selected and will be affected by any paragraph formatting applied. 
Figure 36. In this example, the insertion point is in the first paragraph. That entire paragraph will be affected by any paragraph formatting applied. 
Word offers several methods of applying paragraph formatting: The Formatting Palette (Figure 38) enables you to apply some paragraph formatting. Figure 38. You can apply formatting with options in two areas of the Formatting Palette: Alignment and Spacing and Bullets and Numbering. 
Shortcut keys enable you to apply some paragraph formatting. The ruler enables you to apply indentation and tab formatting. The Paragraph dialog enables you to apply most kinds of paragraph formatting. The Bullets and Numbering dialog enables you to apply bullet and numbering formats.
 Tips Tips
Paragraph formatting applies to the entire paragraph, even if only part of the paragraph is selected (Figure 37). Figure 37. In this example, only part of the first paragraph and part of the third paragraph are selected, along with all of the second paragraph. All three paragraphs will be affected by any paragraph formatting applied. 
A paragraph is the text that appears between paragraph marks. You can see paragraph marks when you display Nonprinting characters (Figures 35 through 37). Nonprinting characters are discussed in Chapter 2. When you press  , the paragraph formatting of the current paragraph is carried forward to the new paragraph. , the paragraph formatting of the current paragraph is carried forward to the new paragraph. Selecting paragraphs is explained in Chapter 2.
To apply paragraph formatting with the Formatting Palette Set options in the Formatting Palette (Figure 38) to apply formatting to selected paragraphs as desired: To set horizontal alignment, click Align Left, Center, Align Right, or Justify. To set line spacing, click Single Space, 1.5 Space, or Double Space. To set orientation, click one of the Change Text Direction buttons. To set paragraph spacing, enter a value (in points) in the Before and After boxes. To set indentation, enter a value (in inches) in the Left, Right, and First boxes. To enable automatic bullets or numbering, click Bullets or Numbering. If you enable bullets, you can choose an option from the Bullet Style menu beneath the Bullets button to choose a style of bullets. If you enable numbering, you can enter a starting value in the Start box.
To apply paragraph formatting with shortcut keys Press the shortcut key combination (Table 2) for the formatting that you want to apply. Table 2. Shortcut Keys for Font FormattingFormatting | Keystroke |
|---|
Align left | 
| Center | 
| Align right | 
| Justify | 
| Indent | 
| Unindent | 
| Hanging indent | 
| Unhang indent | 
| Single line space | 
| 1.5 line space | 
| Double line space | 
| Open/Close Up Paragraph |  (zero) (zero)
| Reset Paragraph | 
|
Tip
To set indentation with the ruler Drag the indent markers (Figure 39) to set indentation as desired: Figure 39. Indent markers on the ruler. 
First Line Indent sets the left boundary for the first line of a paragraph. Hanging Indent sets the left boundary for all lines of a paragraph other than the first line. (Dragging this marker also moves the Left Indent marker.) Left Indent sets the left boundary for all lines of a paragraph. (Dragging this marker also moves the First Line Indent and Hanging Indent markers.) Right Indent sets the right boundary for all lines of a paragraph.
Tips If the ruler is not showing, choose View > Ruler (Figure 40) to display it. Figure 40. To display the ruler, choose Ruler from the View menu. 
Dragging the First Line Indent marker to the right creates a standard indent. Dragging the Hanging Indent marker to the right creates a hanging indent.
To apply paragraph formatting with the Paragraph dialog 1. | Choose Format > Paragraph (Figure 25) to display the Paragraph dialog.
| 2. | Click the Indents and Spacing button to display its options (Figure 41). Then set options as desired:
Figure 41. The Indents and Spacing options of the Paragraph dialog. 
Alignment (Figure 42) sets paragraph alignment. Figure 42. Use the Alignment menu to set paragraph alignment. 
Outline Level applies a style corresponding to one of Word's outline levels. (Styles are covered in Chapter 4; outlines are covered in detail in Chapter 12.) Left sets the left indentation. Enter a measurement in inches. Right sets the right indentation. Enter a measurement in inches. Special (Figure 43) applies First line or Hanging indentation. If you choose an option other than (none), you can enter a value (in inches) in the box beside the menu to set the indentation spacing. Figure 43. Use the Special menu to apply first line or hanging indentation. 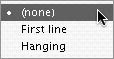
Before sets the amount of space before the paragraph. Enter a measurement in points. After sets the amount of space after the paragraph. Enter a measurement in points. Line spacing (Figure 44) sets the spacing between lines in the paragraph. If you choose At least, Exactly, or Multiple, enter a value in inches in the box beside the menu. Figure 44. Use the Line spacing menu in the Paragraph dialog to set line spacing for the paragraph. 
| 3. | Click the Line and Page Breaks button to display its options (Figure 45). Then set options as desired:
Figure 45. The Line and Page Breaks options of the Paragraph dialog. 
Widow/Orphan control prevents a page break from occurring right after the first line in a paragraph or right before the last line in a paragraph. Keep lines together prevents a page break from occurring within the selected paragraph, thus keeping all lines of the paragraph together on the same page. Keep with next prevents a page break from occurring between the selected paragraph and the next paragraph. Page break before puts a page break before the selected paragraph. Suppress line numbers excludes the paragraph from line numbering when line numbering is enabled. Don't hyphenate excludes the paragraph from hyphenation when the document is manually or automatically hyphenated.
| 4. | Click OK to save your settings and dismiss the Paragraph dialog.
|
Tips The Preview area of the Paragraph dialog illustrates what text will look like with formatting applied. I tell you more about page formatting, including how to insert manual page breaks, in Chapter 5.
To apply bulleted list formatting with the Bullets and Numbering dialog 1. | Choose Format > Bullets and Numbering (Figure 25).
| 2. | In the Bullets and Numbering dialog that appears, click the Bulleted button to display its options (Figure 46).
Figure 46. The Bulleted options of the Bullets and Numbering dialog. 
| 3. | Click the box that displays the type of bullet character that you want.
| 4. | Click OK.
|
Tips Clicking the Bullets button on the Formatting Palette applies the last style of bullets you set in the Bullets and Numbering dialog (Figure 46) or Customize bulleted list dialog (Figure 47). Figure 47. The Customize bulleted list dialog. 
To further customize a bullet list, after step 3 above, click the Customize button in the Bullets and Numbering dialog (Figure 46). Set options in the Customize bulleted list dialog that appears (Figure 47), and click OK. You can also use pictures for bullets. Click the Picture button in the Customize bulleted list dialog (Figure 47). Then select one of the pictures in the Choose a Picture dialog that appears (Figure 48) and click Insert. Word automatically uses the same picture for all bullets in the list. Figure 48. Use the Choose a Picture dialog to select a picture to use for all bullets in a bulleted list. 
To apply numbered list formatting with the Bullets and Numbering dialog 1. | Choose Format > Bullets and Numbering (Figure 25).
| 2. | In the Bullets and Numbering dialog that appears, click the Numbered button to display its options (Figure 49).
Figure 49. The Numbered options of the Bullets and Numbering dialog. 
| 3. | Click the box that displays the numbering format that you want.
| 4. | Click OK.
|
Tips Clicking the Numbering button on the Formatting Palette applies the last style of numbering you set in the Bullets and Numbering dialog (Figure 49) or Customize numbered list dialog (Figure 50). Figure 50. The Customize numbered list dialog. 
To further customize a numbered list, after step 3 above, click the Customize button in the Bullets and Numbering dialog (Figure 49). Set options in the Customize numbered list dialog that appears (Figure 50), and click OK. If your document already includes a numbered list, you can use the radio buttons at the bottom of the Numbered options of the Bullets and Numbering dialog (Figure 49) to determine whether Word should restart numbering or continue the previous list's numbering. These options are only available if the document contains multiple numbered lists. I tell you about the Outline Numbered options of the Bullets and Numbering dialog in my discussion of Word's outlining feature in Chapter 12.
To remove bulleted or numbered list formatting 1. | Choose Format > Bullets and Numbering (Figure 25).
| 2. | In the Bullets and Numbering dialog (Figure 46 or 49), click the None box.
| 3. | Click OK.
Or
To remove bulleted list formatting from a selected paragraph, click the Bullets button on the Formatting Palette (Figure 38).
Or
To remove numbered list formatting from a selected paragraph, click the Numbering button on the Formatting Palette (Figure 38).
|
|