| An index is an alphabetical list of topics with page references for each topic's location within a document. Word indexes can include two levels of index entries: main entries and subentries. Indexes may also include See cross-references to other topics and special formatting of page numbers. Creating an index in Word is a two-step process: 1. | Mark index entries. This tells Word what text should be included in the index.
| 2. | Generate the index. This gathers together all index entries, alphabetizes them, and displays them with page numbers in index format.
|
This part of the chapter explains how to create an index in a Word document.  Tips Tips
The indexing feature can use bookmarks, which I discuss earlier in this chapter, to include ranges of pages in an index entry. If you plan on indexing topic discussions that span multiple pages, it's a good idea to bookmark those topics before marking index entries. Indexes, like other reference features, are created with Word fields. If pagination or document content changes after an index has been generated, you'll need to update the index before finalizing the document. I explain how to update indexes at the end of this chapter.
To manually mark an index entry 1. | In the document window, select the text you want to index (Figure 50).
Figure 50. Select the text you want to create an index entry for. 
| 2. | Choose Insert > Index and Tables (Figure 1) to display the Index and Tables dialog.
| 3. | If necessary, click the Index button to display its options (Figure 51).
Figure 51. The Index pane of the Index and Tables dialog. 
| 4. | Click the Mark Entry button to display the Mark Index Entry dialog (Figure 52).
Figure 52. The Mark Index Entry dialog. 
| 5. | In the Main entry box, enter the text you want to appear in the index. By default, the selected text appears there, but you can enter something else if desired.
| 6. | If the entry should be a subentry under the main entry, enter the text you want to appear as a subentry in the Subentry box. Figure 53 shows an example.
Figure 53. An example of an index entry with a main entry and subentry. The subentry text will appear indented beneath the main entry text in the index. 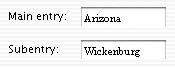
| 7. | Select one of the Options radio buttons:
Cross-reference enables you to create a textual cross-reference to another index entry. Since a cross-reference normally appears after the word See, that word is entered in italics by default. Enter the cross-reference text in the box after See. Current page sets the index entry's page reference to the page on which the selected text appears. This is the most commonly used option. Page range enables you to choose a bookmark to correspond to the range of pages you want to index. Use the pop-up menu to select the bookmark.
| 8. | To set special formatting for the index entry's page number, turn on one or both of the Page number format check boxes.
| 9. | Click Mark. The index entry is marked with an XE field. If nonprinting characters are displayed, you can see the field codes for the entry (Figure 54), which are formatted as hidden text. The Mark Index Entry dialog remains onscreen.
Figure 54. If formatting marks are displayed, the field codes for each index entry appear after the text it was inserted for. 
| 10. | To index another entry, follow step 1, then click the Mark Index Entry dialog to activate it and follow steps 5 through 9.
| 11. | Repeat step 10 for every index entry you want to mark.
| 12. | When you are finished marking index entries, click the Mark Index Entry dialog's close button.
|
Tips A quicker way to open the Mark Index Entry dialog (Figure 52) is to press  . By doing this, you can skip steps 2 through 4. (The trick is to remember all the keys you have to press!) . By doing this, you can skip steps 2 through 4. (The trick is to remember all the keys you have to press!) In step 9, if you click Mark All, Word automatically searches through the document and marks all occurrences of the selected word as an index entry using the options you set in the Mark Index Entry dialog. Although this is a quick way to consistently mark text for indexing, it may create far more index entries for selected text than you need. Use this option with care! If you find the index entry fields distracting (I do!), you can hide them by clicking the Show/Hide ¶ button on the Standard toolbar. Or, to show all formatting marks except hidden characters, set options in the Nonprinting characters area of the Preferences dialog's View options (Figure 55). Figure 55. The View options of the Preferences dialog. When Nonprinting characters are set as shown here, all nonprinting characters except hidden text will appear. The field codes for index entries do not appear. 
I cover bookmarks in detail earlier in this chapter.
To automatically mark index entries 1. | Choose File > New Blank Document, press  , or click the New Blank Document button on the Standard toolbar to create a blank Word document. , or click the New Blank Document button on the Standard toolbar to create a blank Word document.
| 2. | Choose Table > Insert > Table (Figure 56) to display the Insert Table dialog (Figure 57).
Figure 56. Choose Table from the Table menu's Insert submenu. 
Figure 57. Use the Insert Table dialog to insert a cell table in the document window. 
| 3. | Enter 2 in the Number of columns box and 1 in the Number of rows box.
| 4. | Click OK. A two-by-one table appears in the document window (Figure 58).
Figure 58. A table in a Word document. 
| 5. | In the left cell, enter a word that appears in your document that you want to be automatically marked as an index entry.
| 6. | Press  . .
| 7. | In the right cell, enter the text you want to appear in the index:
If you want just a main entry to appear, enter just the main entry text. If you want a main entry and subentry to appear, enter the main entry followed by a colon (:) and then the subentry.
Figure 59 shows what a completed entry might look like.
Figure 59. A completed concordance file entry. 
| 8. | To add another entry, press to add another row to the table. Then follow steps 5 through 7 to add entry information.
| 9. | Repeat step 8 for each entry you want to add. When you're finished, you should have a table of indexable words with corresponding index entry text (Figure 60).
Figure 60. Each entry in a concordance file appears in its own row. 
| 10. | Choose File > Save, press  , or click the Save button on the Standard toolbar. Then use the Save dialog that appears to save the document. , or click the Save button on the Standard toolbar. Then use the Save dialog that appears to save the document.
| 11. | Open or switch to the document you want to index.
| 12. | Choose Insert > Index and Tables (Figure 1) to display the Index and Tables dialog.
| 13. | If necessary, click the Index button to display its options (Figure 51).
| 14. | Click the AutoMark button to display the Choose a File dialog (Figure 61).
Figure 61. The Choose a File dialog. 
| 15. | Locate and select the file you created in step 10. Then click Open.
Word searches the document for the words you entered in the left column and inserts index entries from the right column (Figure 62).
|
Figure 62. To select an index entry, select the { and } characters and all text between them. 
Tips The document you create with steps 1 through 10 is referred to in Word documentation as a concordance file or an Index AutoMark file. Use this feature with care! If you include a word in the left column that has multiple meanings, all occurrences will be indexed the same way. Is this really what you want?
To delete an index entry 1. | Select the entire index entry, including the { and } characters (Figure 62).
| 2. | Press  . The entry disappears and will not be included in the index. . The entry disappears and will not be included in the index.
|
To generate an index 1. | Position the insertion point where you want the index to appear. Normally, this will be at the end of the document, but it can be anywhere you like.
| 2. | Choose Insert > Index and Tables (Figure 1) to display the Index and Tables dialog.
| 3. | If necessary, click the Index button to display its options (Figure 51).
| 4. | Select one of the Type options:
Indented indents each subentry beneath the main entry. This is the type of index used in this book. Run-in displays all subentries with the main entry, in the same paragraph.
| 5. | Enter the number of columns the index should occupy on each page in the Columns box.
| 6. | Set other formatting options as desired:
Formats enables you to select one of several predefined index formats. Click a format to select it; a preview of what it might look like appears in the Preview area. Headings for accented letters creates separate headings for entries that begin with accented characters. Right align page numbers shifts page numbers to the right side of the column. This option is only available if you chose Indented in step 4. Tab leader enables you to choose the characters that appear between the index text and page number reference. This option is only available if you turned on the Right align page numbers check box.
| 7. | Click OK. Word generates the index and inserts it in the document (Figure 63).
Figure 63. A completed index in Print Preview. This index uses the Indented type, Classic format, and three columns. 
|
Tips You can see the effect of changes you make in steps 4 through 6 in the Preview area of the Index and Tables dialog (Figure 51). You can further define the appearance of an index by clicking the Modify button in the Index pane of the Index and Tables dialog (Figure 51) when From template is selected in the Formats scrolling list. This displays the Style dialog (Figure 64), which you can use to modify style definitions for index styles. I tell you more about styles in Chapter 4. Figure 64. The Style dialog enables you to modify style definitions for index styles. 
If you don't like the way an index looks, you can delete it and start over. Just select the entire index and press , then follow the steps on the previous page to generate a new index. If your index looks more like Figure 65 than Figure 63, View preferences are set to display field codes. To display the index instead, turn off the Field codes option in the Preferences dialog's View options (Figure 55). Figure 65. The index field codes for the index in Figure 63. 
As illustrated in Figure 65, an index is created with an index (INDEX) field.
|