Optimizing Web Graphics
| The process of preparing graphics for display on the Web is called optimization. This process entails choosing how artwork is exported from Illustrator, what file formats are being used, and what settings are being used for each file type. Illustrator offers several features, such as Web slicing and Save for Web, which helps you create the best-looking Web graphics. Creating Web SlicesOne way to optimize Web graphics is to use a technique called Web slicing. In simple terms, Web slicing is the process of cutting a large image into several smaller images, which is desirable for various reasons. First of all, there's user perception. If you try to load a Web page that has a single large image on it, you sit there impatiently waiting for it to download and appear on the page. But when an image is sliced into smaller parts, each smaller image loads faster, and as a result, it feels like the image itself is loading faster. On that same note, you can use different file formats for each image slice, which can save some valuable file size space, resulting in a faster-loading graphic overall. As you'll see when we discuss the Save for Web feature, these settings directly impact the final file size (read: download time) of your total image. Slicing is also helpful if parts of a graphic need to be updated often. Instead of always creating larger images, you can update just a part of the image. Swapping out a slice or two can be more efficient than having to work with one large, bulky file all the time. Finally, because each slice is its own image, you can assign a link (a URL) to it, effectively making it a button. When someone clicks a sliced part of an image, they are linked to another Web page. Of course, you can specify other functionality for such a button as well. Any Way You Slice It...Illustrator offers two ways to create Web slices. The more traditional way is to draw them yourself, but Illustrator can also create slices from objects automatically using a feature called object-based slicing. Let's explore both methods. Once your artwork is created, you can choose the Slice tool from the Toolbox and click and drag in your document window. When you do, Illustrator draws rectangular regionsslicesand each appears with a number that identifies it (Figure 10.8). As you create slices, other dimmed slices might appear automatically in the document. These are called auto slices. Slices that you create are called user slices. Because the overall image has to be rectangular (for an explanation, see the sidebar "Web Slices = HTML Tables"), and all of the slices must be rectangles as well, Illustrator creates slices as necessary (Figure 10.9). As you continue to create slices, Illustrator updates the auto slices accordingly. Figure 10.8. Create slices where it makes sense to do so to allow for interactivity or future editing. Figure 10.9. As you draw slices with the Slice tool, Illustrator creates other slices to fill out the rest of the document.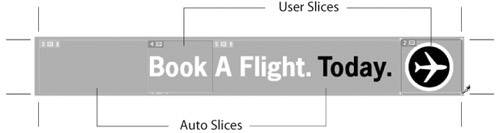
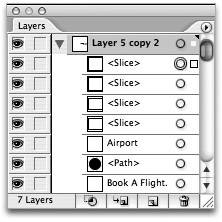
When you draw a slice with the Slice tool, Illustrator is really drawing a rectangle with no fill and no stroke and making it a slice (Figure 10.10). When you want to edit the slice, you can use the Slice Select tool to change the boundaries of the slice. Figure 10.10. Slices that you create with the Slice tool appear listed in the Layers palette. They are special rectangles that have their Fill and Stroke attributes set to None. However, Illustrator also has a different kind of slice. Instead of creating graphics and drawing slices over them, you can apply a slice as an attribute to a selectionsomething that Illustrator calls an object-based slice. To apply this kind of slice, make a selection and then choose Object > Slice > Make. Illustrator uses the bounds of your selected artwork as the area for the object-based slice. Using this method, if you make an edit to your graphic, the slice updates automatically along with it. If you want to hide all the little squares and numbers that indicate slices on your screen, you can do so by choosing View > Hide Slices. Editing Slice AttributesYou can specify certain attributes for a slice. Remember that a slice is really a cell in an HTML table. So, for example, a slice can have its own background color or URL link. Once a slice has been defined using either of the two methods described earlier, you can select it with the Slice Select tool. To edit the attributes of a slice, select a slice and choose Object > Slice > Slice Options to specify settings such as URL and ALT text (Figure 10.11). When you specify text as an object-based slice, you can also set the slice to be an HTML slice (rather than an image slice). In that case, Illustrator exports the text as editable HTML instead of as a graphic. Figure 10.11. The Slice Options dialog gives you the ability to assign specific URLs and additional information for each slice in your document.
HTML text slices might not format exactly as you see them in Illustrator. Although bold or character attributes are preserved, exact fonts and sizing depend on the browser used. Other text features, such as kerning and baseline shift, are ignored. Once you have created all of your slices, you can choose individual file formats and additional settings by using the Save for Web feature, which we discuss in detail right about . . . now. Using the Save for Web FeatureAt one time, saving a graphic for use on the Web was a difficult task that involved saving an image, opening it in a Web browser, and then repeating that process again and again. Illustrator's Save for Web featurewhich is also found in Photoshop and GoLiveis actually a component of Adobe ImageReady and allows you to speed up the process of optimizing and saving Web graphics. Once you're ready to export a final version of your Web graphic, choose File > Save for Web to open the Save for Web dialog. The dialog, which fills up most of your screen, is split into several different sections (Figure 10.12). Along the far left are several tools that you can use within the Save for Web dialog. In the center, a preview pane allows you to view up to four different versions of your art. The upper right side offers a variety of different export formats and their settings and the lower right side offers a trio of palettes that control color, image size, and layer settings. Along the bottom of the dialog are zoom controls, color information, and a Preview in Browser button. Figure 10.12. The Save for Web dialog is almost an entire application within itself.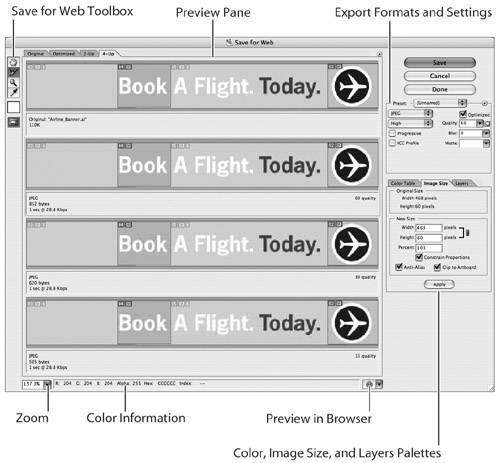 Let's take a closer look at each of the individual sections of the Save for Web dialog.
The two remaining sections, which feature the group of three palettes and the ability to choose from different file types are covered individually, in the following sections. Choosing the Right Image File TypeOverall, the main benefit of using the Save for Web feature is the ability to compare the final results of multiple file formats, and choosing the one that fits best for a particular use. To make the right decision, you have to understand the differences between each of these file formats, and what their strengths and weaknesses are. Let's take a closer look.
Choosing the GIF File FormatA common image file format used on the Web, the GIF format (Graphics Interchange Format) was developed by the people at CompuServe, one of the pioneers of the Internet and the Web, though you hardly hear their name mentioned today (amazing how fast things change). Recognizing the need to send graphics files across modem connections (which in those days, were quite slow), they developed the GIF file format, which can contain a maximum of 256 colors and which uses a lossless method of compression. A GIF tries to save space by looking for large areas of contiguous solid color; this makes the format perfect for logos, backgrounds, text headlines, and the like. However, the 256-color limit and the limited compression for images with a lot of detail make the GIF format a bad choice for photographic content. The GIF format supports other features, including the ability to control the exact number of colors present in the file and the ability to specify a single color of the file as being transparent. When you choose the GIF file format in the Save for Web dialog, you have the following settings available:
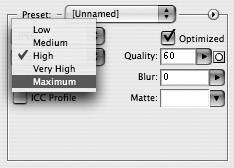
Choosing the JPEG File FormatJPEG (pronounced jay-peg) stands for Joint Photographic Experts Group, and it was created to allow photographers to share images using a standard file format. JPEG files can contain millions of colors and use a lossy compression method. Digital images usually contain more color information than the human eye can see or detect, and by throwing out some of that extra information, JPEG images can achieve amazing file size savings. For example, a 10 MB photograph can easily be compressed into a JPEG that's less than 1 MB. Because the JPEG format supports millions of colors (as opposed to only 256 in a GIF), it's the perfect format to use for photographs or images with complex colors and gradient fills. However, JPEG files do not support transparency as GIF files do. When you choose the JPEG file format in the Save for Web dialog, you can choose from the following settings:
Choosing the PNG File FormatThe PNG (pronounced ping) format was developed mainly as an alternative to the GIF format. Shortly after the GIF format became popular on the Web, the Unisys corporation, which developed the actual compression algorithm used in the GIF format, tried to collect royalties on its technology from those who used the GIF format. To get around the legal issues, an open standard called PNG (Portable Network Graphic) was developed. The PNG format utilizes lossless compression and can support millions of colors. Instead of allowing you to specify a single color as being transparent, the PNG format also supports 256 levels of transparency, similar to alpha channels inside Photoshop. Older Web browsers require a special plug-in to view PNG files, although most newer browsers can display them natively. PNG files also might not be compatible with some PDA devices and cell phones. PNG files come in two varieties, 8 bit and 24 bit. The different optimization settings for PNG-8 are identical to those found for the GIF format, mentioned previously. Choosing the SWF File FormatSWF (Shockwave Flash) is a popular Web-based file format that supports both vectors and rasters. This Flash file format has become extremely popular because of its capability to contain interactive or animated content. You can use Illustrator to generate a SWF file that you want to upload directly to a Website or to create art for import into Macromedia Flash for further editing. When you choose the SWF file format in the Save for Web dialog, you can choose from the following settings:
Choosing the SVG File FormatSVG (Scalable Vector Graphics) is an XML-based file format that is used primarily on the Web and has recently become more popular in creating content for cell phones and handheld wireless devices. Most Web browsers require a special plugin to view SVG files, although some of the newer versions of browsers, including Firefox and Apple's Safari are beginning to support SVG files natively. Because SVG files are text-based, they can be edited easily, even after they have been exported and uploaded to a Web server. Because of this ability, SVG files are used in data-driven server-based workflows where customized content is a necessity. When you choose the SVG file format in the Save for Web dialog, you can choose from the following settings:
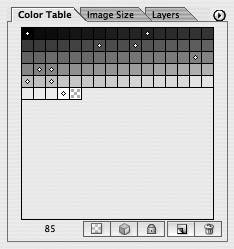
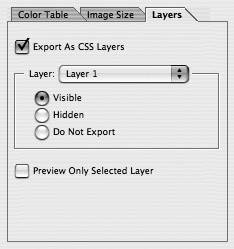
Choosing the WBMP File FormatThe WBMP file format, which stands for Wireless Bitmap, is a format that is optimized for wireless devices that have slow connections and limited display capabilities. These devices are quickly fading because newer phones are being introduced constantly and cell phones are the largest-selling consumer electronic devices worldwide. WBMP files are black-and-white images (color isn't supported) and are optimized via a dithering setting. Specifying Additional Image SettingsIn addition to choosing a file format, Illustrator's Save for Web allows you to control how colors, image sizes, and layers are treated when saving your files. These settings are found within the three palettes that appear at the lower right side of the Save for Web dialog. Color TableThe Color Table palette displays a complete list of all of the colors that are contained within the selected slice. Colors that appear with little diamond icons are Web-safe colors (Figure 10.17). Using the Eyedropper tool to sample colors, you can click the Maps selected colors to transparent icon beneath the palette to specify a color that will appear as transparent. Figure 10.17. Illustrator indicates Web-safe colors in a color table with tiny diamond-shaped icons. Image SizeThe Image Size palette gives you feedback on the actual size of the selected slice, and it also allows you to specify new sizes, although it's always better to make changes to image size on the Illustrator artboard, before launching the Save for Web dialog. Of importance are the Anti-Alias button and Clip to Artboard check boxes. By default, Illustrator anti-aliases artwork that is exported from the Save for Web dialog and exports artwork based on the art's bounding box or your crop area setting. To have the Save for Web dialog honor the artboard size, you can check the Clip to Artboard setting. LayersIf you specified layers in your Illustrator document, you have the option of exporting those layers as CSS Layers by checking the Export as CSS Layers option in the Layers palette found in the Save for Web dialog. CSS, which stands for Cascading Style Sheets, allows you to take advantage of absolute positioning and overlapping objects within a Web page. Although the technical aspects of CSS are outside the scope of this book, it's important to realize that CSS has become a standard, especially when you're generating content that will be displayed on a wide range of devices. If you choose to export Illustrator layers as CSS layers, you can choose whether each top-level layer in your document should be exported as being visible, or hidden (Figure 10.18). Alternatively, you can specify that certain layers aren't exported at all. Figure 10.18. CSS Layers that are exported as hidden can be activated via scripts on the server using Dynamic HTML.
|


EAN: 2147483647
Pages: 147