Using Graphic Styles
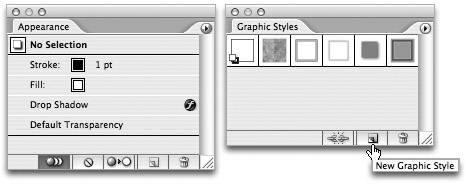
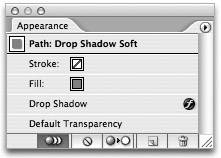
| You probably already have a sense of how powerful appearances and Live Effects are. However, if you have several objects in your file to which you need to apply the same appearance, it can be inefficient to do this manually using Live Effects. Additionally, if you ever need to update the appearance you applied, you would need to do so for each object individually. Graphic Styles can help. A graphic style is a saved set of attributes, much like a swatch. When you apply a style to an object, that object takes on the attributes that are defined in the style. At any time, you can redefine the attributes of a particular style, and when you do, any objects in your file that already have that style applied are updated as well. The best part about Graphic Styles is how easy they are to use. And you'll never guess which palette plays an integral part in creating graphic stylesthat's right, the Appearance palette. Defining a Graphic StyleAs we mentioned earlier, a graphic style is a saved set of attributes. You know that the Appearance palette lists all attributes, so you already understand the first step in creating a graphic stylespecifying the attributes you want defined in the style. Once you've specified stroke and fill settings and added Live Effects, click the New Graphic Style button in the Graphic Styles palette (Figure 3.16). Alternatively, you can drag the target thumbnail from the Appearance palette and drop it into the Graphic Styles palette. Double-click a style in the Graphic Styles palette to give it a name (which is always helpful). If you Option-click (Alt-click) the New Graphic Style button, you can define a new style and give it a unique name in a single step. Figure 3.16. Once you've specified your attributes in the Appearance palette, you can use the Graphic Styles palette to create a new graphic style. Notice that when you apply a graphic style to an object in your file, the Appearance palette identifies the target and the style that is applied. This makes it easy to quickly see which style is applied to an object (Figure 3.17). Figure 3.17. When a graphic style is applied, the Appearance palette helps you easily identify the target and the applied style.
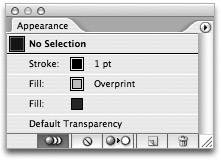
Figure 3.18. To simulate a multi-ink color, combine two fills and use the Overprint command. The result is a single editable path that contains two colors. Editing a Graphic StyleEditing a graphic style is an exercise that involves both the Appearance palette and the Graphic Styles palette, so it makes sense to position them side by side. You don't need to have an object selected in order to modify an existing graphic style, but if you do have an object selected, you'll be able to preview the changes you're making to the style. In the Graphic Styles palette, click the style that you want to edit. The Appearance palette lists all of the attributes for the selected style. You can modify the style by either adding additional attributes, deleting existing ones, or by changing the paint order by dragging attributes in the Appearance palette. Once you're happy with the modifications, choose Redefine Graphic Style from the Appearance palette menu to update the style (Figure 3.19). Figure 3.19. Once you've modified the attributes, you can update the style, which updates all other objects that have the style applied.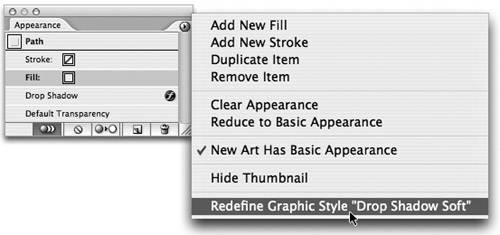 Any objects in your file that have that particular style applied then immediately update to reflect the modifications. Alternatively, you can Option-drag (Alt-drag) the target thumbnail on top of the existing style in the Graphic Styles palette. A heavy black outline appears around the style in the palette to indicate that the style will be updated (Figure 3.20). Figure 3.20. Dragging the thumbnail from the Appearance palette on top of an existing graphic style while holding the Option (Alt) key redefines the style.
|

EAN: 2147483647
Pages: 147