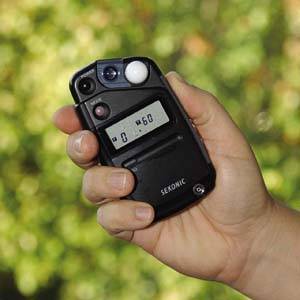
Using a Handheld Meter
| If a camera with non-manual settings is at the low end of the exposure-control spectrum, then using a handheld light meter is at the high end. Handheld meters usually employ two or three metering methods that overcome many of the shortcomings of your camera's onboard meter. For starters, handheld meters allow you to take reflected light readings by pointing the meter at the subject and measuring the light as it bounces off the subject. Note that this kind of reflected metering is susceptible to false readings from objects with above and below average reflectivity, just as is true with the meter in your camera. Remember that your objective is to record the amount of light in the scene; the reflection part is a necessity imposed by the meter's placement inside the lens. So how do you avoid false readings from reflected light? Avoid the reflection by turning your handheld meter around, pointing it at the camera, and record the light as it falls onto the subject, before the light is distorted by reflectance or averaged into a generic, homogenous reading. This type of measurement is called an incident reading, and it can produce some very accurate exposures. Most handheld meters include some sort of dome attachment or slider used to take incident readings. The meter averages the light falling on the dome from all angles. This type of averaging is good in that you've avoided the reflectance problem, ensuring that the reading does not overcompensate for light or dark subjects. Just make sure that there are no shadows falling across the meter, and that the meter shares the same light as the subject.
The third type of measurement available on advanced meters is a spot meter option that narrows the angle of the metering cell to take readings from specific spots in a scene in as little as a 1-degree metering angle over long distances. Spot metering involves looking through the viewfinder, lining up the center spot on the subject of your image, and pushing the button to take the reading off the subject. Because spot metering is a reflective technique, it produces a reading that renders the sampled area as neutral gray. Make sure that this is what you want, or use some form of exposure compensation to lighten or darken the area. Spot metering is also good for measuring the relative brightness between different areas of the scene. |
EAN: 2147483647
Pages: 141
- Chapter VIII Personalization Systems and Their Deployment as Web Site Interface Design Decisions
- Chapter IX Extrinsic Plus Intrinsic Human Factors Influencing the Web Usage
- Chapter XII Web Design and E-Commerce
- Chapter XIV Product Catalog and Shopping Cart Effective Design
- Chapter XVII Internet Markets and E-Loyalty