| Sharpening images with Photoshop is a very common and useful task. If your image appears soft or blurry, you can bring back detail, clarity, and contrast with sharpening. Sharpening brings out additional detail in virtually all images except those created on the highest-quality scanners. The best way to add overall sharpness to an image is to use the Unsharp Mask filter. Be careful not to oversharpen, which results in an unnatural halo around the objects in the image, flattening the space. If this occurs, choose Edit, Undo and reapply the effect. Select the Unsharp Mask Filter With the image open, choose Filter, Sharpen, Unsharp Mask. The Unsharp Mask dialog box opens. 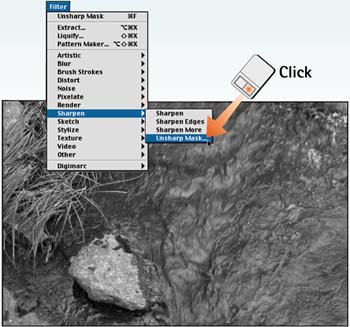
Set the Amount Slider Enable the Preview check box and set the thumbnail magnification view to 100 by clicking the + or button. The Amount slider controls the degree of sharpening applied to the image. Adjust the slider as needed, noting the changes in the preview window in the dialog box. 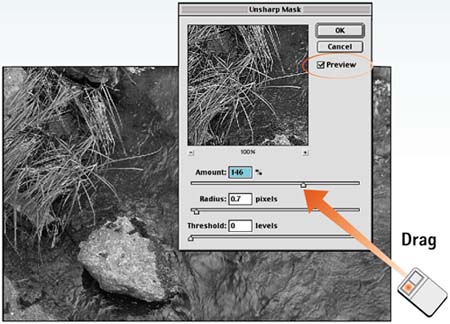
Set the Radius Slider The Radius control determines whether the effect is applied to a single pixel or to a group of pixels. A higher radius value lowers image detail in exchange for higher overall contrast. For the most naturalistic images, begin by setting this option at 1 and don't let it rise above 3. 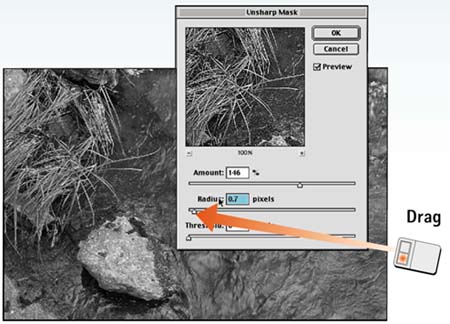
Set the Threshold Slider The Threshold setting excludes a portion of the tonal range from receiving the effect. Leave it at 0 to apply the effect globally; move it higher to exclude tones from dark to light. For all practical purposes, you do not typically change this setting. 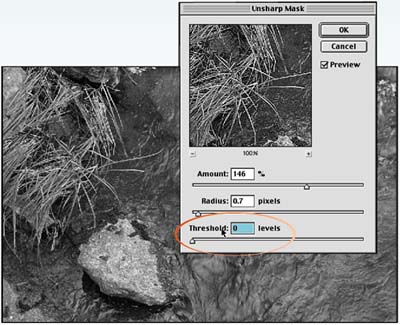
Apply the Effect To zoom in on the image window, select View, Zoom In as many times as needed. If the image is larger than the image window, you can use the scrollbars to scroll to different areas in the image. Check the image carefully to ensure that all areas are sharpened to the proper level. When you are satisfied with the image, click OK to apply the effect. 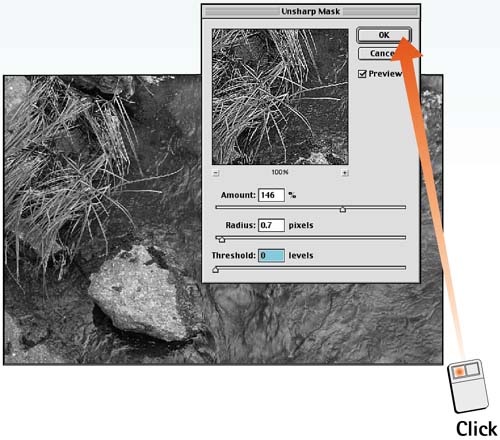
Fade the Result as Necessary Choose Edit, Fade Unsharp Mask. After the Fade dialog box opens, move the Opacity slider to the left to gradually decrease the sharpen effect as necessary. If you decide to soften the effect, set the slider accordingly and click OK, leaving the Mode setting at Normal (see Part 13, Task 1, "How to use Blending Modes," for details on other mode options). If you determine that the initial effect is acceptable, click Cancel to close the dialog box and leave the image unchanged. 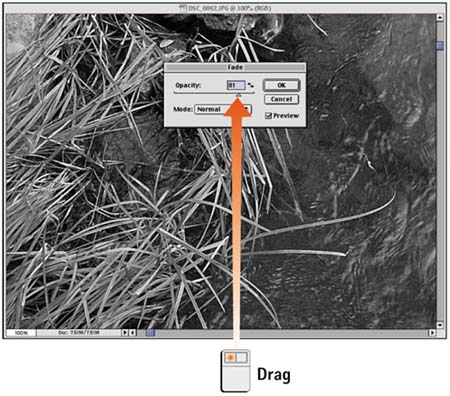
How-To Hints Don't Forget About Color Although this task uses a black and white image, sharpening an image is as much about color as it is about tone. Be sure to color balance your images to maximize overall contrast and color vibrancy. Unsharp Mask Does It All Notice that Adobe lists other sharpening filters in the Filter, Sharpen submenu. These options are all rolled into the Unsharp Mask dialog box, which you can use to apply all the other filters. Don't waste your time with the other filter options Unsharp Mask is all you need. |
|