| The History palette is the control center for Photoshop's multiple undo capability. It allows you to revert an image back beyond what the simple Edit, Undo command can do. The History palette records each edit or command as a layer tile. Click a tile to revert the image back to that earlier state. You can set features and options to optimize how the History palette works for you. Open the History Palette Choose Window, History to open the History palette. The palette shows a snapshot at the top, representing the original state of the file as it was opened. As you make changes to the file, those changes are displayed as tiles running in descending order in the palette. 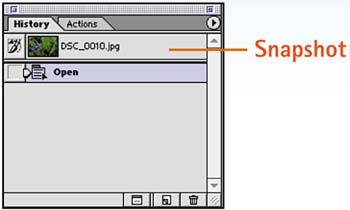
Set the Number of History States Select Edit, Preferences, General to open the General Preferences dialog box. Set the number of states you want to record, with the understanding that any states that exceed this limit will be lost. If you set History States to 20, for example, you cannot go back to what you did 21 steps ago. On the other hand, having more states is memory-intensive, so you must strike a happy medium between a History palette safety net and efficient allocation of memory and disk space. Click OK to save the history states and close the dialog box. 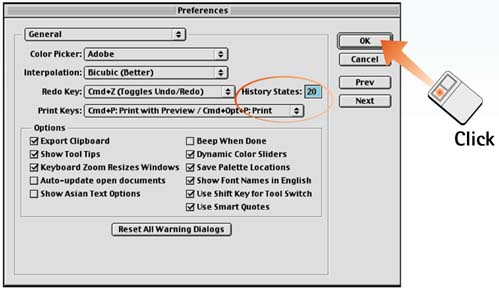
Take Snapshots Another way to preserve a specific image state is to take a snapshot. Snapshots are independent of the standard image states mentioned in Step 2 and remain available until you close or save the file. To take a snapshot, display the History palette menu and select New Snapshot. Give the snapshot a name in the dialog box that appears and click OK. A thumbnail of the snapshot appears in the upper part of the palette. 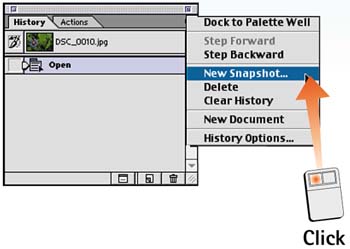
Revert to a Previous State To revert to a previous state or snapshot, select the corresponding tile in the History palette. The image in the active window reverts to the point in the editing process you selected. All tiles below the active tile are dimmed, but you can still revert to them by clicking them. 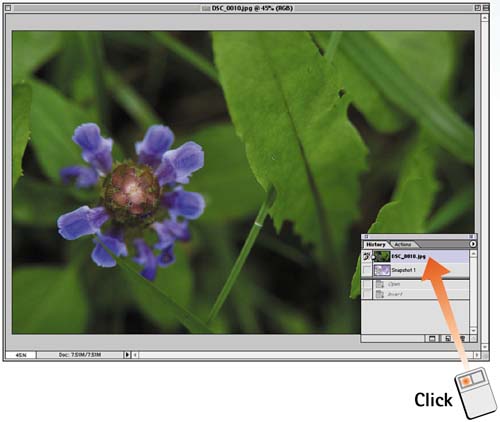
Create Duplicate Files The History palette also lets you create a duplicate image file. After you create a duplicate, you can continue editing that duplicate, leaving the original in its previous state. To make a duplicate, choose New Document from the History palette menu. Photoshop copies the image in a new window (without keeping track of any of the previous history states), which you can modify further or rename and save. 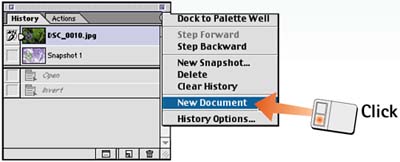
How-To Hints Watching Those Brushstrokes Remember that each time you click the mouse to apply a brushstroke, you "consume" a history state. Clicking away with multiple brushstrokes can consume all your history states in a hurry. Be sure to grab a snapshot before you start brushing, leaving you an escape route to a previous version. Using the History Brush You also can do great things with the Photoshop History brush, which allows you to brush in corrections using history states as a source. See Part 8, Task 4, "How to Use the History Brush," for details. Snapshot Options In the Snapshot dialog box that appears in Step 3, you can control what portions of the image are archived. Select Full Document, Merged Layers, or Current Layer from the From menu as desired. |
|