Task 3 How to Create Lighting Effects

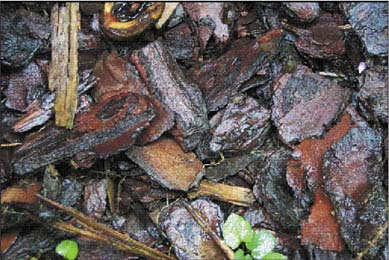
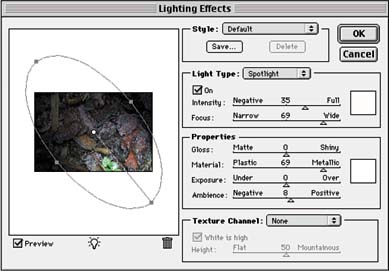
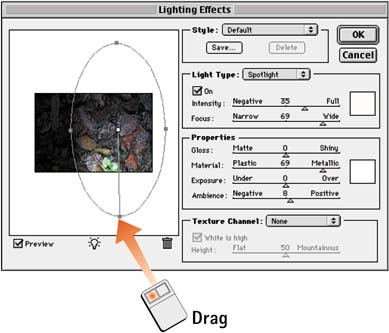
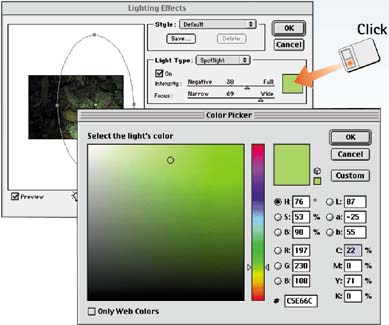
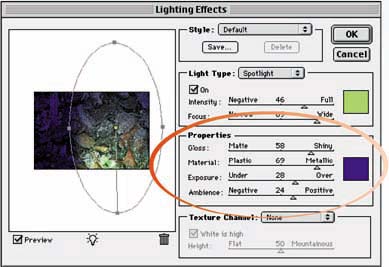
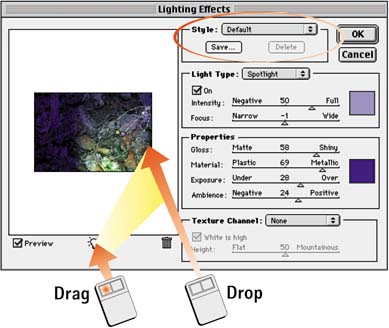
The Lighting Effects filter casts multiple spotlights of different colors, falling across the image as though it were a flat surface. The filter gives you full control over the focus and direction of the light, as well as the color, exposure, surface texture, and ambient light characteristics. Use this filter to add depth and drama to an image, as well as to build interest into a composition by highlighting a focal point.

  1. Open the File

    Choose File, Open and select the file you want to modify.

    graphics/p13_03fig01.jpg

  2. Select Lighting Effects

    Choose Filter, Render, Lighting Effects to open the Lighting Effects dialog box. You will see a thumbnail of the image on the left side of the dialog box, with one spotlight already placed over the image.

    graphics/p13_03fig02.jpg

  3. Reposition the Light

    Click and drag the center of the light to reposition the light circle in relation to the thumbnail image. Then click the point where the light-source line meets the light circle and drag to move the light source. Finally, drag the handles on the light circle to widen or narrow the light beam as it is cast on the image.

    graphics/p13_03fig03.jpg

  4. Configure the Light Type

    Modify the Intensity and Focus sliders as desired to brighten the image and focus the light beam. Click the color swatch to display the Color Picker so that you can select a color for the light itself.

    graphics/p13_03fig04.jpg

  5. Configure Properties

    The four Properties sliders control the appearance of the surface of the image as well as the overall brightness of the exposure. Adjust the Gloss and Material sliders to modify the surface brightness. The Exposure slider controls image brightness, and the Ambience slider controls the amount of secondary ambient light. You can click the color swatch in this area of the dialog box to modify the color of the ambient light.

    graphics/p13_03fig05.jpg

  6. Add Other Lights As Needed

    To add other light sources, click and drag the light bulb icon into the thumbnail image. Reposition and reset the parameters as described in Steps 3 through 5. The Style drop-down list at the top of the Lighting Effects dialog box contains many more fun options with which you can experiment. If you want to remove a light, drag it to the trash can icon at the bottom of the dialog box. Keep in mind that you need at least one light source.

    graphics/p13_03fig06.jpg

How-To Hints

Other Kinds of Light

In addition to spotlights, you can use omni-directional lights and directional lights. Omni lights radiate light equally in all directions from the center point; directional lights cast an even blanket of light across the entire image. Select Directional and Omni lights from the Light Type drop-down list in the Lighting Effects dialog box.

Using Presets

The Style drop-down list in the Lighting Effects dialog box offers 16 lighting presets. In addition to exploring these options, you can save your own combinations by clicking the Save button and naming the effect in the Save As dialog box that appears. This option saves the current configuration of Lighting Effects settings as a preset, which then appears in the Style list.


How to Use Adobe Photoshop 7
ISBN: 0789727706
EAN: 2147483647
Year: 2005
Pages: 144

flylib.com © 2008-2017.
If you may any questions please contact us: flylib@qtcs.net