Task 10 How to Create Custom Gradients
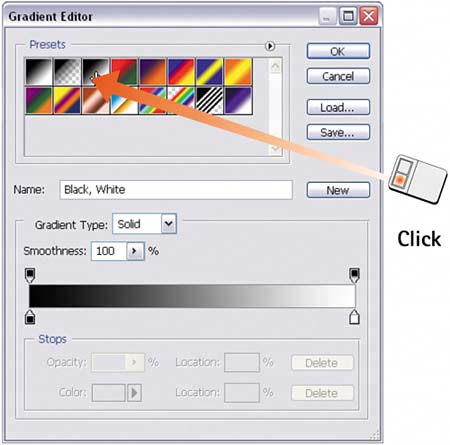
| Building a custom gradient in Photoshop involves defining the number of colors in the gradient and specifying how those colors fade and transition. You can also build transparency into the gradient, which allows the layers below the current layer to show through. Gradients are similar to custom brushes in that you can customize them for each image. Photoshop lets you create and save custom gradients and add them to the preset list for easy access. After you create a gradient, you can use it with any of the gradient shapes selected from the Options bar. 1. Select a Gradient ToolSelect the Gradient tool from the toolbox. In the Options bar, click the gradient swatch to launch the Gradient Editor dialog box. 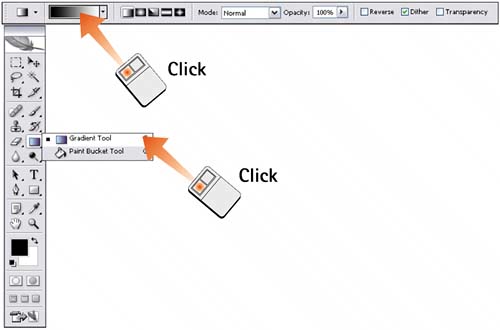 2. Select a PresetFrom the palette at the top of the dialog box, select one of the existing gradient presets if you want to use it as a starting point. Starting with a preset is a good idea if you want to predefine many of the parameters (such as color choices and color stops).
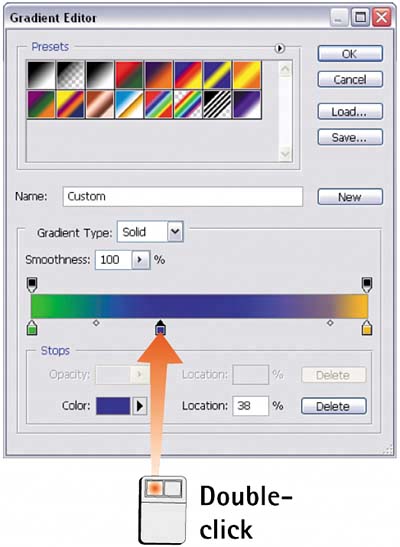
3. Select the Starting ColorDouble-click the left color stop in the gradient bar in the Gradient Editor dialog box to open the Color Picker. Select a color you want to use in the gradient you are creating and click OK to close the Color Picker. The new color appears on the left end of the gradient bar, and the gradient is updated.
4. Select the Ending ColorDouble-click the right color stop in the gradient bar in the Gradient Editor dialog box to open the Color Picker. Select another color you want to use in the gradient you are creating and click OK to close the Color Picker. The new color appears at the right end of the gradient bar, and the gradient is updated. 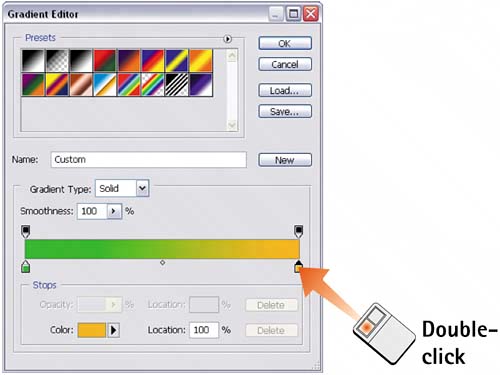 5. Set the BreakThe break in a gradient determines where a 50% mix of the two colors occurs. By default, the break is in the middle of the gradient, but you can adjust the placement by dragging the diamond that appears below the gradient bar. By adjusting the break point, you can designate a dominant color for the gradient.
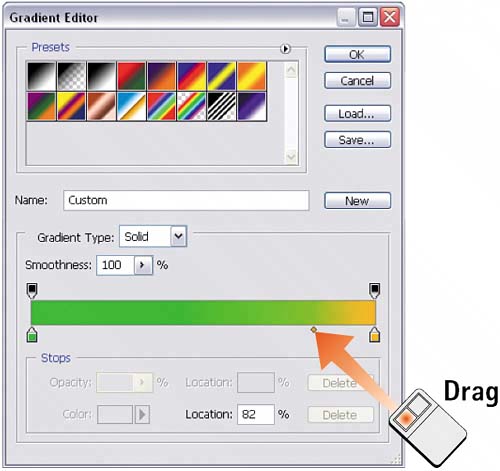
6. Add Additional ColorsDouble-click in the color stop section below the gradient bar to add a third color stop. This action also opens the Color Picker. Select the third color you want to add to the gradient, click OK to close the Color Picker, and add the color to the gradient. Drag the new color stop as necessary to control the color placement in the gradient. Notice that a new diamond is placed between each color to control the breaks between colors.
7. Save the GradientClick New to save the gradient and add its swatch to the gradient palette. Click OK to close the Gradient Editor. If you want, you can click the Save button to save the gradient as a separate file to be loaded later. When you do this, a Save As dialog box opens for you to name the gradient file and specify where it goes.
|


EAN: 2147483647
Pages: 184