Task 2 How to Make Picture Packages
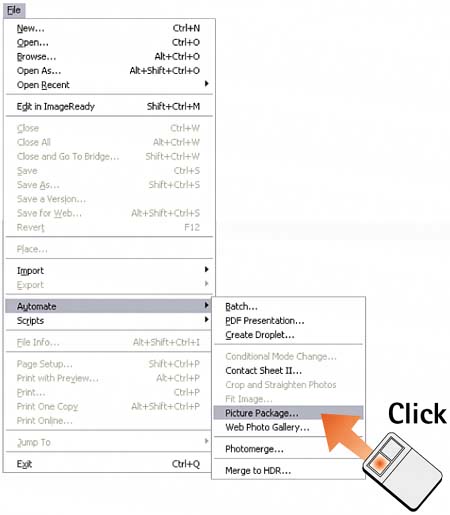
| The Picture Package command places multiple copies of a selected image in a page layout, allowing you to make several prints on one sheet of paper. This arrangement saves time and printing materialsand allows you to satisfy the extended family's request for the latest baby pictures. If you print photos on a home inkjet printer, this command makes life a lot easier. 1. Select Picture PackageSelect File, Automate, Picture Package to launch the Picture Package dialog box.
2. Select FilesFrom the Use drop-down list at the top of the dialog box, select Folder or File; then click the Browse button in Windows (click the Select button on the Mac) and navigate to the image or folder you want to use. If the target file is open in Photoshop, or if one or more files are selected in Bridge, select Frontmost Document or Select Images from Bridge from the Use menu. If desired, enable the Include All Subfolders check box. 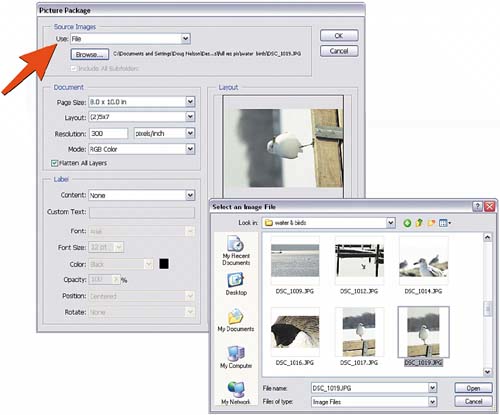 3. Set Page Layout and SizeSelect page parameters from the Document section of the Picture Package dialog box. The Page Size setting determines the size of the overall document. Select the size of each print from the Layout menu, set the Resolution according to your printer specifications (or use the same resolution as the images), leave the Mode set at RGB Color, and enable the Flatten All Layers check box unless you would prefer to save the resulting file as a PSD file (with each image on a separate layer for editing flexibility). 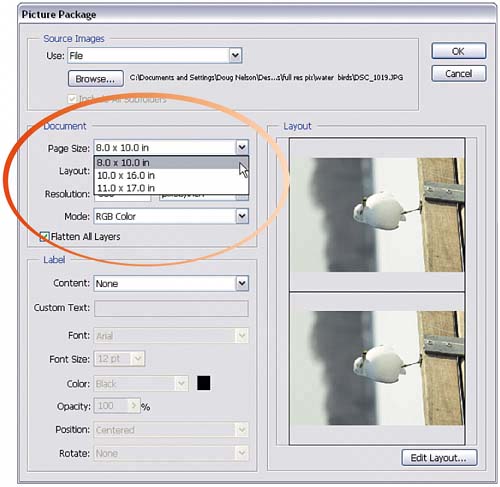 4. Select Additional ImagesWhen you select a Layout option, Photoshop automatically populates all image zones within the layout with the images you selected in step 2. You can substitute an additional image by double-clicking its thumbnail in the Layout pane of the dialog box and navigating to a different image. 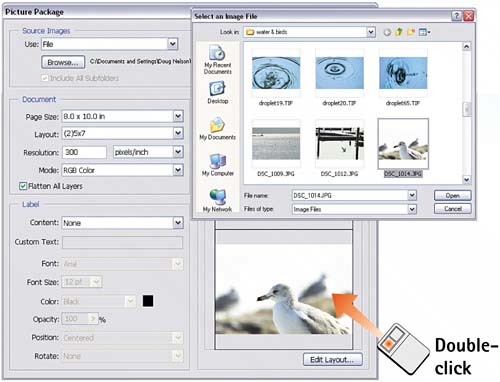 5. Set Label InformationTo add labels to the images in the layout (the labels appear on top of the images), select a content type for the label from the Content pop-up menu. To add a customized text message, select Custom Text from the Content menu and type the message in the Custom Text field. Select any desired text parameters such as Color, Font, or Font Size from the remaining lists in the Label section of this dialog box. 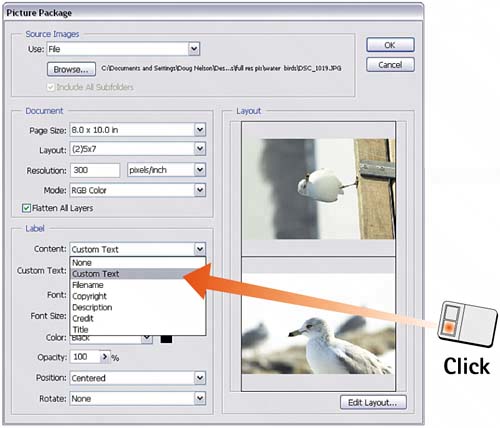 6. Create the FileClick OK to build the Picture Package file. Photoshop launches the image, resizes it, and populates a file that corresponds to the page parameters specified in step 3. If you selected a folder in step 2, or if you included subfolders, Photoshop creates a separate document for each target image. Save the files or print them to complete the process.
|
EAN: 2147483647
Pages: 184