Task 8 How to Add a Layer Mask
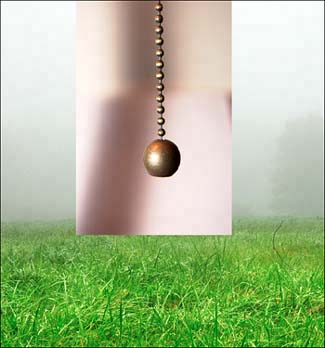
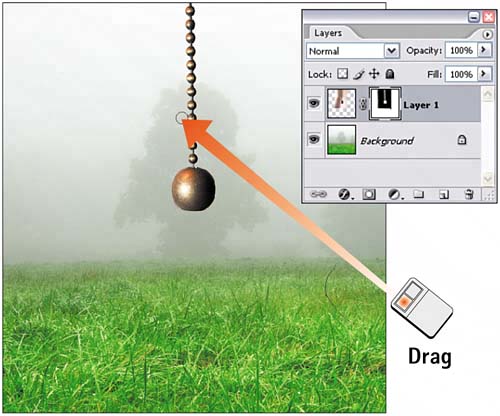
| A layer mask conceals a portion of a layer without actually deleting it, allowing the lower layers to show through. Erasing the layer mask restores the layer's original appearance so that nothing is lost. The general approach to applying a layer mask is to brush it on using any of the paint tools, controlling the visibility and transparency with grayscale values. As you saw in Part 3, Task 4, "How to Use Quick Mask," a black value conceals the layer image, white reveals it, and grayscale dictates the transparency. 1. Open the FileSelect File, Open or click the Go to Bridge button on the Options bar and select the image file you want to modify. For this task, I've opened an image with two layers. The lower layer is of a misty landscape with grass in the foreground and an ancient tree in the background; the top layer is of a pull chain. By "painting" in a mask, I'll make it appear as if the pull chain was suspended in front of the camera lens when the landscape was shot.
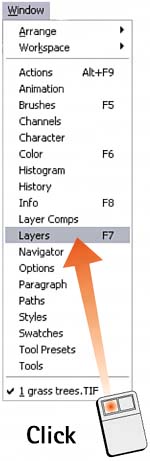
2. Open the Layers PaletteSelect Window, Layers to open the Layers palette.
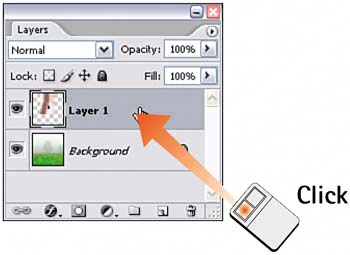
3. Select the Mask LayerSelect the layer to be masked by clicking its name in the Layers palette. In this example, select the layer containing the pull chain.
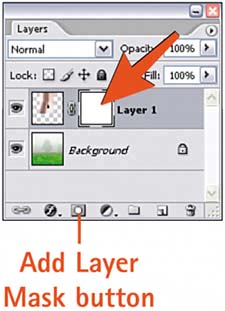
4. Add the Layer MaskClick the Add Layer Mask button at the bottom of the Layers palette to add a layer mask to the current layer. The layer mask is indicated in the image tile by a white thumbnail next to the image thumbnail. The border of the new thumbnail is doubled, indicating that the mask is selected.
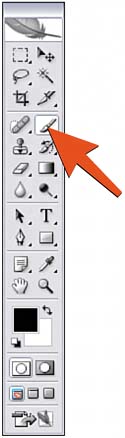
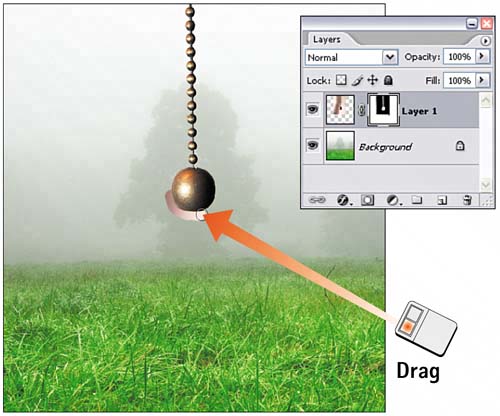
5. Paint the MaskSelect the Brush tool from the toolbox. Press D for the default black and white colors (if necessary, press X to switch black to the foreground). Move the mouse pointer into the image area and paint the areas you want to mask (or remove). As you do so, you'll see the current layer disappearing and the lower layer showing through; the thumbnail mask icon is updated to show the current mask. In this example, notice that the blurred background behind the pull chain is being "erased" and the misty Background layer is showing through.
6. Erase the MaskTo erase or correct painting errors when masking, change the foreground color to white and repaint the mask. The image layer reappears as you work. To paint in transparency, select a gray foreground color or reduce the Opacity setting in the Options bar for the paint tool you are using. Note that pressing the X key enables you to quickly toggle between the foreground and background colors. This is helpful while adjusting the edges of the mask.
|

EAN: 2147483647
Pages: 184