Code Behind a Document
| VSTO supports code behind a document by requiring that the developer use classes generated in a VSTO project that have preconnected context and preconnected events. These classes are sometimes called code-behind classes because they are code associated with a particular document or worksheet. In Word, there is one code-behind class corresponding to the document. In Excel, there are multiple code-behind classesone for the workbook and one for each worksheet or chart sheet in the workbook. The first time your code runs in a VSTO code-behind-the-document project is when Office raises the Startup event handled by any of the code-behind classes created for you. VSTO provides context via the base class of the code-behind class you are writing code in. A VSTO code-behind class customizing an Excel worksheet derives from a base class that aggregates all the methods, properties, and events of an Excel worksheet. This enables you to write code such as this in the Startup method of a worksheet class: MsgBox(String.Format("{0} is the sheet name", Me.Name)) By using Me.Name, you are referring to the Name property of the Excel Worksheet object inherited from the base class. Listing 2.6 shows a VSTO code-behind class for an Excel Worksheet. VSTO code-behind document classes also use partial classes to hide some additional code generated by VSTO. Listing 2.6. A VSTO Excel Workbook Customization
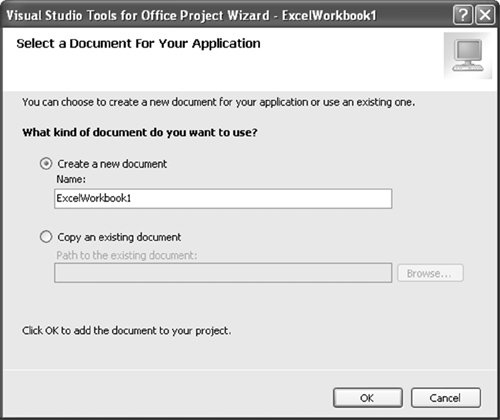
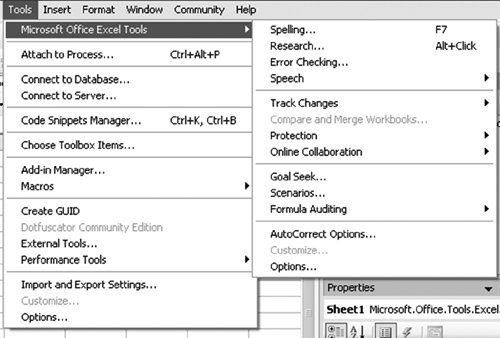
In this section, we create some simple code behind a document in Excel using VSTO. First, start VSTO, and choose File > New > Project. As you have seen previously, navigate to the Office node under the Visual Basic root. We will create an Excel workbook project using Visual Basic as shown in Figure 2.7. If you already have a workbook that you want to add VSTO customization code behind, you can specify its location in the dialog box shown in Figure 2.8 that appears after you click OK in the New Project dialog box. This time, we will start from scratch, creating a new, blank workbook. Figure 2.7. Using the New Project dialog box to create an Excel Workbook project.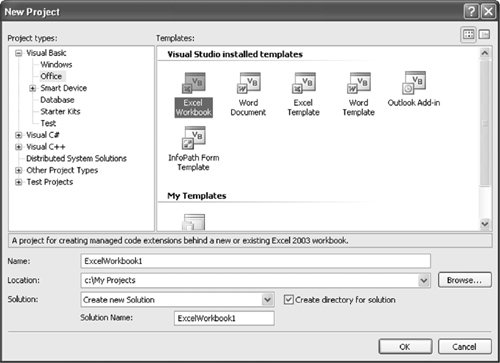 Figure 2.8. Selecting the workbook to associate with your code behind. After we have created the project, the design view appears, as shown in Figure 2.9. Figure 2.9. The design view for VSTO Excel code behind.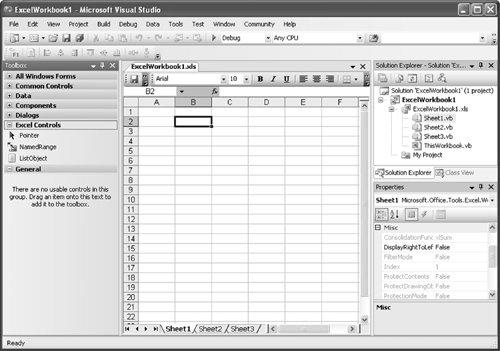 Notice a few interesting things in Figure 2.9. First, Excel is running inside Visual Studio 2005 as a designer, just the same as a Windows Forms designer would when developing a Windows Forms project. Second, look at the menu bar shown in Figure 2.10. VSTO merges the Visual Studio menus (Build, Debug, and so on) and the Excel menu items (Format, Data, and so on). Menu items that appear in both Visual Studio and Excel (Tools, for example) merge by adding a submenu to the Visual Studio menu, such as Microsoft Office Excel Tools, that can be selected to show the Excel Tools menu. Figure 2.10. The merging of Visual Studio and Excel menus. Third, notice in Figure 2.9 that the toolbox contains a new category: Excel Controls. When designing a document using Visual Studio, you can create named ranges and list objects using the Excel menu items familiar to Excel users or the toolbox idiom familiar to Visual Studio users. Fourth, notice that the Properties window shows the properties of the selected objectin this case, Sheet1. You can use the Properties window to edit properties of Excel's objects the same way that you would edit properties of controls and forms in a Windows Forms project. Fifth, notice that the Solution Explorer has four classes in it already. Each underlying Excel Worksheet and Workbook object is represented by a .NET class that you can extend and customize. As you make changes to the document in the designer, the code behind updates automatically. Drag a list object from the toolbox onto the Sheet1 designer, for example, and draw it to be ten rows by four columns, as shown in Figure 2.11. Figure 2.11. Creating a list object in the designer.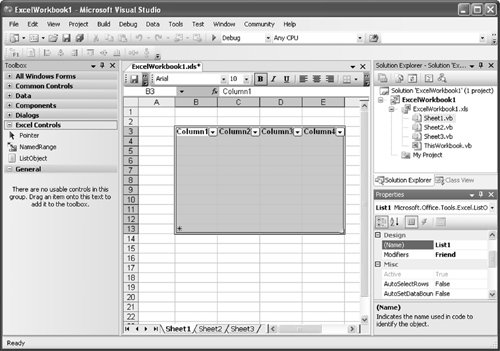 As you can see from the Properties window, the designer has chosen a default name for the new list object. We could edit it, but in this example, we will keep the default name List1. Let's take a look at the code behind this worksheet and make some simple changes to it. Right-click Sheet1.vb in Solution Explorer, and choose View Code. We are going to briefly illustrate two VSTO features: support for the Document Actions pane and list object data binding. We will declare a Windows Forms button as a member variable of the class and call it myButton. In the Startup event handler, we will show that button in the Document Actions task pane of Excel by adding it to the ActionsPane's Controls collection. Doing so will cause Excel to show the Document Actions task pane and display our button. We will also handle the Click event of the button, and when the button is clicked, we will data-bind our list object to a randomly generated DataTable. Listing 2.7 shows this code. Listing 2.7. A VSTO Customization That Adds a Control to the Document Actions Task Pane and Data-Binds a ListObject Control to a DataTable
Build and run the code, and sure enough, Excel starts; the Startup event is raised for the sheet; and the button is added to the actions pane. Click the button, and a random DataTable is generated and bound to the list object, as shown in Figure 2.12. Exit Excel to end your debugging session. Figure 2.12. The result of running Listing 2.7 and clicking the button we added to the Document Actions task pane.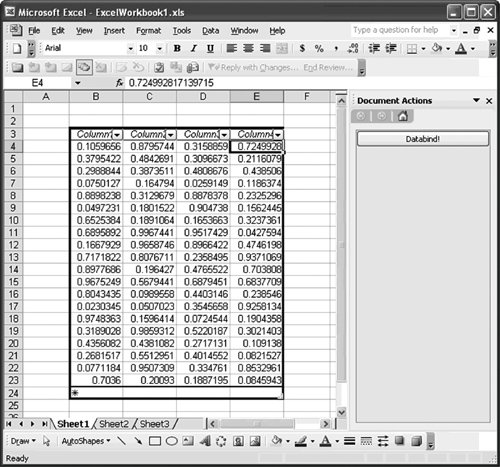 We have briefly illustrated VSTO's support for the Document Actions task pane and the ability to bind data that VSTO adds to Excel's list object. For more information on VSTO's support for the Document Actions task pane, see Chapter 15, "Working with the Actions Pane." For more information on VSTO's support for data binding, see Chapter 17, "VSTO Data Programming." |
EAN: 2147483647
Pages: 221