Adding Windows Forms Controls to Your Document
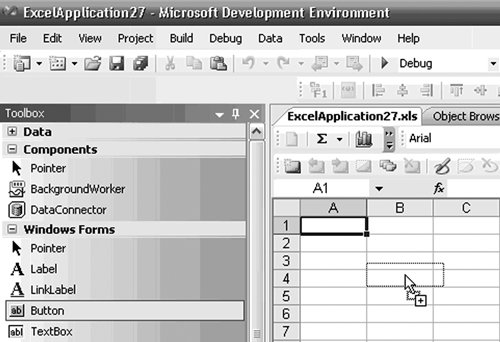
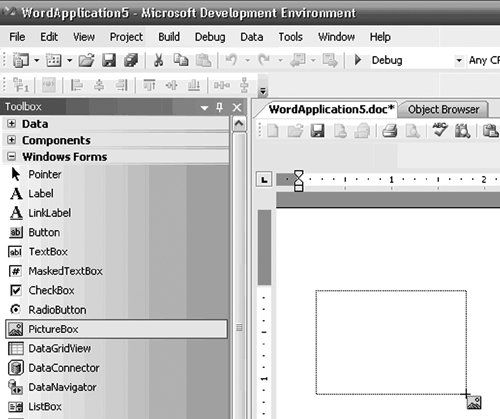
| One of the key design goals for VSTO was to keep the design experience as close to existing Windows Forms development as possible, and adding Windows Forms controls to the document is a key tenet of this goal. The great thing about adding controls to the document or spreadsheet is that you really do not have to think about it, because most of the design experience is almost identical to that of creating a Windows Forms form. There are some differences in the experience, however, and we examine them in this section. When you create a new project based on an Excel workbook or Word document, VSTO creates a project and automatically loads the Excel or Word document surface into Visual Studio to provide a design surface for you to drag and drop controls onto. It is easier to pin the toolbox to make it dock to the side of Visual Studio window, because it is difficult to drag and drop from the toolbox onto Word or Excel when it is in its default auto hide mode. Why? When the toolbox shows itself, it obscures quite a bit of the left side of the document or spreadsheet. When you drag and drop a control onto the document surface, the toolbox does not autohide and get out of the way until the drag and drop is over. Modes for Adding ControlsVSTO provides three modes for adding controls to the document surface:
Controls That Are Not in the Control ToolboxA number of Windows Forms controls do not show up in the controls toolbox for Excel and Word projects. These controls were purposely excluded because of known issues in using them on the document surface. Some of these issues are purely design-time-related, in that the design-time representation of the control does not work well. This does not mean that the control cannot be used, but it might mean that the only way that you can use it on a document is to add it programmatically at runtime or to use the control in a user control that you then add to the document. A good example of such a control is the group box. The design-time experience of the group box does not work well in Excel or Word, because the group-box designer requires the container to support container drag and drop, which the Excel and Word designer does not support. You have two options to work around this limitation:
Some other controls are excluded from the toolbox for the following reasons:
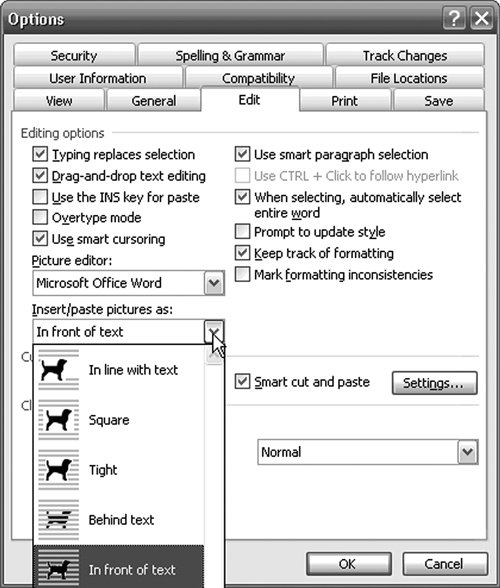
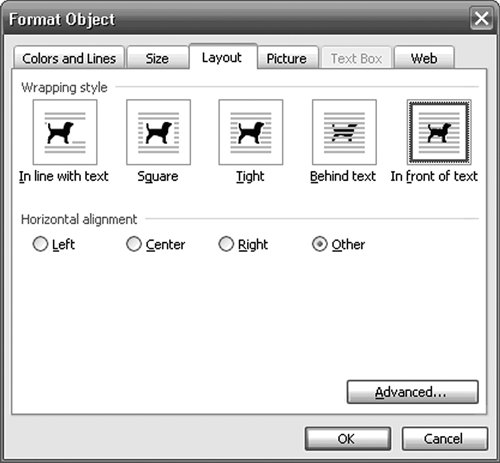
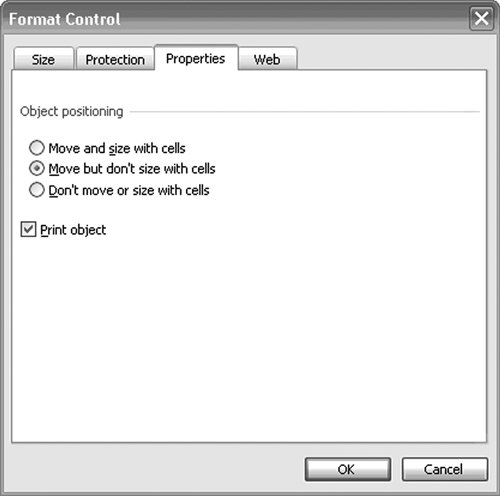
Control Insertion Behavior in WordA control added to Word is affected by the insertion settings set in Word's Options dialog box. A control can be inserted "in line with text," which means the control is inserted into the text flow of the document and moves as the text flow changes. It also can be inserted "in front of text," which means that the control is positioned at an absolute position in the document that does not change when the text flow changes. You can change the default insertion behavior in Word to be exact-position-based rather than flow-based by changing the insert/paste pictures setting in Word's Option dialog box from the default In Line with Text to In Front of Text. After you change this setting, all controls will be positioned where you want them instead of having to be in line with the text. To change this setting, choose Options from the Tools menu, and click the Edit tab of the Options dialog box. Figure 14.7 shows the Insert/Paste Pictures As setting. Figure 14.7. Changing the default insertion behavior in Word's Options dialog box. You can also change the way a control in Word is wrapped with the text by right-clicking the control in the designer and selecting the Format Control menu option. Doing so brings up Word's Format Object dialog box, shown in Figure 14.8. Changing the wrapping style from in line with text to in front of text provides exact positioning. Figure 14.8. Changing the wrapping style for a control with Word's Format Object dialog box. From the standpoint of the Word object model, a control whose wrapping style is set to In Line with Text, Square, or Tight is represented by the InlineShape object in Word's object model and located in the Document object's InlineShapes collection. A control whose wrapping style is set to Behind Text or In Front of Text is represented by the Shape object in Word's object model and located in the Document object's Shapes collection. Control Insertion Behavior in ExcelExcel also provides options for positioning a control on the worksheet surface, with the default being to move the control relative to the cell but not to size with the cell. This setting means that when you put a control onto the worksheet surface, it is linked to the cell that you dropped it on; so if you insert or delete cells around that cell, the control will stay positioned relative to the cell it was dropped on. If you resize the cell you dropped, however, the size of the control stays the same. This is usually the behavior that you would expect when adding a control. If you want your control to resize with the cell, you can either draw the control over the cell so that it matches the size of the cell (not for the faint of heart) or right-click the control inside Visual Studio and select Format Control, which brings up the Format Control dialog box, shown in Figure 14.9. Click the Properties tab, and select one of three options: Figure 14.9. Setting object-positioning options for a control in Excel.
Layout of Controls on the Document or Worksheet SurfaceThe Windows Forms editor in Visual Studio has some great alignment tools that make it much simpler to design professional-looking forms without having to resort to per-pixel tweaks on each control. Unfortunately, the alignment tools do not work on documents because the display surface is very different from that of a form. In the place of these tools, a new toolbar provides easy access to the alignment functionality in Word and Excel. Figure 14.10 shows the toolbar. To align controls, just select the controls you want to align and then click the button that represents the alignment option you want. Figure 14.10. The control-positioning toolbar in VSTO. |
EAN: 2147483647
Pages: 221