Creating Indexes
3 4
Creating indexes is not difficult. You create clustered and nonclustered indexes in much the same way, by using wizards provided with Enterprise Manager or by using the SQL command CREATE INDEX. In this section, you'll learn how to create indexes by using these two methods, and you'll also learn about using the fill factor and how to use stored procedures to create a full-text index.
NOTE
Although the wizards are easy to use, if you will be repeating operations or creating multiple similar databases, you might find scripts more convenient. Scripts allow you to both document and reproduce the build process.
Using the Create Index Wizard
Obviously, if you want to create an index on a table, the table must already exist in the database. You can use the Create Index Wizard to create either a clustered or nonclustered index on a table by following these steps:
- Open Enterprise Manager, and click the Wizards button on the Tools menu. The Select Wizard dialog box appears. In this example, we'll use the Northwind database.
- Expand the Database folder, select Create Index Wizard, and then click OK.
- The Create Index Wizard welcome screen appears, as shown in Figure 17-9. Notice that the name of the server and the name of the database you selected appear in the title bar. In this example, the server W2KSERVER and the Northwind database have been selected.
Figure 17-9. The Create Index Wizard welcome screen.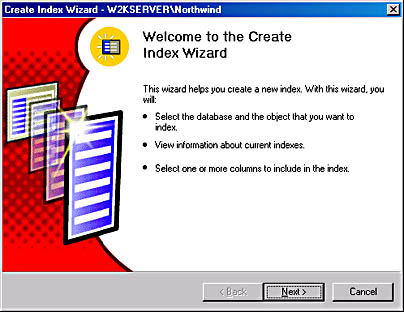
- Click Next to display the Select Database And Table screen, shown in Figure 17-10. Here you can specify the database and the table on which you want to create the index. The default database is the database you selected when you started the wizard. A default table within the database is also listed.
- Click Next to proceed to the Current Index Information screen, shown in Figure 17-11. This example uses the Customers table because it contains a large number of rows. As you can see, quite a few indexes have already been created on the Customers table, including one clustered index and four nonclustered indexes. Remember, you can create only one clustered index on a table, thus transforming it into a clustered table.
All of the indexes that have been created on the Customers table are simple indexes (there is only one column listed), and each has been created on a different column. When the Query Optimizer analyzes a query to choose the query execution plan, it will decide which index to use based on the available indexes and on the predicate in the WHERE clause.
Figure 17-10. The Select Database And Table screen.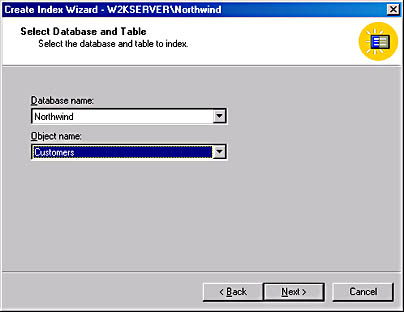
Figure 17-11. The Current Index Information screen.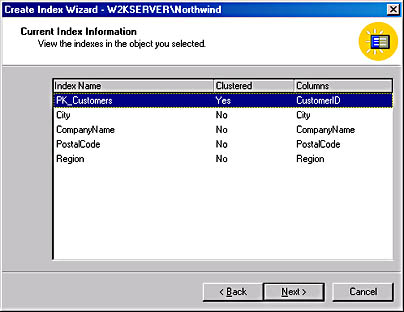
- Click Next to display the Select Columns screen, shown in Figure 17-12. This screen enables you to choose which columns to include in the index. Don't worry about the order of the columns at this point—you'll be able to change that later.
Figure 17-12. The Select Columns screen.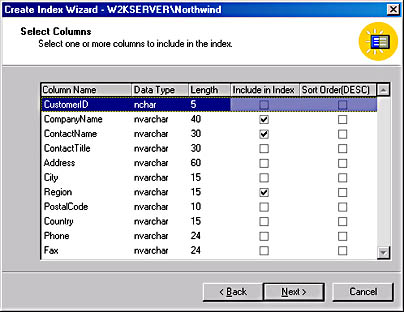
- Specify the columns you want to include in the index by selecting the check boxes to the right of the column names. In this example, we will create a composite index on the CompanyName, ContactName, and Region columns.
- Click Next to display the Specify Index Options screen, shown in Figure 17-13. This screen enables you to set several important options that determine how the index is created. You can select the Make This A Clustered Index check box to make the new index a clustered index. In this example, the check box used to create a clustered index is shown in the disabled state because a clustered index has already been created on the Customers table.
You can select the Make This A Unique Index option to specify that the index will be a unique index rather than a nonunique index. You can also specify the fill factor: optimal or fixed. Because rows in an index are stored in sorted order, SQL Server might have to move data to maintain this order. The fill factor option enables you to specify how full the newly created index should be in order to leave space for future inserts. The default fill factor (what you get if you click Optimal) is 0, which specifies full leaf nodes but free space in the upper index nodes. For a more detailed explanation of fill factor, see the section "Using Fill Factor to Avoid Page Splits" later in this chapter.
Figure 17-13. The Specify Index Options screen.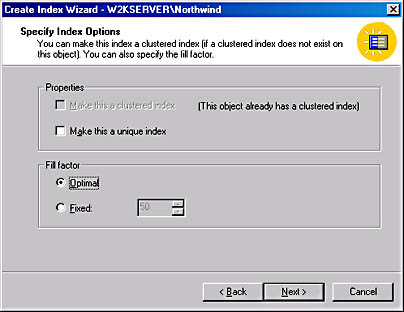
- Select your index options and then click Next to display the Completing The Create Index Wizard screen, shown in Figure 17-14. In this screen, you can reorder the columns that make up the index. Select the column you want to move, and click Move Up or Move Down until the column reaches the desired location. You can also assign the index a name in this screen.
Figure 17-14. The Completing The Create Index Wizard screen.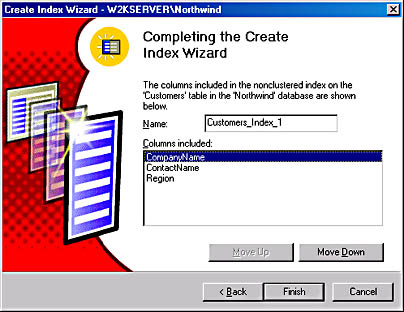
The order of a composite index is important. An SQL statement can take advantage of an index only if the leading portion of the index is in the WHERE clause of the statement. Figure 17-15 shows the same screen with the index renamed to CustomerAreaIndex and the columns reordered as Region, CompanyName, and ContactName.
Figure 17-15. Reordering the index columns.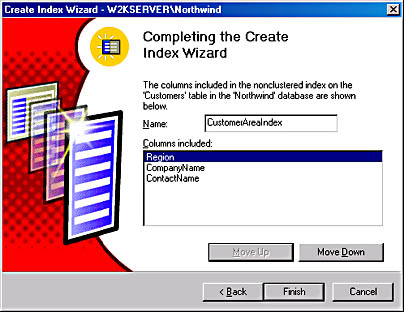
With the index columns in this order, an SQL statement must contain Region in its WHERE clause in order for the index to be used, because Region is the leading column. Of course, the statement could have Region and CompanyName, or even Region, CompanyName, and ContactName in the WHERE clause. If you can use all three values in the WHERE clause, you will achieve the best performance because you will be performing the fewest I/O operations. It does not matter in what order the column names appear in the WHERE clause.
- Once you are satisfied with the column ordering, click Finish and the index will be created. This process can take anywhere from a few seconds to several hours, depending on the amount of data, the performance of the system, the performance of the disk drives, and the amount of memory in the system. To create an index on a table, SQL Server must read all of the data in the table, so the time it takes is quite variable.
CAUTION
If you are creating a unique index and duplicate values are found in the index key, the index creation process will fail.
Creating an index by using the Create Index Wizard is easy, but the process has some disadvantages. In particular, because the Create Index Wizard does not maintain information about the tasks you perform while using it, you must go through the process outlined in this section every time you want to create another index. If you create an index by using a script file, you can use the file over and over again. Also, if you want to re-create the database, you must go through the Create Index Wizard all over again for each index in the database. Remember though, after indexes are created, you can generate SQL scripts for them by using Enterprise Manager.
Using Transact-SQL
By using Transact-SQL (T-SQL) to create an index, you can script the command and run it over and over again. You can also modify the index creation script to create other indexes. In addition, this method of creating an index offers you more flexibility because more parameters are available to you. To use this technique to create an index, simply put the T-SQL commands in a file and read the file into OSQL by using the following syntax:
Osql _Uusername _Ppassword < create_index.sql
This command assumes that the file you created is named create_index.sql. You could also execute the script by using Query Analyzer. (See Chapter 13 for more information about this process.)
To create an index by using T-SQL, you must use the CREATE INDEX command. The syntax for using CREATE INDEX is shown here:
CREATE [UNIQUE] [CLUSTERED | NONCLUSTERED] INDEX index_name ON table_name ( column_name [, column_name, column_name, … ] ) [ WITH options ] [ ON filegroup_name ]
The values within the brackets are optional. You can create the index as unique or nonunique, as clustered or nonclustered, with one or more columns, and with the optional parameters listed in Table 17-1. You can also optionally specify a filegroup in which to place the index.
Table 17-1. Optional parameters for use with CREATE INDEX
| Parameter | Description |
|---|---|
| PAD_INDEX | When used in conjunction with the FILL_FACTOR parameter, indicates that space should be left in the branch nodes, rather than just in the leaf nodes. |
| FILL_FACTOR ? number | Specifies how full to make each leaf node; a percentage ranging from 0 through 100. |
| IGNORE_DUP_KEY | Specifies that an insert into a unique index with a duplicate value will be ignored and a warning message will be issued. If IGNORE_DUP_KEY is not specified, the entire insert will be rolled back. |
| DROP_EXISTING | Specifies that the existing index of the same name should be dropped and the index re-created. This parameter enhances performance when you re-create a clustered index on a table that has nonclustered indexes because separate steps are not required to drop and re-create the nonclustered indexes. |
| STATISTICS_NORECOMPUTE | Specifies that statistics data should not be recomputed. This option is not recommended because if execution plans are based on old data, they probably will be less than optimal. Use this parameter only if you plan on updating statistics manually. |
MORE INFO
For further information regarding these optional parameters, go to the Books Online index, look up "CREATE INDEX," and then choose "CREATE INDEX (T-SQL)" from the Topics Found dialog box.
Using T-SQL scripts is preferable to using the Create Index Wizard. Although T-SQL is initially more difficult to use, in the long run, you'll find that it is much easier to create multiple indexes by using T-SQL.
Using Fill Factor to Avoid Page Splits
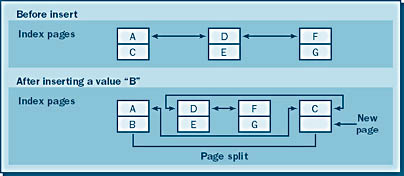
When updates or inserts are made to a table that has indexes, the index pages must also be updated. Index pages are chained together by pointers from one page to another. There are two pointers, one to the next page and one to the previous page. When an index page is full, an update to the index will cause a change in the pointer chain because a new index page must be inserted between two pages (in a process known as an index page split) so that the new information can be put into the right spot in the index chain. SQL Server moves approximately half of the rows in the existing page (where the new data needs to go) to this new index page. The two pages that originally pointed to each other now point to the new page, and the new page points to both of them (forward and back). Now the new index page is pointed to in the right order in the chain, but the index pages are no longer physically in order in the database. (See Figure 17-16.) Eventually, because new index rows are constantly being added to the index (assuming that updates or inserts are occurring) and the index page size is finite, more and more index pages will fill up. When that happens, additional space for new index pages must be found. To create more space, SQL Server continues to perform index page splits, which result in increased system overhead because of additional CPU usage and additional I/O operations. This also causes a fragmented index. The index data is scattered around in the database, causing slower performance.
One way to reduce page splitting and fragmentation is by tuning the fill factor of the index nodes. The fill factor specifies the percentage of the node to be filled when you are creating the index, enabling you to leave room for additional index rows. You can specify the fill factor for an index by using the FILL_FACTOR option of the CREATE INDEX T-SQL statement, as described earlier. If a fill factor is not specified in the CREATE INDEX command, the system default will be used. The default is set to whatever value the sp_configure parameter fill factor is set to. This value was set to 0 when you installed SQL Server.
NOTE
The fill factor parameter affects only how an index is created; changing it has no effect after an index has been built.
The value of the fill factor ranges from 0 through 100, indicating the percentage of the index page that is filled. A value of 0 is a special case. When 0 is specified, the leaf nodes are completely filled, but the branch nodes and the root node retain some free space. This value is the SQL Server installation default and usually works well.
A fill factor value of 100 specifies that all index nodes be completely filled when the index is created. This value is optimal for indexes on tables that never have new data inserted into them and are not updated. Both the leaf index nodes and the upper level nodes will be completely packed, and any insert will cause a page split. Read-only tables are ideal for this setting, although deleting data would be OK as it does not cause page splits.
A low fill factor value will leave a lot of space for inserts but requires a lot of extra space to create the index. Unless you will be doing constant inserts into the database, a low value for the fill factor is usually discouraged. If too many page splits are occurring, try reducing the value for the fill factor and rebuilding the index to see whether this lowers the number of page splits.
You can find out the number of page splits per second that your system is experiencing by using the Performance Monitor counter Page Splits/Sec. This counter can be found in the SQL Server: Access Methods object.
If, over time, page splits do occur and your indexes become heavily fragmented, the solution is to rebuild your indexes. Fragmentation can happen even if you use a fill factor that leaves space in the index pages. Eventually, that space can fill up too. See the section "Rebuilding Indexes" later in this chapter for more information.
Using the Full-Text Indexing Wizard
To use the Full-Text Indexing Wizard to create a full-text index, follow these steps. (The next section will show you how to take advantage of full-text indexes.)
- In Enterprise Manager, select the table on which you want to create a full-text index. This example uses the Customers table of the Northwind database.
- Click Wizards on the Tools menu. Alternatively, you can expand the database, and click the Wizards tab. The Select Wizard dialog box appears.
- Expand the Database folder in the Select Wizard dialog box. Select Full-Text Indexing Wizard and click OK. Or, if you used the Wizards tab in the previous step, click Full Text Index. The welcome screen of the Full-Text Indexing Wizard appears, as shown in Figure 17-17.
- Click Next to go to the Select A Database screen. We'll choose Northwind for our example. (Note: This screen will not appear if you used the Wizards tab, because the database is already selected.)
Figure 17-17. The Full-Text Indexing Wizard welcome screen.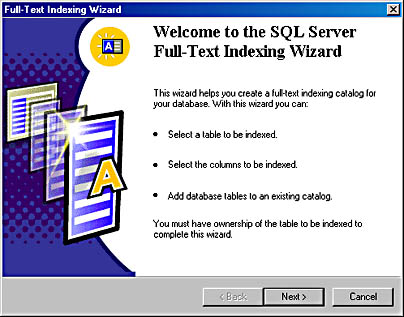
- Click Next to display the Select A Table screen, shown in Figure 17-18. We'll select the Customers table. Click Next.
- The Select An Index dialog box appears. The wizard requires you to select an existing unique index to use in conjunction with the full-text operations. Only one unique index, PK_Customers, is available for the Customers table.
Figure 17-18. The Select A Table screen.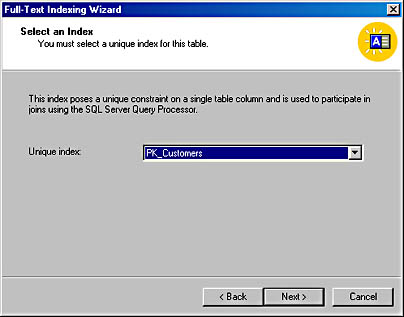
- Click Next to display the Select Table Columns screen. Here you will choose the columns that are eligible for full-text queries. Figure 17-19 shows this screen with a few columns selected.
Figure 17-19. The Select Table Columns screen, with several columns selected.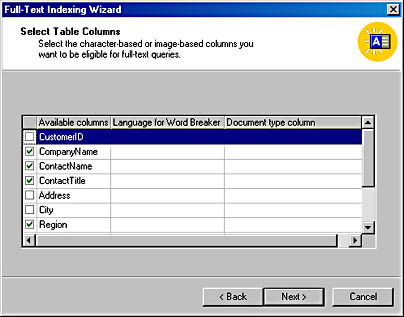
- Click Next to display the Select A Catalog screen, shown in Figure 17-20. This screen lets you choose between using an existing catalog (if there is one) and creating a new catalog. If you are creating a new catalog, be sure to place the catalog where the I/O system can support it and to type a descriptive name in the Name text box.
Figure 17-20. The Select A Catalog screen.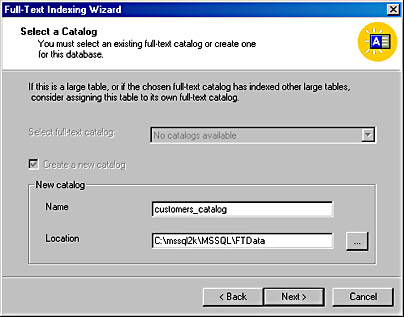
- Click Next to display the Select Or Create Population Schedules screen, shown in Figure 17-21. Unlike a B-tree index, the full-text index is not continually updated when data is inserted. The scheduling feature allows you to specify the interval at which updates to the index occur. Here you can choose an existing schedule (if there is one), create a new schedule to populate the index on a table basis or per catalog (a catalog can contain many tables that are enabled for full-text indexing), or choose no schedule at all. If you create a schedule, you can choose full population or incremental population. Full population means that all rows for the table (or for the tables in a catalog) will have index entries created for them (or re-created if they already exist). Full population usually occurs only when a catalog is created. Incremental population means that only the modified rows of data in the table will have their index entries updated. The table must have a timestamp column in order for incremental population to work. If not, full population will occur.
Figure 17-21. The Select Or Create Population Schedules screen.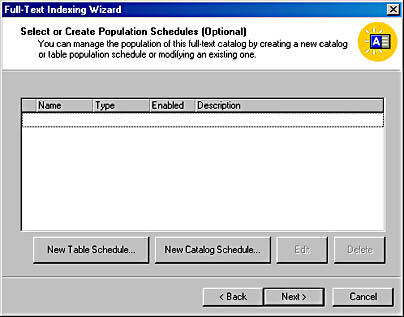
From here, you can click Next to continue or choose to create a schedule. If you click Next without creating a population schedule, the full-text index will be created once only, at the completion of the wizard (rather than being re-created on a periodic basis).
NOTE
Because the full-text index is not constantly updated with changes to the underlying database, it might be necessary to update it periodically. The scheduling feature allows you to schedule automatic updates to the full-text index. Once this schedule has been created, the index will be updated according to the schedule. - Click Next to display the Completing The SQL Server Full-Text Indexing Wizard screen, shown in Figure 17-22. Click Finish, and the Full-Text Indexing Wizard creates the full-text indexing catalog for you. If you have established an update schedule, the schedule will be implemented also. Once the catalog has been created, it is available for use.
Figure 17-22. The Completing The SQL Server Full-Text Indexing Wizard screen.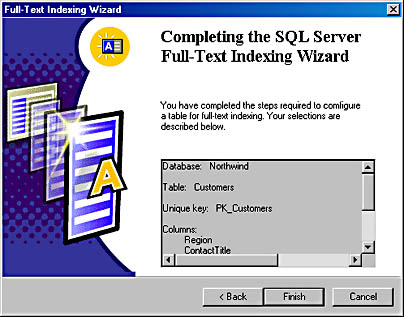
Creating Full-Text Indexes by Using Stored Procedures
You can also create full-text indexes by using stored procedures. A brief overview of the process of creating a full-text index by using stored procedures is presented here; for the complete syntax, consult SQL Server 2000 Books Online.
- Call sp_fulltext_database with the enable parameter to enable full-text support in SQL Server.
- Call sp_fulltext_catalog to create the catalog. This stored procedure must be called with the create parameter.
- Call sp_fulltext_table to establish the connection between the catalog and a table/index pair. This stored procedure must be called with the create parameter, and you must provide both a table name and the name of the unique index that the full-text index will use.
- Call sp_fulltext_column to add a column that will take part in the full-text index. This stored procedure must be run with the add option and the name of the column that will participate in the catalog, and the procedure must be run for each column in the index.
- Call sp_fulltext_table again. This stored procedure must be passed the activate parameter in order to activate the catalog with this table.
- Call sp_fulltext_catalog again, this time passing it the start_full parameter to start the full population of the catalog, for every row of every table associated with the catalog.
Creating a full-text index by using stored procedures is more complicated than using T-SQL commands to create a B-tree index. However, if you're creating a number of full-text index catalogs, it might be worth the trouble to create a script file to perform this task.
Using the Full-Text Index
Once the full-text index has been created, it's easy to take advantage of it. You can specify T-SQL keywords that take advantage of the full-text indexes: CONTAINS and FREETEXT. The following statement shows how typical string recognition in SQL would be performed if you didn't use a full-text index. As you can see, the LIKE keyword is used in the WHERE clause of the query:
SELECT * FROM Customers WHERE ContactName LIKE '%PETE%'
This statement might not produce the desired result. To use a more user-friendly query and to take advantage of the full-text index, you can use the CONTAINS predicate. The CONTAINS predicate must contain the column name and the desired text, as follows:
SELECT * FROM Customers WHERE CONTAINS(ContactName, ' "PETE" ')
The CONTAINS predicate can find text strings that contain the desired string, such as "PETER" or "PETEY," by using the full-text index.
You can also search full-text indexes by using the FREETEXT keyword. Like CONTAINS, FREETEXT is used in the WHERE clause. FREETEXT can be used to find a word (or related words) whose meaning matches the meaning of a word (or a set of words) given in the FREETEXT call but whose form does not exactly match that of the specified word. This can be done in an SQL statement such as the following:
SELECT CategoryName FROM Categories WHERE FREETEXT(Description, 'Sweets candy bread')
This query might find category names containing such words as "sweetened," "candied," or "breads."
EAN: N/A
Pages: 264