Firewall
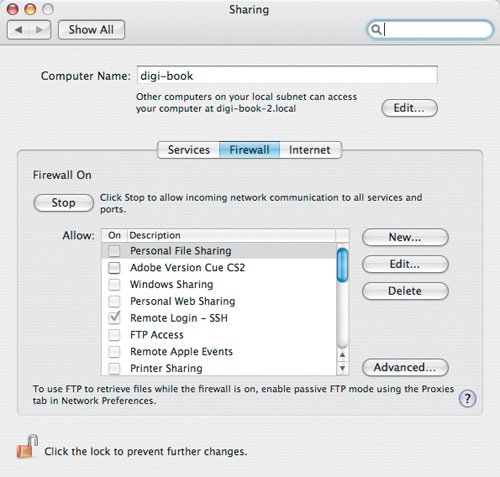
| A firewall is a safety barrier that hides and protects your Mac from the rest of your network and the Internet by stopping unauthorized information from coming into or going out of your Mac. If you work someplace that has a large network and servers, there's a good chance that some type of firewall is already in place protecting your network, proprietary business records, and client projects from attacks over the Internet. Thanks to its Unix core, Mac OS X has a robust firewall built in. All you have to do is turn it on.
If you want to make your Mac as close to invisible as possible, enable Stealth Mode. Stealth Mode prevents your Mac from responding to any queries from your network or the Internet to see if it is on and working.
Some information needs to come and go from your Mac through the network and Internet; otherwise, you wouldn't be able to connect to file or font servers, use network printers, check your e-mail, or view Web pages. Applications like InDesign, the rest of the Adobe Creative Suite, and QuarkXPress also use your network connection to activate your software license, and Adobe Version Cue relies on your network to keep document versions synchronized between workstations.
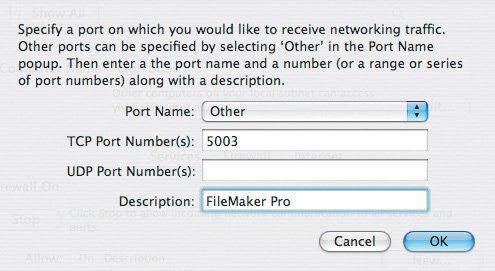
The Allow options below the Start/Stop button show what types of information can pass back and forth through your firewall. Any item with a check by its name can pass through your firewall. For example, if you share an inkjet printer that's connected to your Mac with other designers on your network, there should be a check next to Printer Sharing. Occasionally you will see dialogs that tell you that your firewall is blocking an application from sending or receiving data. That's a safety precaution protecting you from having information leave your Mac without your permission. If you want to let the application send and receive its information, click the Allow button. If the application is something familiar to you, like FileMaker Pro or Adobe Version Cue, you're probably OK clicking the Allow button. If, however, you don't recognize the application, clicking Allow might not be such a good idea. Ask your IT department or favorite Mac consultant about the applications you are unsure of. Working with Network PortsJust as USB and FireWire ports let you connect different types of devices to your Mac, network ports let you connect with different types of information. In reality, network ports are part of the protocols that transfer data over your network and across the Internet, but without them, no data would ever move around. There are different ports for most every type of information that winds its way through your network. Each port is assigned its own number so that your Mac and other network devices know what type of data is passing through. If the number isn't on your firewall's list of accepted data, it doesn't get through. For example, when you visit a Web page, that information passes through port 80. If port 80 is blocked, your Web browser can't go look for the page you want to view, and the page information can't make it back to your Mac. Most of the time, you don't need to worry about network ports because your agency's or Mac's built-in firewall will manage them for you. In fact, most applications that need to pass information through network ports that aren't already open in your firewall will ask permission to open up those ports. If an application fails to ask to open a network port, you may have to create the port yourself. Applications from Adobe and Quark shouldn't require any special network ports. A custom-designed network database or project-management system, however, may be a different story. Before you get started, you'll need to know the port number that you are adding to your firewall. The application documentation should tell you what ports need to be open, but you may have to contact the developer's technical support team to get the information. Let's assume that you are sharing a FileMaker Pro database that contains client and project information with the other designers in your office. Something goes wrong, and FileMaker doesn't automatically open the network port in your Mac's firewall that it uses to transfer the database information to other users. You check FileMaker's online help and find out that it uses port 5003. Here's what you do:
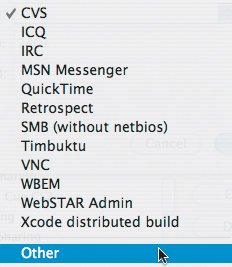
Tip If you are using Retrospect to back up your Mac over a network, and the necessary firewall port isn't open, choose Retrospect from the Port Name pop-up menu instead of Other. Retrospect's network port information will fill in automatically. |
EAN: 2147483647
Pages: 107
- Challenging the Unpredictable: Changeable Order Management Systems
- ERP System Acquisition: A Process Model and Results From an Austrian Survey
- Enterprise Application Integration: New Solutions for a Solved Problem or a Challenging Research Field?
- Distributed Data Warehouse for Geo-spatial Services
- Relevance and Micro-Relevance for the Professional as Determinants of IT-Diffusion and IT-Use in Healthcare