| Connecting to servers and other computers that have file sharing turned on is easy to do. Most of the time, you won't even have to worry about what kind of computer you are connecting to. Once you are connected to another computer, you can share files or, if you connect to a file server, work with files directly without having to copy them from the server. If you work with a group of designers, a prepress department, or some other type of agency where several people will work on the same documents, it's a good idea to have a server that you can use as a common repository for your files. Working without one means you have to copy files from Mac to Mac depending on who needs to work on them at any given time. Once you start copying files around, someone is bound to work on the wrong version, which can lead to costly reprints of jobs, or even lost clients. Mac OS X Connecting to a Mac that has file sharing turned on, or to a Mac OS X server, is a fairly painless process. Be sure to find out ahead of time if you need a user name and password to connect to the server or Mac that is sharing, or if you can connect as a guest. | | 1. | In the Finder, double-click your hard-drive icon.
| 2. | Click the Network icon (Figure 6.3). It's in the Finder window sidebar near the top, along with your hard drive and any other disks that are connected to your Mac. Every server and computer with file sharing turned on should be visible.
Figure 6.3. Click the Network icon in any Finder window Sidebar to see all of the computers and servers that have File Sharing turned on. 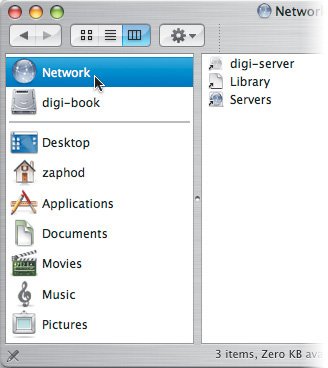
| 3. | Double-click the computer you want to connect to, and in the Connect to Server dialog enter your user login information and then click Connect (Figure 6.4).
Figure 6.4. Enter your server login name and password in the Connect to Server dialog to log in to servers. 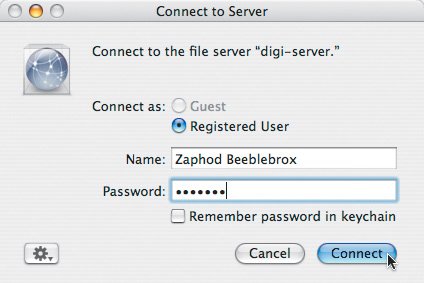
If you are connecting to a server, you should have a user name and password. If you don't know your login information, whoever takes care of your server should be able to provide you with the information. Don't confuse a server's login information with your own account on your Mac. You use your server login information when you connect to a specific server. You use your Mac's login information when you are performing software updates and installing some applications.
| | | 4. | A window opens that lists all the different areas you can connect to on your server (Figure 6.5). Your server may have an area for current design projects, administration, or anything else you can think of. It all depends on how your server was set up.
Figure 6.5. Once you successfully log in to a server, you can choose what directory to mount on your Desktop, just like any other hard drive. 
| | | 5. | Select the area you want to connect to, and then click OK. Once connected, the server appears on your Desktop, and you can use it as if it were another hard drive connected to your Mac (Figure 6.6).
Figure 6.6. Servers and Macs with File Sharing turned on show up on your Desktop just like any other disk. 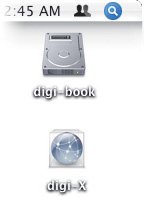
|
Sorting Out Your Passwords There are several places in the Mac world where you need passwords and user names. You have a user name and password for logging in to your Mac, another for checking e-mail, and maybe even another for logging in to your agency's server. Unfortunately, those passwords and login names aren't typically the same for each. Here's how to tell Mac and server passwords apart: Computer login. This is the user name and password you use to log in to your own Mac. If you set up your Mac, these are most likely the same user name and password you created when you worked through Setup Assistant. In addition to using this user name and password to log in to your Mac, you also use it when performing software updates and installing some applications, such as the Adobe Creative Suite. If your Mac automatically logs you in at startup, you don't have to enter your user name and password. If not, your Mac stops partway through the startup process and waits for you to enter your user name and password. To learn more about automatic login, go to Chapter 10, "Security." Server login. If you work with files that are stored on a server, odds are you need a login, or user name and password. These are not the same user name and password you use to log in to your Mac or to perform software updates. Instead, they are created and stored on the server and used to verify who you are, and to determine which files you can access.
Passwords can become a confusing mess real fast, since you end up with so many different ones for all the things you do in your life. Beyond connecting to servers and logging in to your Mac, there are voicemail passwords, ATM PINS, cell phone codes, and on and on. Don't succumb to the temptation of using the same password for everything. If someone discovers your single password, he or she can get into every part of your life. The moral of the story: Use more than one password. Oh, and don't put them on a sticky note next to your Mac for everyone to see. |
Some servers may allow guest access. If so, the Guest radio button is selected. If you connect to a server as a guest, don't expect to be able to do everything that regular users can do. For example, you may find that you can look at documents or copy them to your Mac, but you can't save files back to the server. Whoever is managing your server determines what types of things guest users can do. Guest access is also what you use to connect to other Macs in your studio that have file sharing turned on. Connecting to other users' Macs gives you access to their Public folders so that you can copy files to your Mac and copy files to their Drop Boxes. This is useful if you don't have a server and need to share project files, but it's kind of slow and too cumbersome to use all the time. Before disconnecting from a server, be sure to close any open files that live on the server. Then, either drag the server icon from your Desktop to the Eject icon in your Dock (Figure 6.7), or click the Eject icon that's just to the right of the server's name in the sidebar of any Finder window (Figure 6.8). Disconnecting from a server is important if you work from an iBook, PowerBook, or MacBook Pro, and take your laptop out of the office. You will lose your connection to the server once you leave your own network, and you will lose any changes you made to files you still have open from the server. For designers using Macs that stay in the office, disconnecting from a server isn't as critical, unless your server gets shut down at night or gets restarted on a regular basis. Figure 6.7. One way to eject a server is by dragging it to the Trash. When you do, the Trash icon turns into an Eject icon. 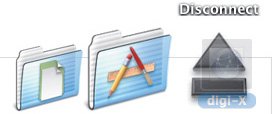
Figure 6.8. Another way to eject a server is by clicking the Eject icon next to its name in any Finder window sidebar. 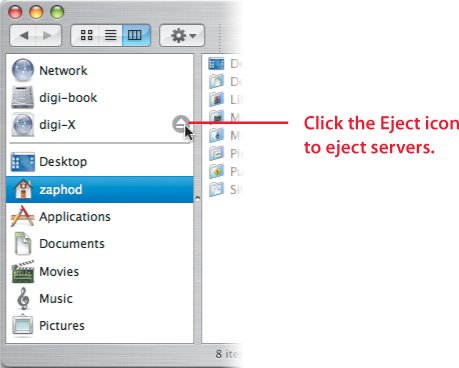
IP-Based Servers Some servers may not show up when you click the Network icon in a Finder window because they are not on your local network, or because they aren't using a communication protocol like Mac or Windows file sharing. For these, odds are you need to enter the server's network address, or TCP/IP address, before connecting. If you are connecting to a server through the Internet, this is most likely what you'll have to do. To connect to a server using its IP address, choose Go > Connect to Server in the Finder, or use the Command-K keyboard shortcut. In the Connect to Server window, enter the address of the server in the Server Address field (Figure 6.9). The server address will look something like 192.168.0.240 or 207.217.96.41. The numbers you use won't be the same as in these examples, but they always follow the same pattern: four sets of numbers no longer than three digits, all separated by periods. Figure 6.9. To connect to a TCP/IP-based server, enter the server's IP address in the Connect to Server window and then click Connect. 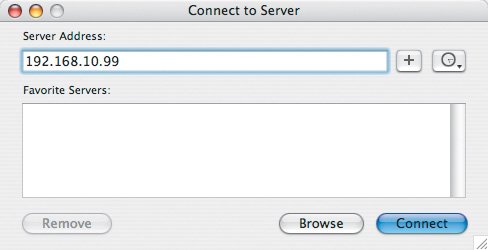
What's an IP Address? As a designer, you should be able to focus your energy on being creative instead of on learning about networking communication protocols, but TCP/IP is one of those things that deserve a minute or two of your brain time. TCP/IP stands for Transmission Control Protocol/Internet Protocol. It's the communication scheme that lets you communicate on the Internet and most networks. Each device, be it a computer, printer, or some other electronic gizmo, that talks on the network or the Internet is assigned a unique number, or IP address. There are three types of IP addresses you will encounter: internal, external, and self-assigned. Internal, or private, IP addresses start with either 10 or 192. These are the addresses you usually see on an office network. An AirPort Extreme Base Station assigns IP addresses that look like 10.0.1.5. Other Internet sharing devices typically assign addresses that look like 192.168.1.4. The last digit in both addressing schemes is different for each device on your network. That's how your Macs and printers tell each other apart. External addresses are assigned to computers that are directly connected to the Internet, such as Web servers and e-mail servers. Their IP addresses can start with pretty much any number other than 10 or 192. Apple's Web servers, for example, start with 77. Self-assigned IP addresses start with 169. If your Mac ever shows that it is using an IP address that starts with 169, that means it isn't getting an IP address on your network, and it won't be able to talk with other Macs in your studio or on the Internet.
|
After you click the Connect button, you should see the same login window that you get when connecting to a server by clicking its icon in a Finder window. All the same rules apply. You'll still need your user name and password. Disconnecting from the server works the same, regardless of what type it isMac OS X, IP, or whatever. Either click the Eject icon next to the server's name in any Finder window's sidebar, or drag the server's icon from the Desktop to the Trash. Windows Connecting to a Windows server works just like connecting to a Mac server. Your Mac will find all of the Windows workgroups on your network and show you every PC that has file sharing turned on. Follow the steps earlier in the "Mac OS X" section, and you should be good to go. |