Printers and Printing
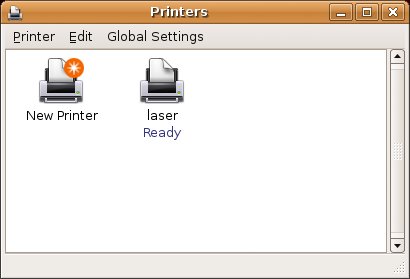
| This might seem like a silly thing to mention, particularly if your printer was automatically detected, configured, and tested at boot time. Nevertheless, there are things that you might want to do with your printer, and we should probably cover some of these now. Furthermore, printing is one of the most important functions a personal computer can perform. It's good to get it right. On that note, I'm going to spend a little bit of time talking about printers and printing. Trust me, it's going to be lots of fun. Printing under Linux works on the basis of print queues. At its simplest, this means that whenever you send something to the printer, it is queued in a directory where it awaits its turn at the printer. This de-queuing is known as spooling. Consequently, the process that sends the print jobs from the queue to the printer is called the spooler. That spooler can be one of a small handful of programs, all of which are transparent to you when you print from applications. Here's a quick roundup of the more popular spoolers. CUPS, the Common UNIX Printing System, is designed to be a platform-independent printing system that works across a great number of UNIX flavors, including Linux. CUPS uses the Internet Printing Protocol (IPP), a next-generation printing system designed to allow the printing of any job to any printer, anywhere. At this point, CUPS certainly looks like the spooler of the future. Most modern Linux distributions include CUPS, and Ubuntu uses it transparently. The second most likely spooler you run into is LPD, the classic UNIX spooler. LPD has been around for a long, long time and continues to be distributed with pretty much every Linux out there. I mention it mostly for historical reasons. It's there, but you won't likely be using it. Whether it is CUPS or LPD, GNOME handles printing beautifully. Adding, configuring, or removing a printer is done through the system printing manager. Click System on the top panel, then select Printing from the Administration submenu. A window labeled Printers appears with an icon labeled New Printer (see Figure 6-2). Figure 6-2. When the printing manager starts up, you will likely see nothing more than a New Printer icon. However, your Ubuntu system automatically picks up other configured printers. Tip
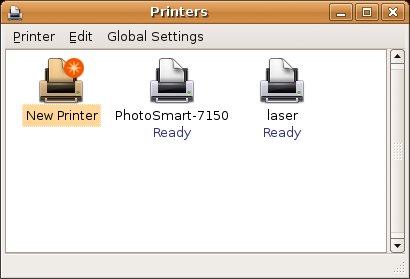
Notice that in my case, there is already a printer listed (laser). That's because I already have a network accessible printer available on my network. In all likelihood, you will only see the New Printer icon, and that's a great place to start. To add a printer, start by making sure your printer is plugged in and online. Next, click Printer on the menu bar and select Add Printer. You can also just double-click the New Printer icon. Assuming you have a supported printer and that it is connected and online, Ubuntu should autodetect your printer (see Figure 6-3). Figure 6-3. If your printer is supported, it should be automatically detected.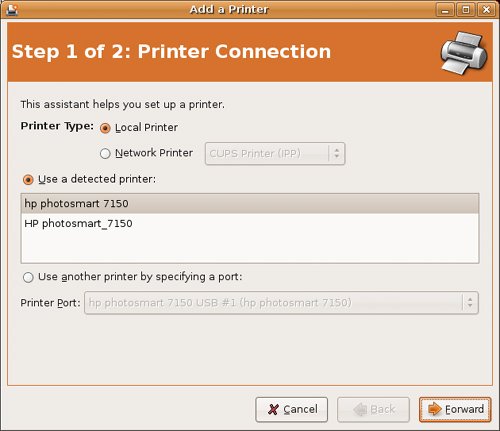 In my example, the system handily noticed my HP printer and all was well from the start. Click Forward and we get to the driver selection screen. Because the printer in this case was properly identified, the system also offers a driver for that printer (see Figure 6-4). Figure 6-4. The second screen is the driver selection screen. You can also specify a different manufacturer and model here.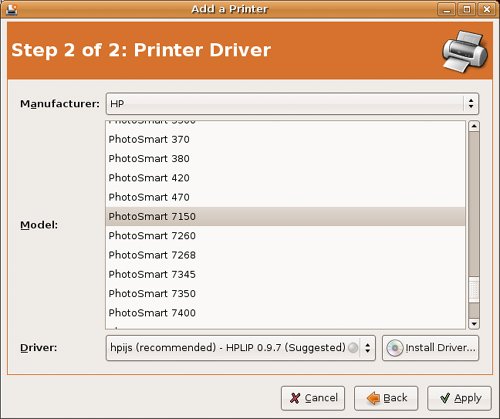 If you don't think this is the right driver or the system hasn't properly autodetected your printer, you can select a different manufacturer and model on this screen. Both options provide a drop-down list with a number of choices. With most printers, there is one recommended driver and it is listed next to the Driver label. You can see that the driver listed here is actually the first item in a drop-down box, which means there can be more than one printer. Generally speaking, the selected driver is the recommended driver and is identified as such. Notice the button labeled Install Driver. On many printers, you can find PPD (printer definition) files either on the printer manufacturer's Web site or via the Linux printing site (linuxprinting.org), even if that driver isn't included with your Ubuntu Linux system. If you have such a printer file downloaded, and your printer's driver is not in the list, click this button and the standard GNOME file selector appears. Navigate to the driver's location and install it. When you are happy with your choice, click Apply to have your changes take effect. The new printer appears in the Printers dialog (see Figure 6-5). Figure 6-5. As new printers are configured, they appear in the Printers dialog. Note
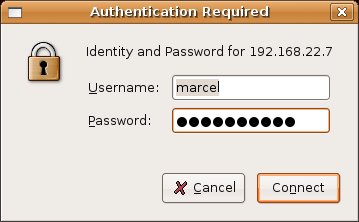
Now that there are two printers configured, take a look at the laser printer, the one that was automagically detected on the network. Notice the check mark icon on its top left. That indicates that this is the system's default printer. To change the default output to another printer, right-click the printer and select Make Default from the pop-up menu. Network PrintersThe example I gave you is for a locally connected printer, one that was autodetected by your system. What if the printer make and model isn't detected or you need to use a network-based printer, perhaps one hanging off a Windows network? Let's look at a more complex installation. Once again, double-click New Printer to bring up the Add a Printer dialog. The radio button for Local Printer is selected by default. Click the radio button for Network Printer for a network connected printer. To the right, there is a drop-down box with options for a CUPS printer (IPP), a Windows printer (SMB), a UNIX printer (LPD), and an HP JetDirect network adapter. For this example, I choose a Windows printer because this is be a common scenario for home users. As soon as you select SMB, your Ubuntu system scans your local network for Windows machines and Windows workgroups. If it finds one, an Authentication Required dialog appears (see Figure 6-6). Figure 6-6. As Ubuntu identifies Windows machines on your network, it asks you for a username and password to access those machines. Enter the information and click Connect. The Add a Printer dialog you saw earlier changes to display options specific to the type of network printer you are trying to configure (see Figure 6-7). In the case of a Windows network printer, there are fields for the Host name of the Windows machines on your network and for the shared printer. Figure 6-7. Configuring Ubuntu to access a Windows network printer.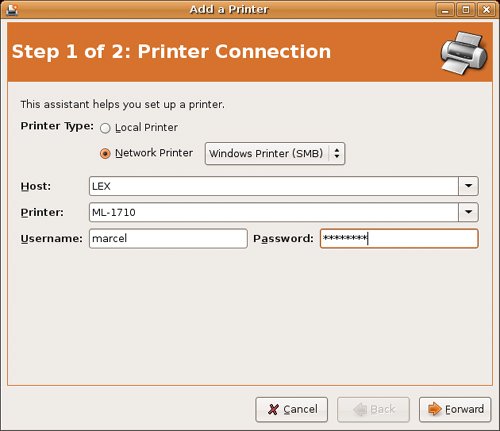 Tip
Select a Windows host, then select a printer from the list below it. If you had multiple machines on your network, it is possible that the Username and Password filled in here doesn't match those you entered earlier. Confirm that the information is correct, then click Forward. Once again, you'll find yourself at the printer driver selection screen (see Figure 6-8). Figure 6-8. Your next step is to select the manufacturer and model for your printer. The driver should be autoselected but note that there can be others besides the suggested option.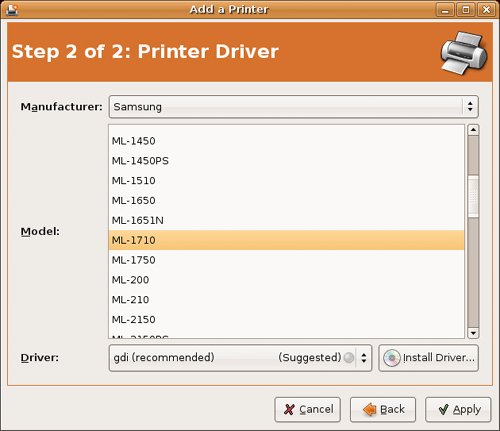 Click Apply and your printer is added. Tip
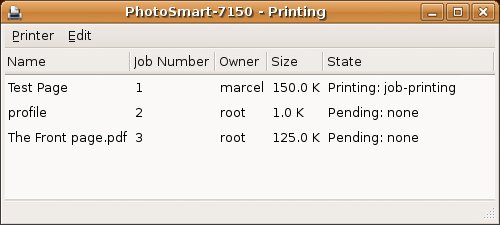
Print JobsWhere Are My Print Jobs?When you send something to the printer, you generally expect action quickly. Something better start coming out of that printer soon. If there is something wrong with the printer or you are sharing that printer with others, you may find yourself waiting, at least a little while, before your precious printout appears. The easiest way to find out how many jobs are in the queue is to open the Printers dialog. Remember, you do that by clicking System on the top panel and selecting Printers. Directly under the icon representing your printer, you see a message telling you that it is printing and how many jobs it is printing (for example, Printing 2 jobs). For more details, double-click the printer icon to open up the printer's job queue (see Figure 6-9). The plus side of doing this is it also gives you the opportunity to pause printing, print test pages, and resume jobs. Figure 6-9. Double-click the printer icon to bring up the print queue information. Let's face it. From time to time, we all end up sending something to the printer we wished we hadn't. "No, I only meant to print the first 5 pages, not 500!" Luckily, you can also cancel a job. Just click the line to highlight it, and then click Edit on the menu bar, followed by Cancel Jobs. See, printers aren't so scary after all. |
EAN: 2147483647
Pages: 201