Optical Character Recognition
| Before I wrap up this discussion of Kooka, let me tell you about one other very cool thing the program does. Say you have an old document page you want to transcribe. The obvious first choice is to sit it in front of you, open up a word processor, and start typing. Your second option is to pop that page on your scanner, use Kooka to scan it, then run it through OCR. Here's how you do it. Because most people won't be using OCR, most distributions by default don't install the supporting software. The package is called ocrad, and you can find it at
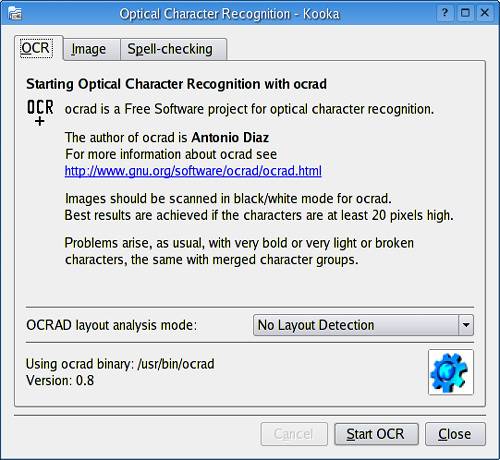
Check your distribution CDs first. If you are going to do OCR, Kooka needs to have this installed. Start by scanning your page as you would any image. Binary scan mode is probably fine for straight text, but this is one case where the higher the resolution, the better your chances are of an accurate OCR. When you are happy with the preview, click Final Scan, and you should see your page in the right-hand window. Now click Image on the menu bar, and select OCR image. Alternatively, you can click the second icon from the left in the icon bar it does the same thing. A window labeled Optical Character Recognition will pop up (Figure 16-14) that allows you to specify a handful of settings to tune the character recognition software. Remember: OCR is not perfect by any means, but with some tweaking you can achieve fairly high levels of accuracy. For your first scan, simply leave it at the defaults and click Start OCR. The whole process of character recognition may take a few seconds, so be patient. Figure 16-14. OCR settings such as multicolumn layout and spell-checking are handled here.
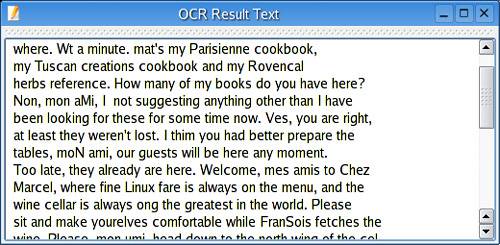
After the process is complete, a window will appear showing you the results of the OCR process (Figure 16-15). If you opted to spell-check the results, the spell-check window will appear as well. Figure 16-15. Kooka OCR results window.
Remember: The higher your scan resolution, the better your results. The only catch, of course, is that higher resolution requires more disk space and more processing power when you are through. If you want to save the results and edit at will, then copy and paste the text into your favorite word processor or text editor, whatever suits your needs.
|
EAN: 2147483647
Pages: 247